
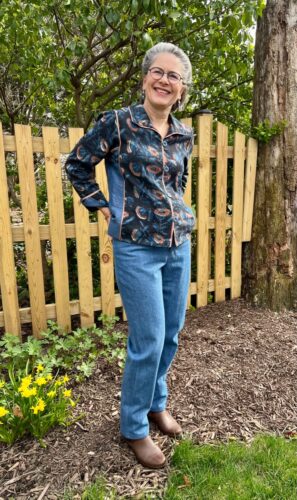
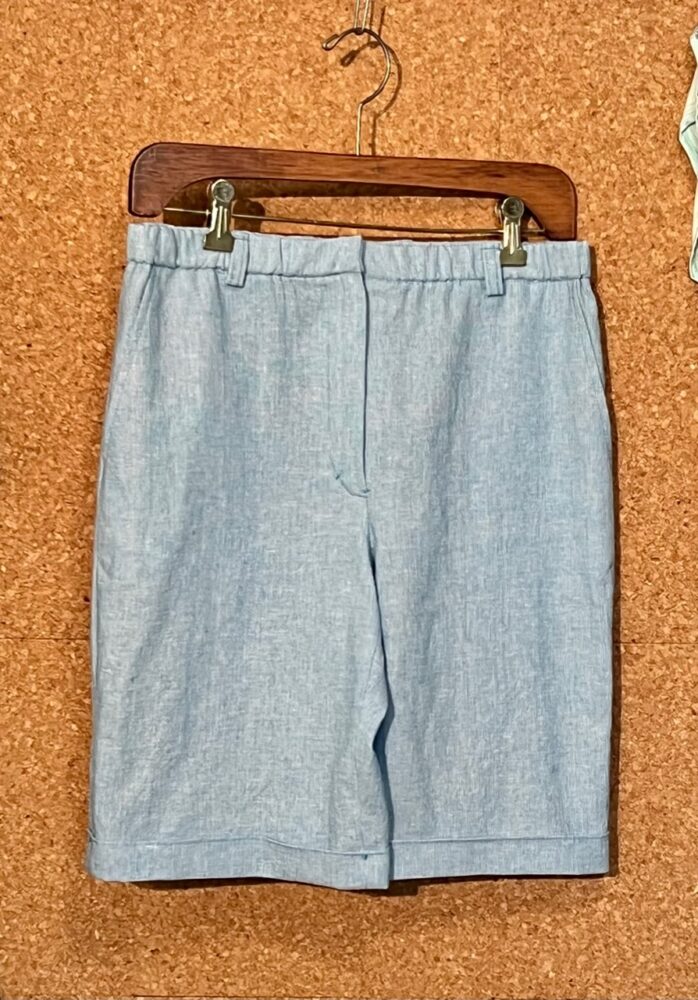
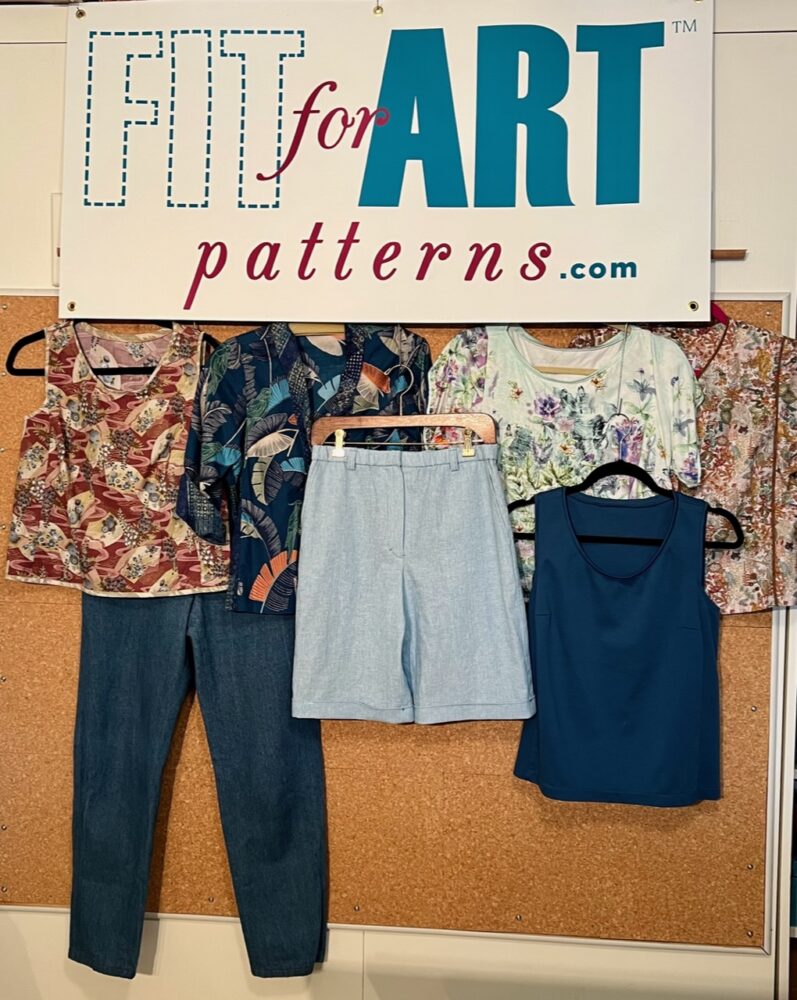
Time for an update on Carrie’s Eureka! Pants journey, one year later. In preparation for our annual Fit for Art France retreat in the heat of summer, Carrie added light weight shorts with Trouser Details to her wardrobe. Earlier in the spring she developed a Sporty Details pattern as she desperately needed jeans that fit.
Pants are a Journey!
We call it a journey because developing a pants pattern you find comfortable is a gradual process – requiring multiple trials and patience. Here’s a quick review of Carrie’s journey so far to provide links that you may find useful. Last spring Carrie launched her journey to redevelop a Eureka! Pants that Fit pattern to suit her changing figure and comfort preferences. She began with basic elastic waist pants and a couple of interesting hem finishes as seen in Summer Pants Journey. For the summer retreat in France, she added back zip Eureka! Pants with shaped lantern cuff and patch pockets in linen, described in Summer Wardrobe Update. Adapting the fit you love into different pant styles is also a part of the journey that must be taken step-by-step. Last fall Carrie moved on to create a Glamour Details pattern with contoured waistband and relaxed legs; review the tips for making your pants journey successful in Carrie’s Pant Journey Continues.
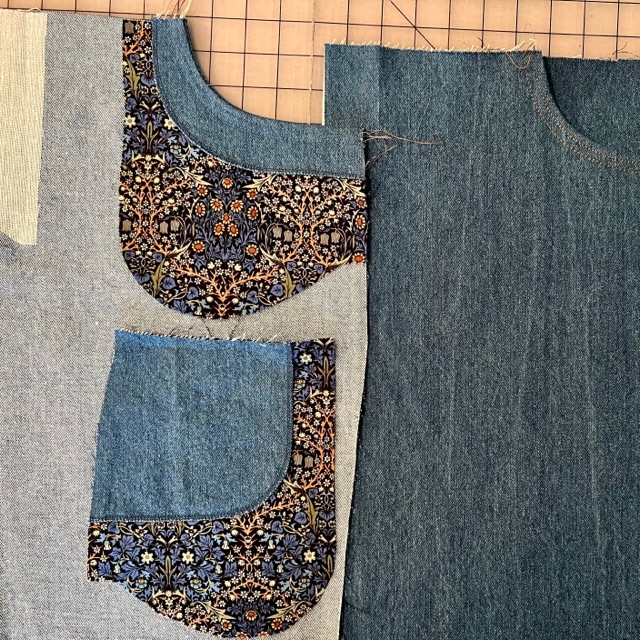
Today we look at Carrie’s foray into fly front styles, both Sporty and Trouser Details. The cotton/linen blend Essex yarn dyed Homespun for the shorts was purchased last year at Artistic Artifacts, along with a coordinating Handmade block printed fabric from India (summer top coming soon!). The non-stretch denim came from Carrie’s stash.
Pattern work for Front Fly and Pockets
Both the Sporty Details and Trouser Details patterns feature a front fly with zipper and front pockets, necessitating changes and additions to the core pants pattern. Allow plenty of time to walk through the pattern work process that is spelled out step by step in the instruction books for each style to achieve satisfactory results. It had been a long time since I had made these detail patterns for myself, so I opened the instruction book and followed along to make sure I got it right.
For Sporty Details, the first step is to change the height of the waistband seam and create shaped waistband patterns front and back. Trouser details assumes that one is using the same waistband location as the core Eureka pattern, but divides the straight waistband into 2 sections. For both styles, a fly front extension is added to the center front, which is pretty straightforward.
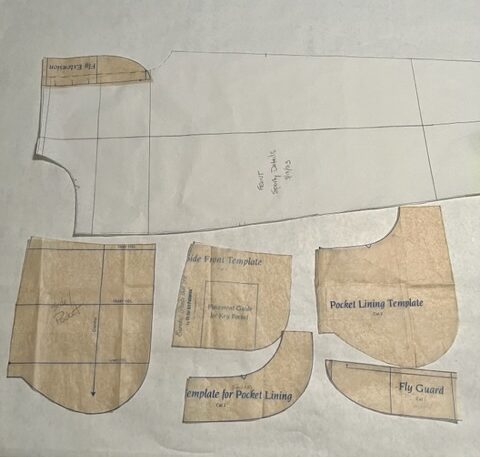

Next is the creation of front pocket patterns, which is accomplished with templates in order to build on one’s personalized Eureka pants pattern. Both styles require a Side/Pocket and Pocket Lining pattern, along with an alteration to the front pant pattern to accommodate the new pocket opening. Sporty Details is very similar, but adds templates for a Pocket Facing and Side Front pattern if using a fabric other than the pants fabric for the pocket bag and optional key and back patch pocket patterns.
For both styles, I built my new front opening pants patterns on the core pattern I had used for the back zip linen pants, wanting to retain the ease built into the hips and upper leg areas. Check out the post Eureka! Shorts that Fit for some pointers on adapting the leg patterns for shorts.
Pant Detail Construction Details
The construction order of both Sporty and Trouser Details is substantially different from the basic pants, so I was happy to refer to my instruction books to remind me of the steps. In both cases, the entire pant front – fly and pockets – is assembled before assembling the legs and crotch. This is why it is so important to be sure you are satisfied with the fit of your core Eureka! Pants that Fit pattern before moving on to the Details styles! (For a guide to putting a fly front and zipper in pants the Fit for Art way, read Rae’s illustrated step-by-steps in the post Fly Front Zippers.)

After the pant front is completed, the rest of the construction goes more quickly: assembling pant legs and crotch, adding waistband and optional belt loops, topstitiching and hemming. For the trouser shorts, I included belt loops and classic turned up trouser cuffs. Don’t forget to try the pants on at each stage of construction and before finishing seams and topstitching! For both styles, I needed to make modifications to the shape of the back leg before finishing the seams. After the pants are done, remember to record those changes on the new Details patterns.

Super Pant Wardrobe Builders
I’m psyched to have the full complement of patterns for Eureka! Pants style details ready to go. The trouser shorts will get plenty of wear this summer with Tabula Rasa tops, knit and woven, from last summer’s wardrobe. Also, look for the shorts to complement two more sleeveless tops already cut out and waiting on the sewing table.
While the denim sporty details are a bit too heavy for summer wear, they will be great for the rest of the year. I am eager to sew up several fall fabrics that have been languishing in my stash waiting for the jeans style pattern.
Help on Your Pants Journey
Are you are nervous about tackling the pattern work by yourself? Join one of our 3-day sewing retreats where we can walk you through the steps of creating a new pant style and/or finesse the fit of your Eureka! Pants. These retreats are held Spring and Fall and usually sell out, so save your space by registering early!
Happy Sewing, Carrie


Carrie, did you add elastic to the waisband? As a thick-waisted senior, it would seem like a good idea that would add some expansion room when one sits.
I did in fact put elastic in the waistband, the first time I’ve done that in the trouser style. It allowed me to leave more ease in the torso/hips area. I think I’m going to like it! Look for pics on social in the next few days.
very good addition.
Thanks Penny!