The Carpe Diem Dress & Tunic pattern is designed for woven fabrics, but this time last summer Rae applied our classic knit neck finish to a linen/cotton canvas tunic with great success. She wrote about the same technique in the post Knit Print Magic and now she will tell you how to achieve similar results with woven fabrics and a bias cut cotton flat piping. Here is her knit finish on a Carpe Diem
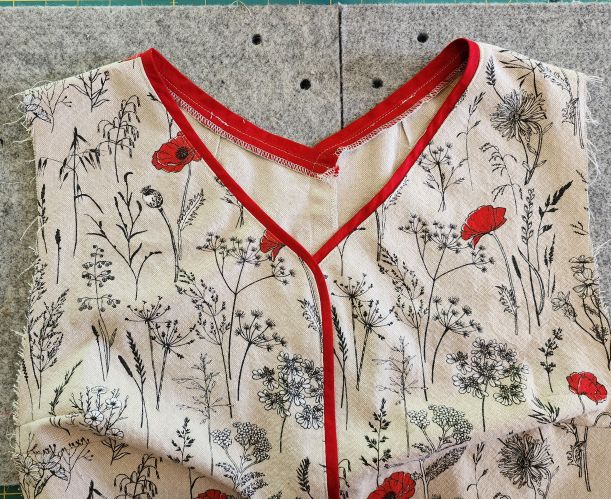
While there is no center front seam in the Carpe Diem Dress & Tunic pattern, sometimes having a visual to break up a print down the center front is a wise choice for my size and shape. This is especially true in light color fabrics. This fun summer fabric was purchased at a fabric show in Toulouse last winter. I really loved the pretty red poppies and the black outlines for a long tunic to wear with black leggings. So comfortable and easy to pop on for a busy day anywhere!
Adjust the Pattern

The front and back Carpe Diem patterns were altered for a V neckline using the templates in V Neckline Variations. A 5/8″ center front seam allowance was also added, extending down to the hem from the V neckline, to allow for piping insertion. Then the patterns were laid out on the prewashed fabric and the top was cut to the middle balance line for a short dress length.
Cut and Prepare the Piping
Two long pieces of piping will be needed, one to extend from the back V to the center front hem and the other to extend from the front V to the center back hem. Additional piping is needed for the second side of the hem slit and around the sleeve hems, which are both optional.
Cut the bias strips 2” wide, sewing strips together if necessary to match the required lengths. Press the strips in half the long way, wrong sides together. Find more detailed instructions for calculating and creating flat piping on the final two pages of the Tabula Rasa Jacket direction book or in the blog post Make Binding for a Quilted Jacket. (Flat piping and binding strips are prepared in the same manner.)
Begin construction of the fronts and backs by stitching in any darts and the shoulder seams. Clean finish the shoulder seams and press them open.
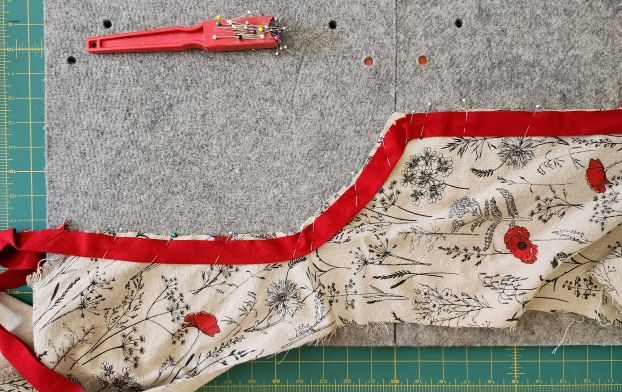
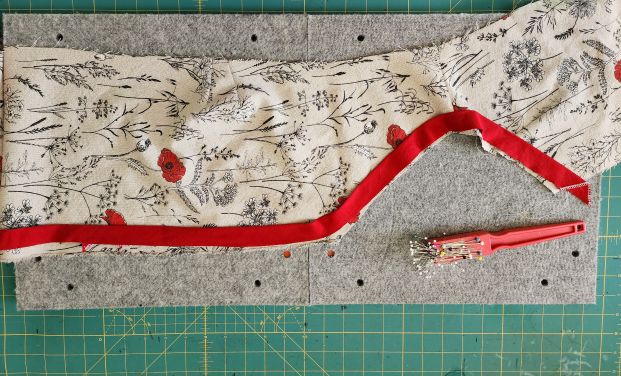
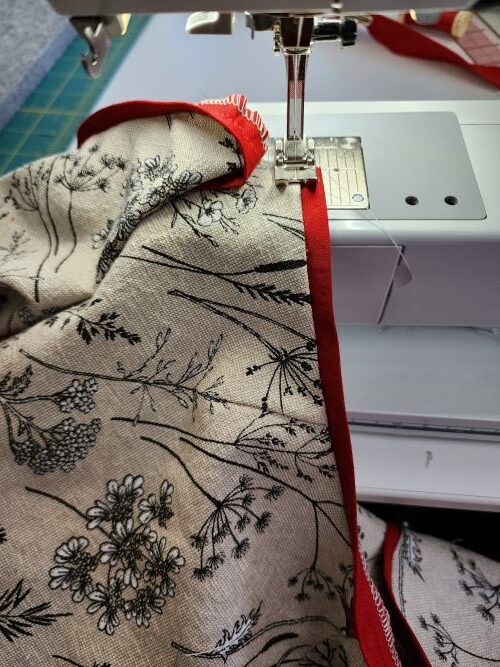
Lay the joined front/back pieces as smoothly as possible on a flat surface, right side up. Begin just below the V opening to position, then pin the piping in place around the neckline and down the desired front or back. Stretch the piping a bit around the neck curves and leave a bit slack in the V neckline turns. Before stitching, check to make sure it will all fit together! If you are making a dress or long tunic and want a back slit, pin and stitch piping to the hem area of the other back.
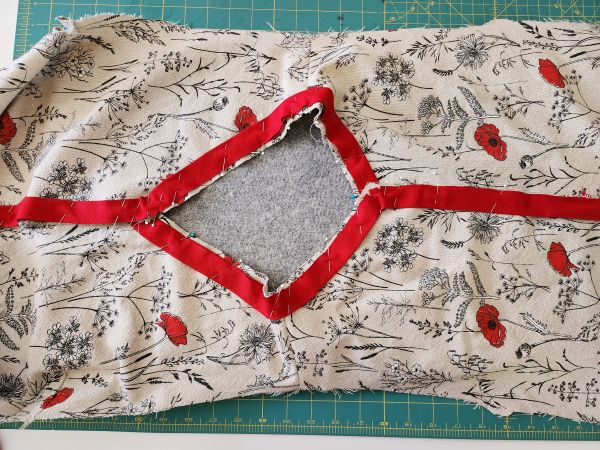
Stitch the piping to both sections along the ⅝” seamline. Press the stitched-on piping seam allowances to the wrong side of the garment, allowing the exposed piping to extend out. Press from the inside and outside for a smooth finish. If the seam feels thick, trim away extra seam allowance from the piping to grade the seam. Clip as needed along the neck curve and V to allow the piping to lay smoothly.
Clean finish all the seams, reducing the seam allowance around the neck edge to ¼”. For the front and back seam allowances that do not have piping attached, clean finish the raw edge without trimming or reducing the 5/8″ seam allowance.
Construct the Top
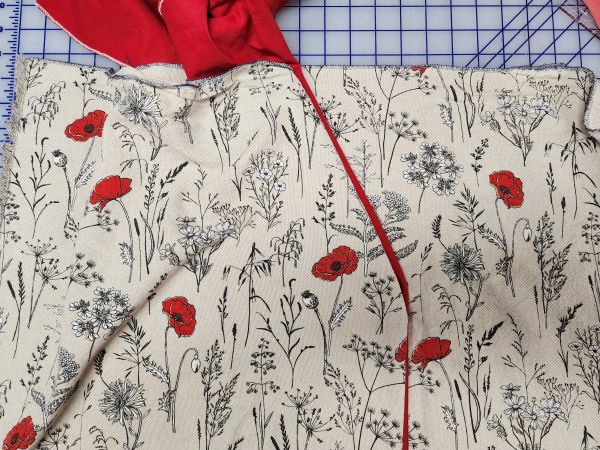
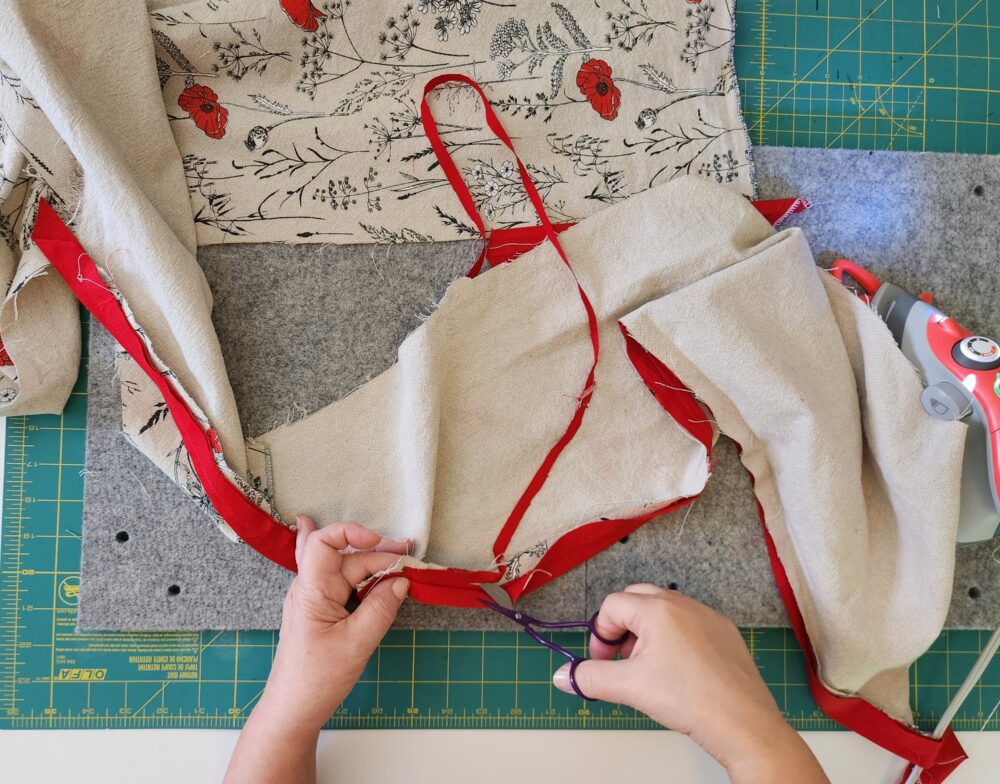
Unfold the pressed piping edges and pin, right sides together, along the center front and center back 5/8″ stitching line, leaving an opening in the back for the slit, if desired. Stitch, beginning about 1” below the V neckline so the piping can be successfully topstitched on every side.
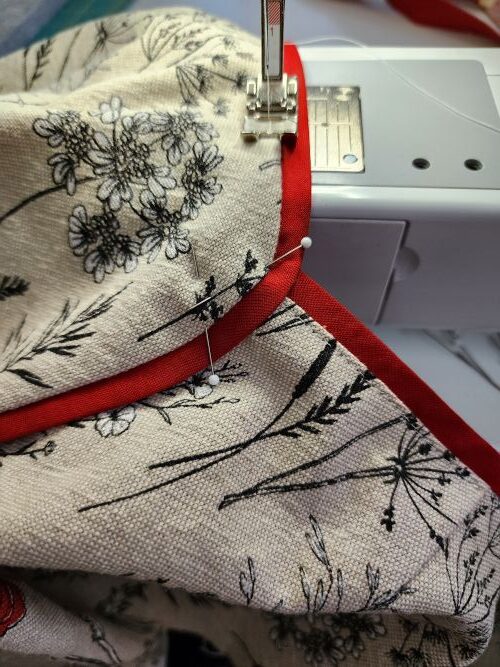
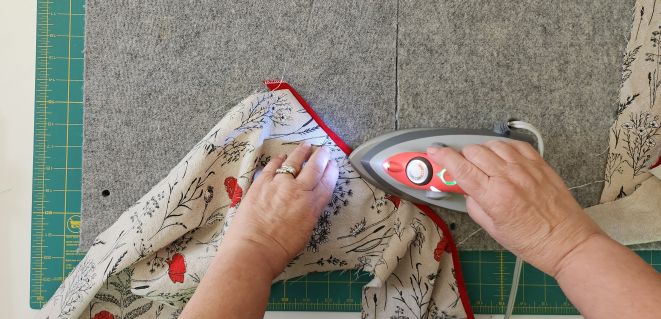
Press the seams smoothly to the side that allows the piping to extend away from the stitched line.
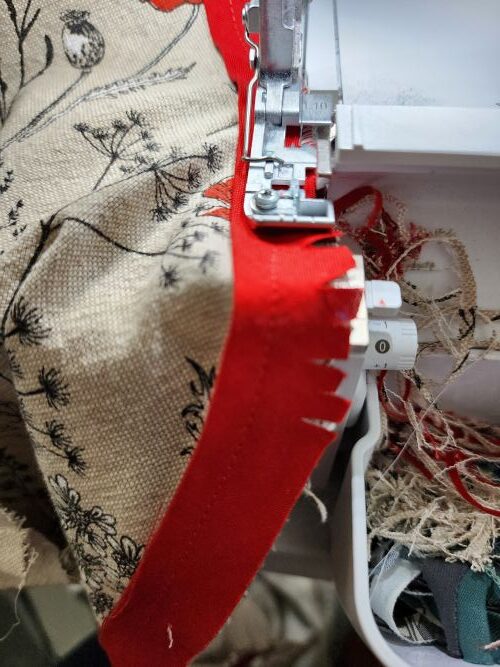
Topstitch very close to the seam line but away from the piping, to secure the seams all around the top.
Now you can complete the top’s construction following the Carpe Diem instructions. If there is enough piping remaining, stitch it around the bottom edge of the sleeves for a coordinating hem.

Try it Yourself!
We are teaching a class in Carpe Diem sewing at Artistic Artifacts in Alexandria, VA this weekend, a great time to get a great fit and master the construction. There are still spaces available, so register now to join us.
Keep an eye on our social media feed this week to see some more tops with this clever piping front detail. Take a look at the completed Red Poppy Tunic in our photo gallery.


Thanks…. I appreciate the look and the time you took to share with all of us