In the Spring, I shared the beginning of my Summer Pants Journey featuring 2 pairs of elastic waist pants, one in brown linen and one in moss green Tencel, based on the Eureka! Pants that Fit pattern. For the last several weeks I have been busy sewing several tops, which you have seen previewed on Fit for Art’s Instagram or blog posts, to go with those pants. Now that I’ve completed my last pair of summer pants and am working on my last top, it’s time to bring you an update.

This last pair of summer Eureka Pants is crafted from medium weight linen in Hibiscus from Core Fabrics, selected to brighten up my summer wardrobe. The first step was to make several pattern tweaks gleaned from wearing the first two pairs. I lowered the waist, more in the front than the back, and brought the front and back side seams in a tad above the middle HBL, still leaving some ease in the waist circumference. I still wanted them to be loose through the leg, but a little less full, so I shaved ¼” off the front and back inseams and side seams below the notches.

In order to progress toward making more fitted pants for Fall, I planned to use a zipper, back darts, and a true waistband finished with elastic (rather than waist stiffener). Because I need a place to carry my phone, I added back patch pockets. And just for fun, I experimented with another pant hem line variation.

The lantern cuff for these pants, which gets smaller in circumference at the ankle, is similar to the lantern cuff included in Sleeve & Cuff Variations for the Tabula Rasa Jacket. Guessing that a 6” deep cuff would be about the right proportion, I shortened the pant leg patterns commensurately, leaving 5/8” for a seam allowance. To create a cuff pattern for the pant front, I measured edge to edge on the front pattern at the seam line (10”) and cut out a paper rectangle that width by 7¼” deep (6” deep cuff plus 2 seam allowances). I made the ankle 3 inches narrower than the top of the cuff by folding three 1” deep darts along the bottom of the rectangle, snipping to release along the top of the rectangle as needed. Then I repeated the process for the back cuff, resulting in these two cuff patterns.
I prepared each set of cuffs by joining them together at the side seams and inseams to create a circle or tube. I basted a cuff to each pant leg so I could try it on to test the finished length. The hem hit just above the ankle as I wanted, so then I finished the cuff with a cuff facing, just like the TRJ Lantern Cuff. The steps to facing the cuff :
- sew cuff facing to cuff at the ankle,
- clean finish the raw edge of facing,
- press the facing to the inside, and
- topstitch the facing in place along the pant/cuff seam.


Of course, this was all trial and error. For example, in the photo above you’ll notice that the cuff facing had a fusible interfacing. After sewing one facing onto the pant leg, I concluded that interfacing made the cuffs too stiff and removed it. In future I might just iron a 1” wide strip of interfacing along the bottom of the cuff facing to support the ankle seam.

I really wanted to add a skirt to this summer wardrobe, especially for going out to dinner in France! I used a tried and true pattern in my collection (Simplicity 4881) to sew an 8 gore elastic waist skirt out of sandwashed textured Tencel in ocean blue, the last piece of fabric I had ordered from Core Fabrics for this project. The skirt was quick, easy, and a perfect style for the drapey Tencel. Finally, I added one old friend to this wardrobe, a beloved pair of linen shorts with Trouser Details as seen in Eureka! Shorts that Fit.
The new tops in my summer wardrobe include:

- Two Carpe Diem tank tops, in the quilting cotton fan print and the cotton double gauze as seen in Finish a Carpe Diem with a Binding.
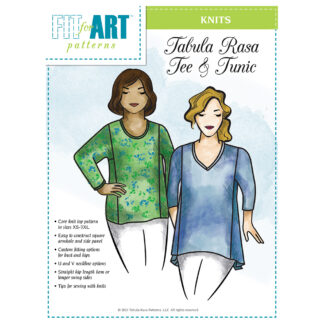
- A watercolor Tabula Rasa Knit Tee with a boat neckline (Wide Neckline Variations) and tulip sleeves (Clever Crossing Variations).
- Two cotton lawn Tabula Rasa Jackets with Band Variations which Rae made for an article in Classic Sewing Magazine. The fabrics are perfect for my summer wardrobe, so Cotton Lawn Parrots and the Vintage Lace Ruched Top were made to fit me.
- An asymmetrical Tabula Rasa Jacket in a vintage linen print with ¾ length sleeves, which I made in 2020 but has been the inspiration for the colors in this summer wardrobe. (And a peek preview of things to come from Fit for Art…)
- I have one more blouse in progress in a very light cotton linen blend with an adorable jungle print that will go with every bottom – so watch our social media for the final garment!


I am having great fun mixing and mingling all my new tops with these 5 bottom pieces. As you can see from these photos, there is an earthy color group and a brighter red and blue group, but they all work together. I am ready to pack my bag for the France Retreat!
We hope this illustrates the beauty of working with Fit for Art’s Four Core Patterns; after fitting each core pattern, you can make an infinite variety of garments!
Happy sewing, Carrie


