The Tabby Jacket pattern in kid sizes 2 – 12, with directions for both kids and adults, was supposed to be a smaller version of the Tabula Rasa Jacket. We envision moms, grandmas and friends sewing jackets with their youngsters using coordinated fabric, loving the process and the results. We still think that is true, but along the way we made a few changes to the kids’ pattern so construction and fit would be easier for young sewists.

So what is different?
Both shaping and construction adjustments were made to accommodate smaller bodies and little hands. If you have made the TRJ for yourself or others, you will probably notice some of the differences.
- The sleeve pattern is not as curved under the arm and extends further into the side.

- The side is shorter to accommodate the longer sleeve; it also has no notches to cut around.
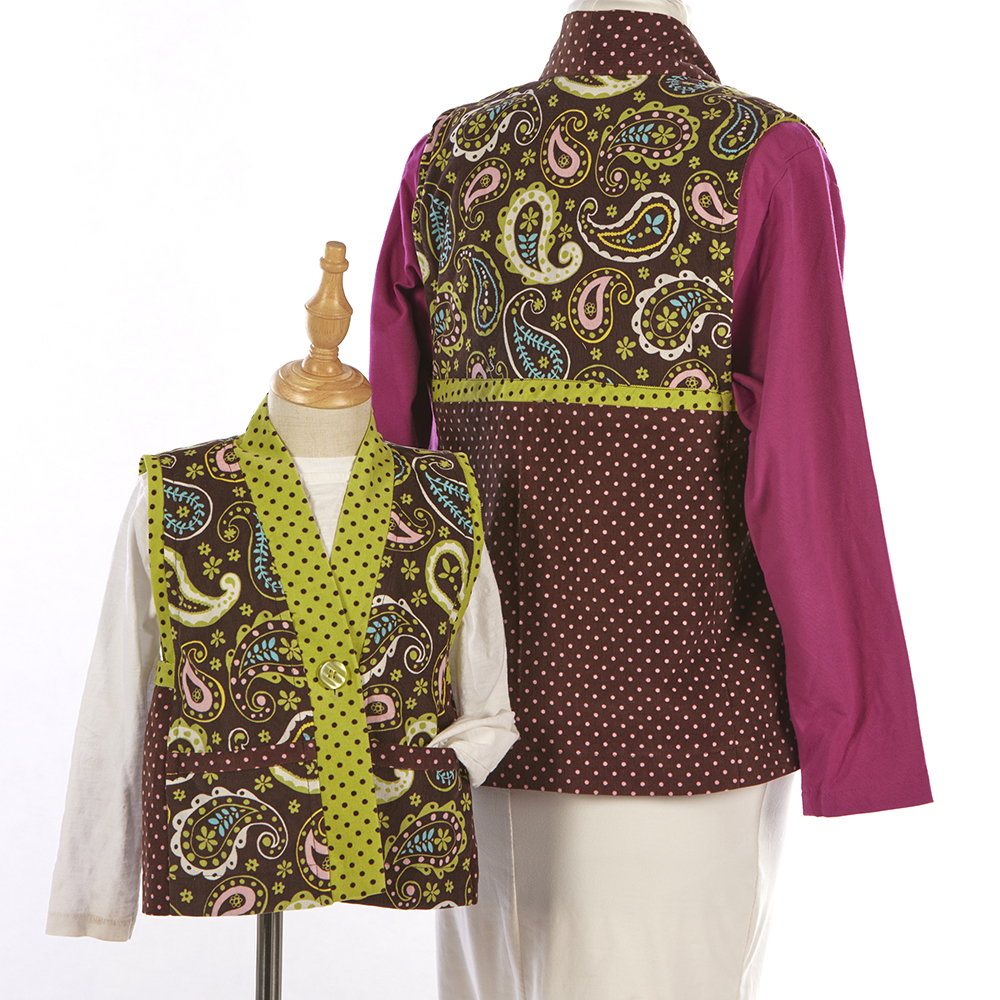
- The band is constructed differently. The ends are finished first and t the band is turned right side out. tThen the entire band is folded in half, pressed, and attached to the unhemmed jacket. The seam that holds the band in place is pressed to the inside of the jacket and the hem wraps around the seam allowance for a clean finish.

- This same technique is used for the Tabby Vest, armhole facings, and cuff construction included as extras in the Make an Even Better Jacket section of the direction book.
- The basic jacket directions do not fuss with seam finishes; it’s like making a mock-up with the intention to learn the construction and check the fit. The finer points of finishing a jacket are also included in the Make an Even Better Jacket section.
- The patterns are printed on a heavier weight tissue with colored lines for each size.
Why did we make these changes?
We did an official testing event with hand drawn patterns and directions that were minimally adjusted from the construction method used for the Tabula Rasa Jacket. We had 7 enthusiastic young stitchers, a few moms, Edye, Carrie and I present for two consecutive Saturday 2-hour sessions at a local fabric store.

It was our privilege to watch these kids really focus and diligently execute the techniques in the pattern. We took a bunch of notes during the process and the moms and kids made notes on their direction books, too. We identified what was really hard for the kids and what directions were missing. Then we went back to the drawing board and reconfigured the instruction book to make the process easier.

We also added detail to the directions, for example prompting action each time it is necessary to reverse stitch to secure the seam. We created some additional illustrations to expand the directions, especially in the section where the sleeve/side is inserted into the front/back. We used a fun font to keep things light.

Cutting notches was particularly hard for little hands with big scissors. While we know learning about notches is part of a basic garment sewing education, we decided to minimize the number of notches by eliminating them in the side panel. The basis of the Tabula Rasa Jacket is to help gals of all sizes and shapes get a well fitting pattern. The fitting nuances of a kid’s pattern is a bit less arduous. We added more width to the bottom of the side pattern so it would be easy to identify the armhole from the hemline during construction. This allowed us to eliminate 4 notches – 2 on the side panel and 1 each front and back – that needed to be cut.
Another real sticking point was the curve under the arm. Several kids just could not imagine sewing a curve when most of their previous sewing was straight lines. By lowering the sleeve we were able to reshape the curve so it is more of an angle. We tested this a couple times to make sure it was really an improvement.

Finally, the TRJ wrapped band, which is a beautiful finish on a woman’s lined or unlined jacket, felt difficult for the kids. That technique allows an adult to choose their own length and then add the band to match their nuanced length. We observed that our young testers did not seem the slightest bit interested in determining their best length, so we picked one for them. Of course, you can teach or use the alternate method found in the TRJ direction book with the kid in your life if you prefer.
What is the same?
You will still find the same classic ⅝” seam allowance, the introduction to interfacing as a excellent support for front bands and other finishes, the gathering stitches in the top of the sleeve and a host of other great info for making a kids jacket that looks for all the world like the Tabula Rasa Jacket.

As summer unofficially starts this week in the US, plan to sew with an older child you love during their school break. Our testers, ages 8-12, already knew how to use a sewing machine. We added a list of sewing tools and skills to the end of the instruction book to help you prepare kids for this project. Keep the sessions short so there is no stress! Refer to the Tabby Jacket Sewing Schedule for guidance on making a great plan. You will find links to additional helps in our Helpful Hints for Kids page of the website, including a Glossary of Common Sewing Terms.
As an incentive to get you sewing with a kid in your life over summer break, we are offereing a summer sewing special – save 15% off the Tabby Jacket with coupon code SEWSUMMER through June 10th. Order now! We can’t wait to see photos of kids sewing and modeling their Tabby Jackets and Vests with #tabbyjacket and #tabbyvest!


