
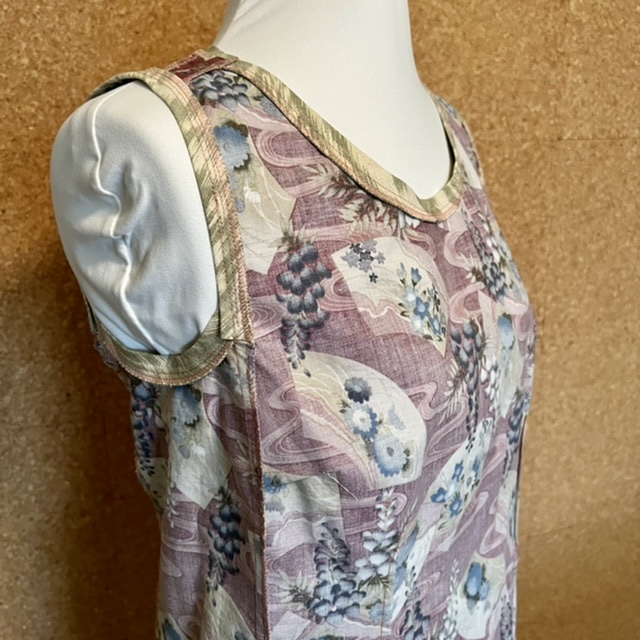
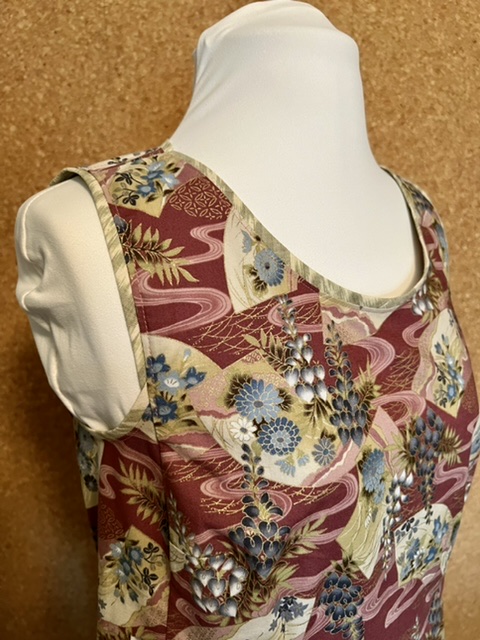
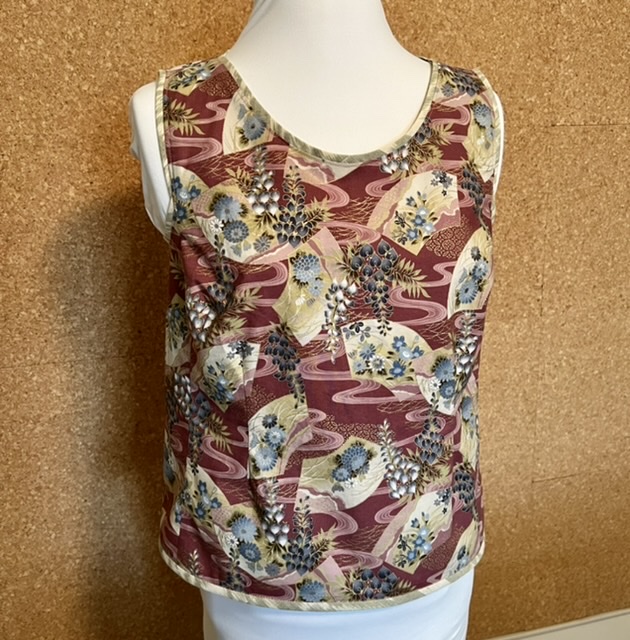
Today we are looking at an alternative way to finish the armholes and neckline of a sleeveless Carpe Diem Dress or Tunic. Patterns and instructions for finishing those areas with a traditional facing is included with the Carpe Diem, as seen on this sleeveless double gauze top.
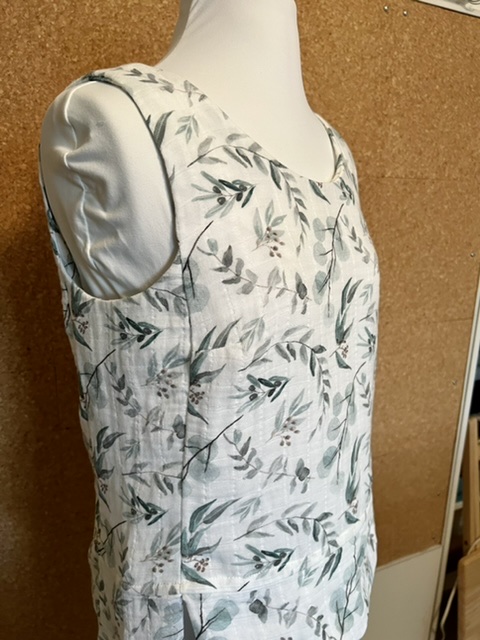
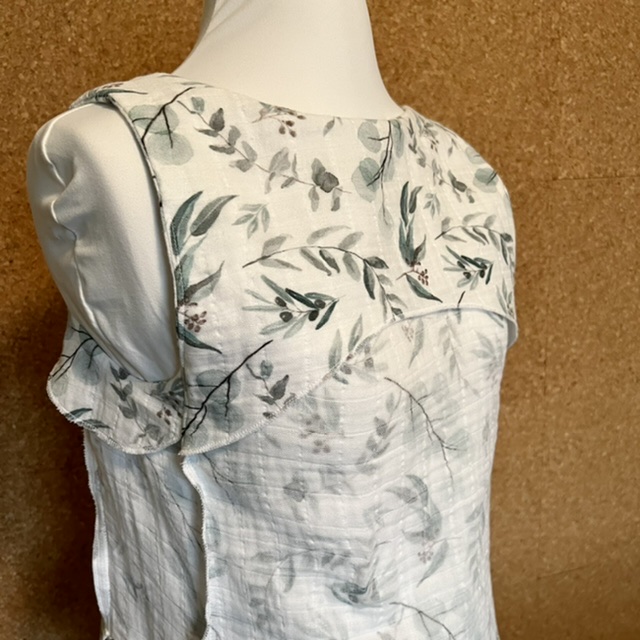
A few weeks ago, Rae wrote about another way she finished the neckline in Trimming a Carpe Diem; she applied a binding to the neckline and turned it entirely inside the garment for a very simple finish. This week I am finishing a Carpe Diem top with a ¼” wide binding around the sleeveless armhole and neckline, as you also see in this Floral Chambray Tank Top. If you have made a knit Tank Top from our Twin Set Variations for Tabula Rasa Knits, this technique will seem VERY familiar!
Prepare the Binding Strips
For this application, binding strips must be cut on the true bias to bend around the curves of the armhole and neckline. By true bias, we mean cutting at a 45 degree angle; you can find a 45 degree angle line on many cutting mats, or by folding a square of fabric into a triangle; the hypotenuse or longest side is on the bias.
Determine the width of the strips for your project by adding the desired finished width to 5/8”, then doubling the total. In this case, I want ¼” of binding to show when I’m done, so I cut strips 1¾” wide. Guessing that most of you have made binding for a quilt, Tabula Rasa Jacket, or other project, I won’t go into detail about how to join the strips. (If you need help, look at the directions at the end of the Tabula Rasa Jacket instruction book or search YouTube, where you’ll find approximately a million video tutorials.) Regardless, you won’t need to join many strips because you’ll use 5 or 6 separate binding strips; I’ll address the length of strip needed at each step. Once you have your strips, fold them in half the long way and press thoroughly.
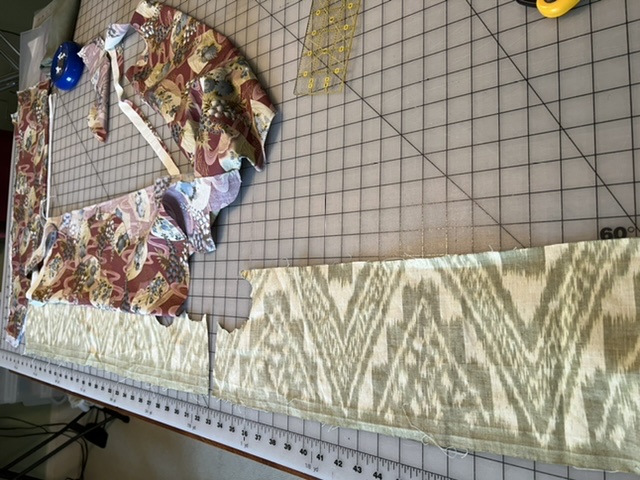
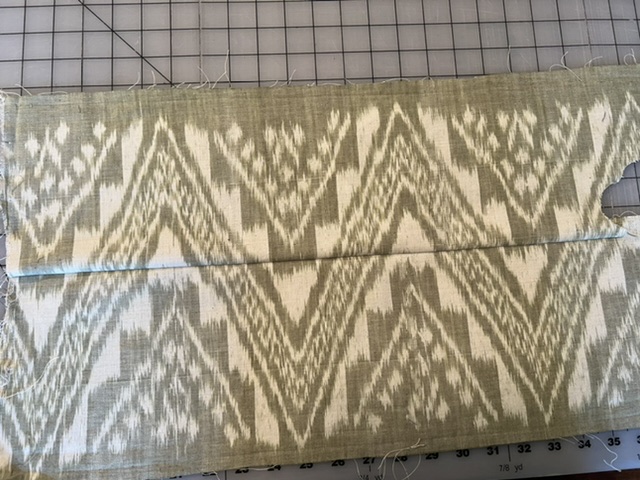
For this sleeveless tank top, I chose a scrap of cotton ikat for the binding because I liked the way it lightened up the quilting cotton print for a summery look. Unfortunately, the ikat scrap was long and narrow which generally requires joining lots of bias strips. I simplified my cutting and joining of strips by cutting the scrap in half and joining the two pieces with one long seam, as you see here. Then I cut the bias strips.
Finish Underarm on Sleeveless Side Panel
It is much easier to bind the sleeveless underarm curve before inserting the side panel into the front and back of the Carpe Diem dress or top. Determine the length of the binding strips needed by measuring along the curve on your side panel pattern at the 5/8” seam line and adding 1-2”. You will cut the excess off later; this just makes the pieces easier to hold and manage. After the binding strips are pressed in half, follow these steps for each armhole:
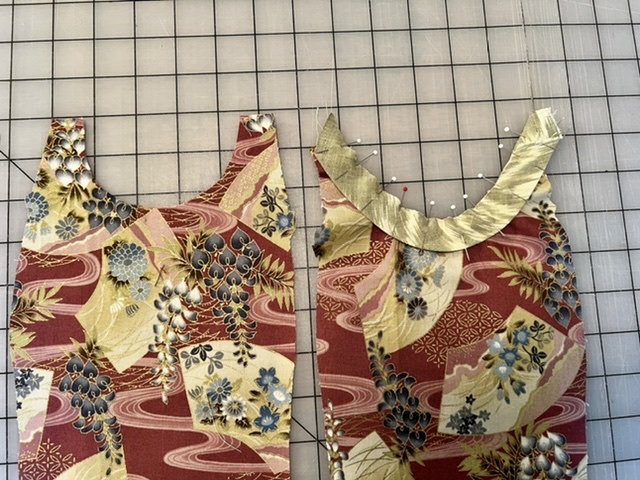

- Pin binding strip along curve, right sides together, aligning the raw edges of binding and underarm curve. Stretch binding slightly as you pin.
- Stitch on 5/8” seam line. Pro Tip: Use the edge of your sewing machine foot as a guide to stitch an even distance from the folded edge (in my case ¼”) for a more accurate result.
- Clean finish the raw edges with a serger or zigzag stitch, cutting the seam allowance to 3/8”.
- Press binding into place with seam allowances to the wrong side of panel.
- Topstitch binding to side panel along underarm curve approximately 1/8” from the seam line, securing the seam allowances in place.
- Cut excess binding from ends of side panels.
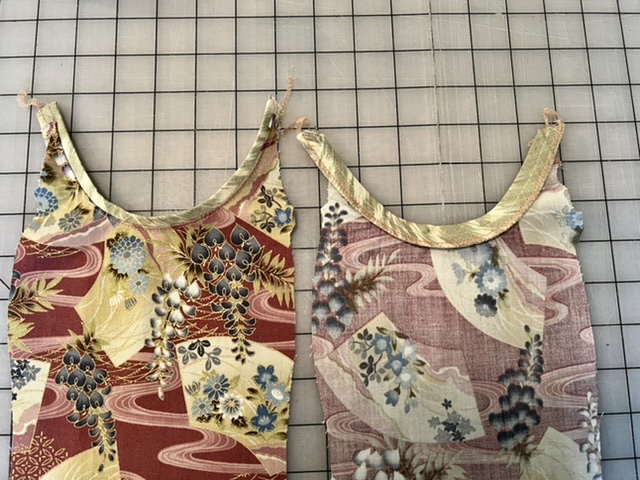
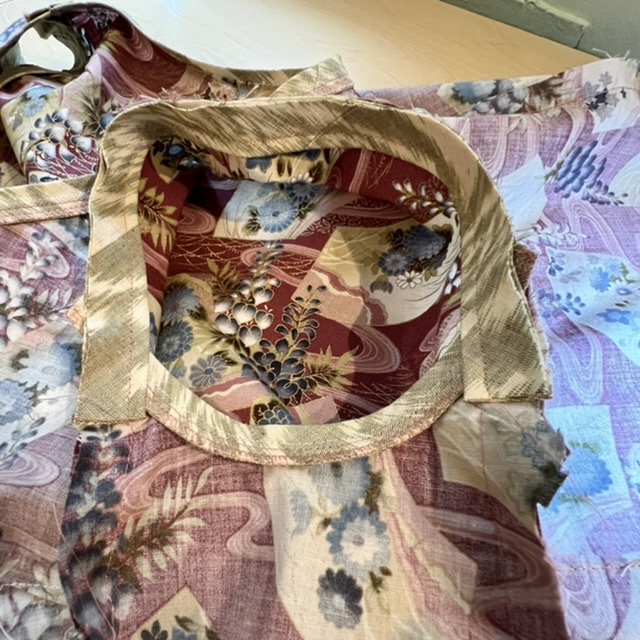
Finish Front and Back Neckline
In this sample, I am binding the front and back necklines separately, then sewing them together at the shoulder seam. The process for binding the front and back necklines is the same as the for the underarm. Determine the length of binding strips needed by measuring along the curve at the 5/8” seam line separately on the front and back and adding 1-2” for ease of management. Press the strips in half and follow the same steps as above to finish each neckline.
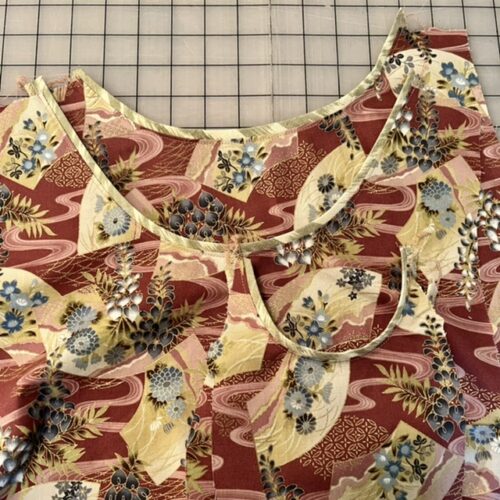
Assemble the Carpe Diem Top or Dress
Now you are ready to join the front to back at the shoulder seam. After stitching shoulder seams, clean finish the raw edges of each seam allowance. On a casual top like this that will go through the wash repeatedly, I like to topstitch the seam allowances in place 3/8″ to 1/2” from the seam line for additional shoulder support.
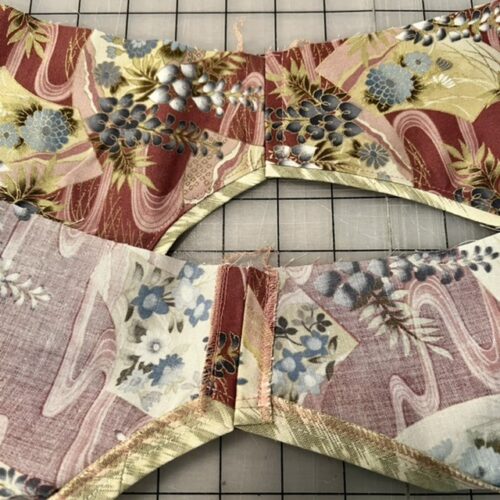
Next, sew the side panels to the fronts and backs. Take the time to try on your dress or top at this step and make any fit adjustments needed to the side seams. DO NOT CLEAN FINISH THE SIDE SEAM ALLOWANCES YET!!
Finish Armhole with Binding
Determine the length of binding strips needed by measuring the upper armhole; start from the underarm binding in front and end at the underarm binding in back and add 1-2”. Fold and press ¼” under along one short end of each strip before pressing the strip in half the long way. You will fold and press under the other short end of each strip after pinning the binding in place and determining finished length. Proceed as follows for each armhole:
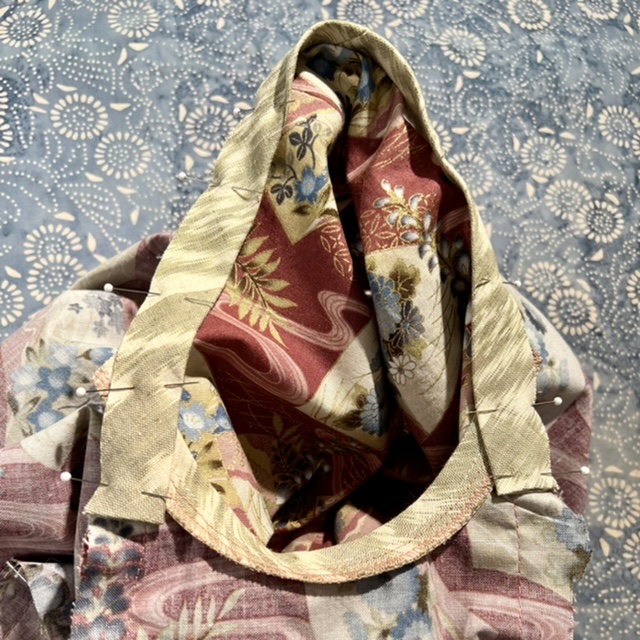

- Pin binding strip along armhole, right sides together, aligning the raw edges of binding and top. The last inch or so at each end will be pinned to the unfinished seam allowances inside the top below the underarm opening. Fold and press ¼” under at the other short end of binding strip before pinning and stitching so there will be no raw edge
- Stitch on 5/8” seam line. Check your work and make any corrections needed.
- Clean finish the raw edges of the entire side seam from hem to hem with a serger or zigzag stitch, cutting the seam allowance to 3/8”. Pro Tip: Clip away excess fabric layers in the seam allowances where the underarm binding crosses the side seam to reduce bulk before serging or zigzagging.
- Press binding into place with seam allowances to the inside of top or dress. Continue to the hems, pressing side seam allowances away from the side panel and toward the front and back.
- Topstitch binding to armhole opening approximately 1/8” from the seam line, securing the seam allowances in place.
Almost Done!
Now all that is left is to hem the Carpe Diem by your preferred method. Because I had enough binding strips left, I decided to bind the hem of this top. If you look carefully, you’ll notice that I scaled up the visible binding to 3/8” for the hem. I also wrapped the binding around the hem, like a quilt binding, and secured it in place by “stitching in the ditch”. Why not use this quilt binding technique for the armholes and neckline? While this technique is easy to use on the straight line of a hem, it is far more difficult to manage in the deep curves of the underarm and neckline.

I encourage you to try this technique for an easy and light summer Carpe Diem! It’s a great way to introduce a contrasting fabric to your project. If making a Carpe Diem with sleeves for any time of year, you could finish just the neckline with binding, or extend it to the sleeve and garment hems for another use of the contrast fabric.
Happy Sewing, Carrie


