

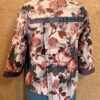
This month’s blast from the past revisits our tutorial on drafting your own pattern for an Asymmetrical Band Front with your personalized Tabula Rasa Jacket pattern. We have been playing around with an asymmetrical band front for the Tabula Rasa Jacket for many years, so this post shows you the adjustments step-by-step to change your Tabula Rasa Jacket pattern into this interesting style. There are several samples of this style in our Asymmetrical Band Fronts photo gallery, some of which also feature an asymmetrical hem like the samples pictured here.
Draft the Extended Front Pattern
Clean off the sewing table and prepare to do some pattern work. You will need a roll of pattern paper, your personally adjusted Tabula Rasa Jacket pattern, tape, a pencil, a curved ruler and a straight ruler. If these are not tools you have on hand, you can purchase them in the Pattern Drafting Kit available in the Fit for Art store.

Only the front pattern needs to be adjusted for this design change. Lay the front pattern on the table and unroll pattern paper on top of it, completely covering the pattern and leaving several inches to the right of center front. Place a couple pins around the edges to connect the two layers or use some weights or strategically position the tape dispenser to anchor the paper to the pattern being copied.
It is smart to first draw the grainline and the three balance lines on the new pattern so if the layers get separated, they may be easily realigned. Next, draw the cutting lines around the entire pattern and add in the dart (or darts). Remove the new pattern from the original and label it Asymmetrical Front for the TRJ.

Now place an easily visible dot at the place where the top balance line joins the front cutting line. Lay the straight ruler along the middle balance line, placing the short end along the grain line and allowing the ruler to extend across the pattern. Measure the distance between the grain line and the center front cutting line. Draw a line that extends from the grain line to the center front and beyond the original center front the same distance as measured, or place a dot at that end point. Repeat at the lower balance line. On my Large pattern with the CD front, this was about 5”.

Use the curved ruler to connect the end of this new line to the dot created at the high balance line. Be sure the ruler blends into the original cutting line above the dot for at least 3/8”.

Step back and observe the line drawn. If it seems graceful enough, then complete the pattern work by laying the ruler parallel with the original cutting line and draw the new front cutting line that creates an asymmetrical front from the neck curve to the hem.

Add an Asymmetrical Hem
If you wish to add an asymmetrical hemline to this new front, allow the new front line to extend down beyond the hem line as desired, 3″ to 5” is a good start. Then angle the straight ruler to draw an angled front hemline for the right side of the jacket. Allow the original hem line to remain for the left side of the jacket. Label each hemline and note that to cut the left side, the pattern should be flipped over and the asymmetrical hemline folded away to create the offsetting hems.


Add a Self Facing
Finish the pattern work by adding a double-turned self facing down the straight front cutting line. Draw the first fold line 1¼” beyond the new cut line and then add a second fold line an additional 1” beyond the first facing line. Let these lines extend at least 1” above the front, so they can be trued to the pattern following the new neck curve.

Cut out the pattern, leaving extra paper at top and bottom for the self facing. Fold back the pattern’s double fold facing so it sits under the front. Use scissors to trim off the extra facing at the hem and the front band edge.


At our recent retreat, I demonstrated how to make a template, not a complete new pattern, so the original TRJ front pattern could be adjusted easily for this new front and neckline. If this is your preference, instead of tracing off the complete front pattern, trace the original pattern from the grain line only before adding the new neck curve, facings and hemline. Make a note to align the template’s edge with the grainline on the TRJ pattern piece.

I am working on a vest using this fresh neckline without the asymmetrical hemline. I simply folded up the pointed pattern for the right front and cut it out with an even hemline all around.

Construction Tips
Join the fronts to back at the shoulder seam as usual. If needed for your fabric, fuse interfacing to the self facings, making sure that it crosses both fold lines. When constructing this new neckline, double turn the self facing and press well. Stitch the facing into place with a topstitch or by hand.
To determine the length of front band needed, measure the neck edge from finished facing edge to facing edge and add a few inches to finish the raw ends of the band.

As you can see, my vest is ready for the band to be added. However, this band is a bit of a challenge! It is being made with a batik backing fabric and a strip of old pillow case painted, pieced and embroidered with an abstract design. Watch our social media this week to see it positioned and finished. Two years ago I made a hot pink tee to wear under this vest, but the handwork on the band took a bit of time. So glad the vest is finally ready to be constructed!

Read about the completion of Rae’s vest project in Asymmetrical Vest Years in the Making. In addition to samples in the photo gallery, you’ll find several blog posts in the archive about garments made with this asymmetrical front band.
Over the years we have made several bathrobes using this crossing front band style, but somehow haven’t managed to get them formally photographed for the gallery. While the asymmetrical band pattern work was not the focus, you’ll find bathrobe inspiration in our posts:
- Bathrobe Needed,
- Traveling to Sew — in Southeast Asia,
- Around the Clock Close Up, and
- Fit for Art Pajamas and Robe.
Try out this fun style to add interest to your Tabula Rasa Jacket sewing. Be sure to send us photos of the fun things you create in this new style or post them with our hashtags.
Happy Sewing, RAE & Carrie



Thank you