
It might surprise you to know that our busy Fit for Art schedule means we don’t have much time to sew. As Rae approached her late October birthday this year she chose to steal some time to sew a new tunic-length Happy Birthday shirt. Here she is to tell you all about it.
As sewing projects often do, this one starts with a piece of fabric, a great button and a blog post topic.
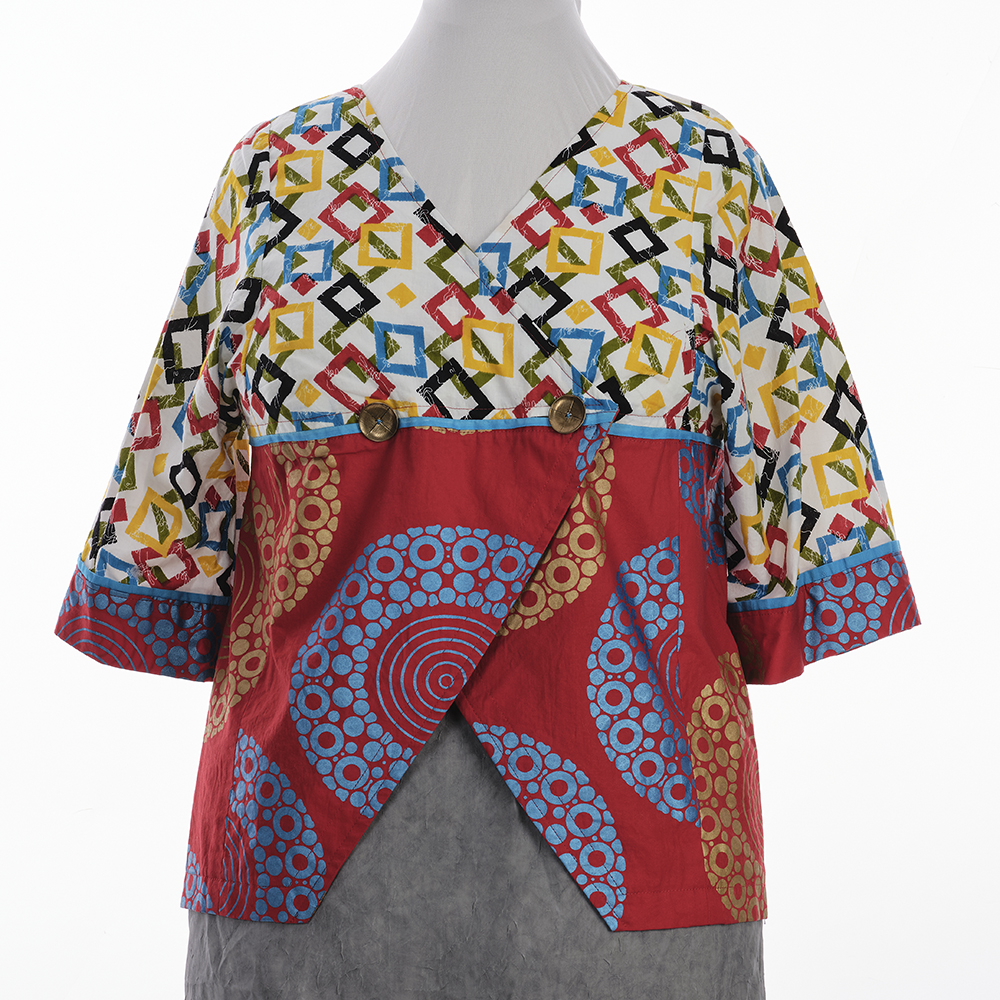
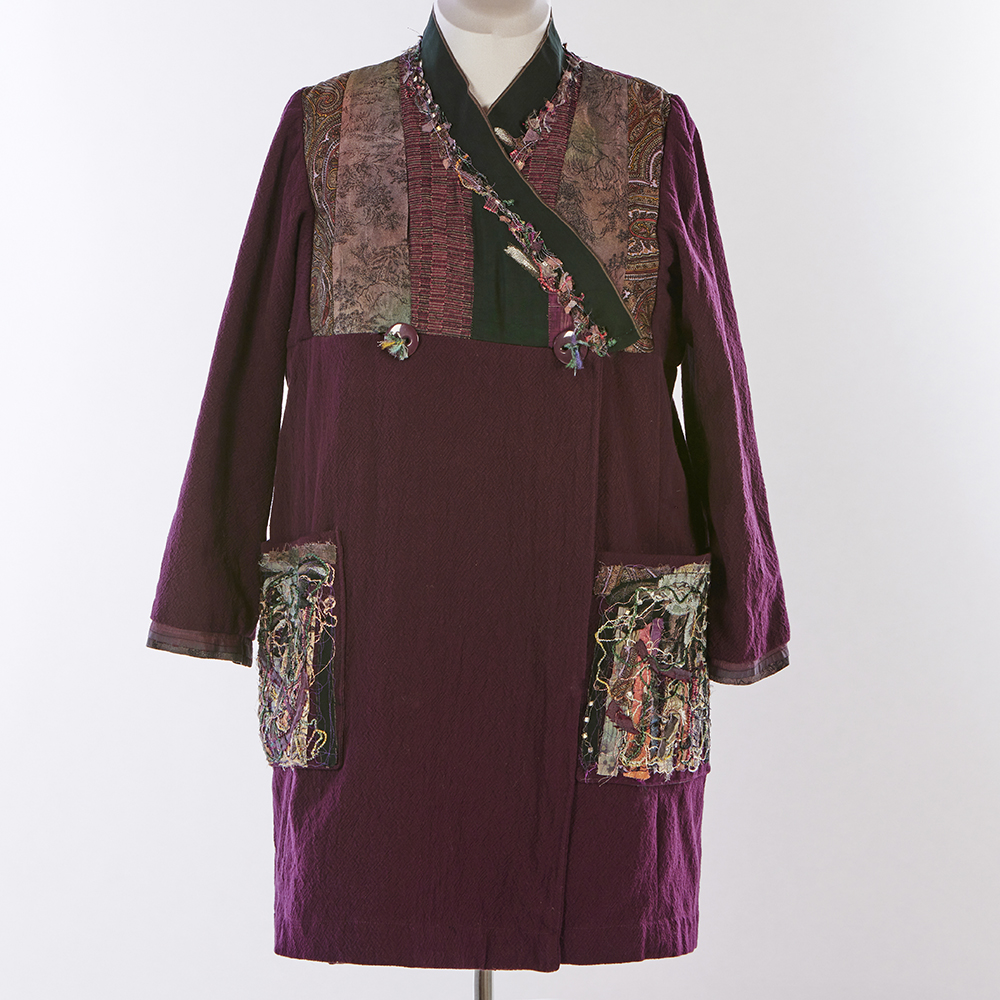
When we re-posted the Asymmetrical TRJ post recently we added to the gallery a few photos featuring woven TRJs with crossover openings. Two of them, Exploding Color Tunic and Scrap Lace Fall Coat, feature a high waisted crossover we have never written about.
This shirt was destined to have that shape with a fabulous single button closure to illustrate the pattern work. The base pattern would be the Tabula Rasa Jacket. The fabric was purchased as an end-of-bolt in a fabric store near my daughter’s home in France. It is a nice cotton poplin with a small bird print that I just loved. It pre-washed beautifully.
In early fall I sketched the idea for this Asian inspired design. After returning from the ASDP conference, I made a plan to work on it a little bit every day in hopes of finishing it by my birthday. I am happy to report that I met that goal and have enjoyed wearing it on cool days.
Pattern Work
First we will look at the pattern work since I could not locate the pattern used for the two previously made garments with a similar design.
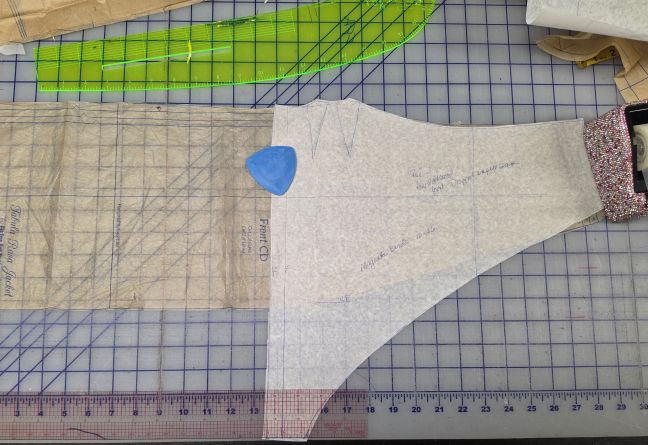
Using my altered TRJ pattern, I traced off the upper body and established a high waist location which was 1” lower than the middle balance line that runs through the dart. This seamline was drawn onto the pattern paper extending 4” beyond the Center front line. Using the curved ruler, I drafted a line that connected the front neckline to the new seamline. Then I added a ⅝” seam allowance below the new seamline.
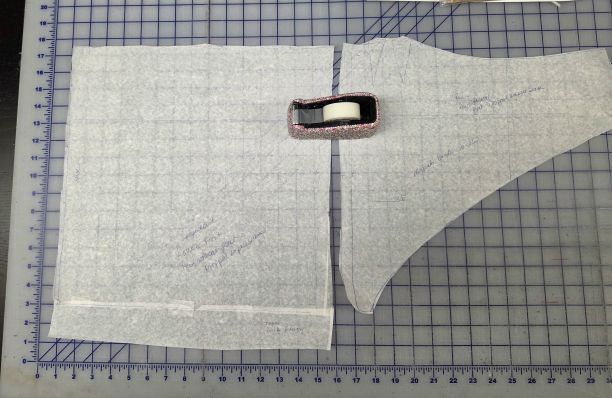
Next I traced the TRJ pattern from the new seamline to the hem, creating a lower front piece. On this pattern I added a ⅝” seam above the top seam line and extended it by 2” beyond the new front edge for a fold back finish down the edge of the new lower front.
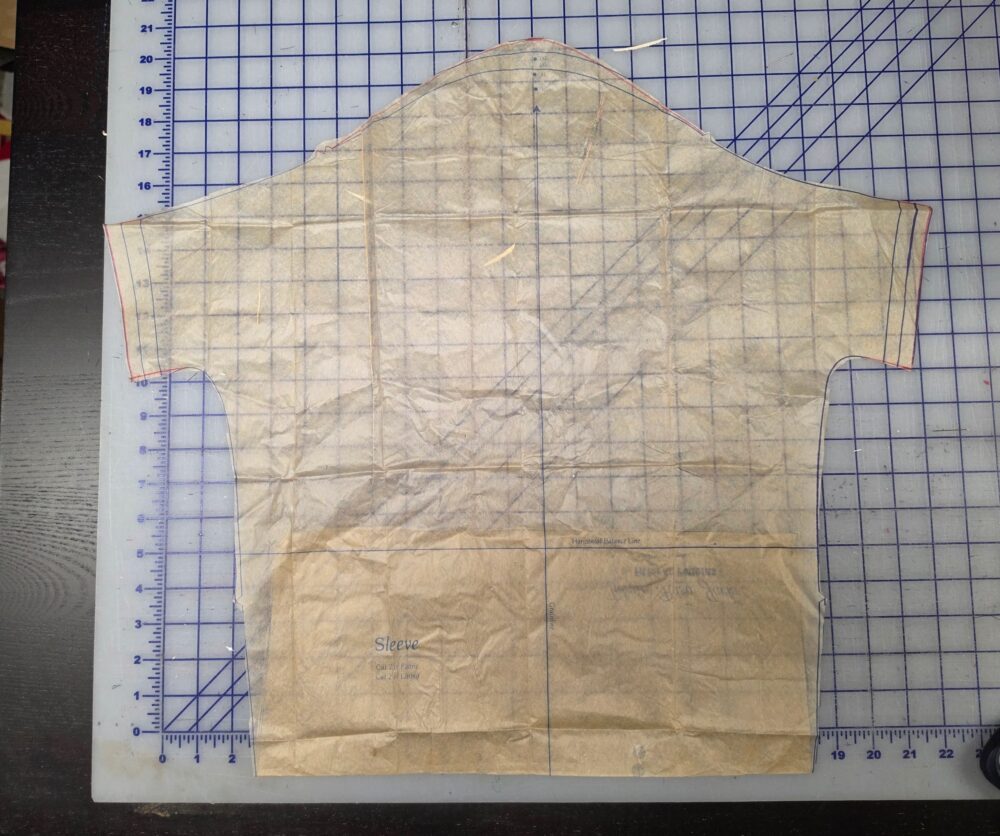
To create a consistent horizontal seam around the shirt, I lowered the side panel by one inch. Finally, I extended the sleeve extensions by one inch to match the lowered side panel. Each pattern was labeled with its name and the date.
Cutting and Interfacing
Because I was using the front, side, back and sleeve from the adjusted TRJ pattern, the only other pattern work was to shorten the band to the length needed for the new pattern.
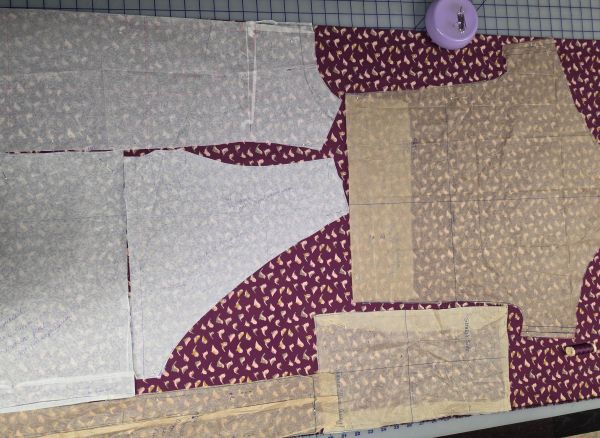
The cutting was not complicated as the shirt was all the same fabric and there was plenty. The print was directional, so each pattern follows the direction of the birds.
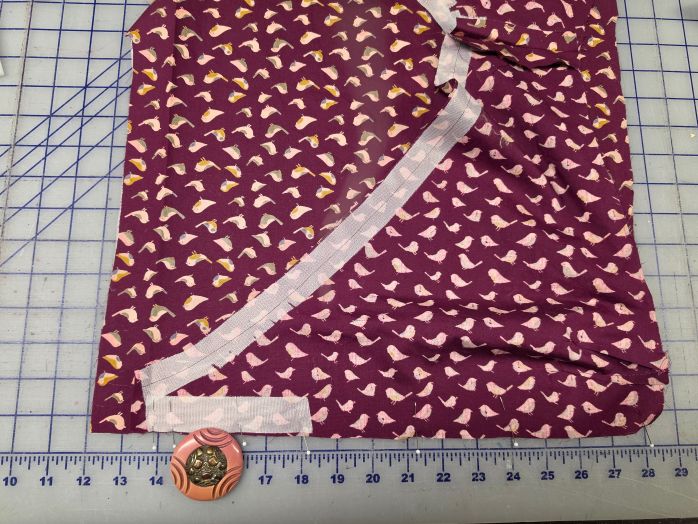
I wanted this to be a simple, unlined shirt so I added strips of interfacing, similar to French Fuse, to support the shoulders, neckline, and inseam buttonhole. To mark the inseam button hole opening with pins I used the button, measuring in at least 1” from the cut edge of the right front top to the far side of the button. Large inseam buttonholes do not need extra length because they expand easily.
When the upper shirt was stay-stitched and constructed, I attached it to the lower shirt fronts, backstitching at each marking for the buttonhole opening. After a good press, the button hole seams were clean-finished and carefully topstitched all a round to keep the opening tidy.
Construction and Fit-Checks
At many points in the process I tried the top on my Ditto-form to make sure it was laying properly on the body and was always pleased with the results. Ultimately, I added darts in the back for additional shaping.
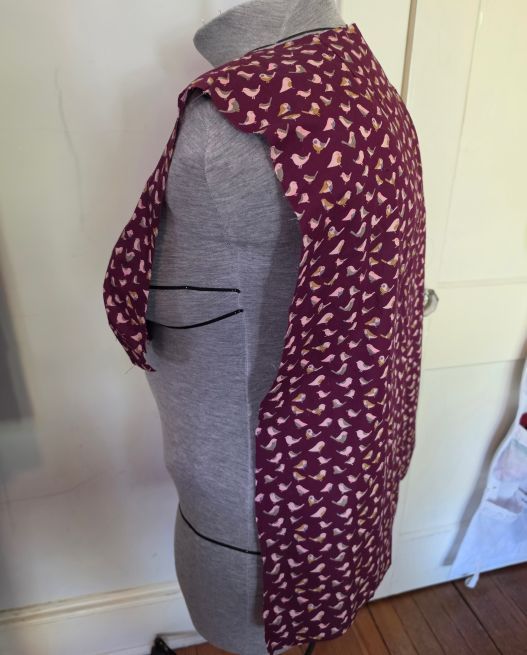
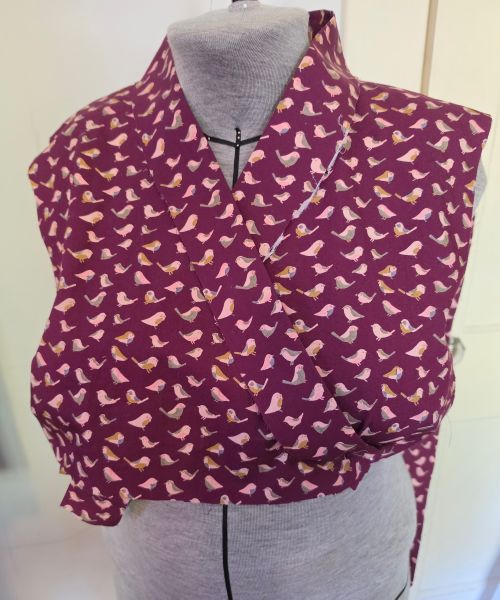
Once the bodice fronts and back were constructed and tested for fit, the band and front fold-back facing were interfaced with Envy Silk. The Band was attached using the same method as on the TRJ, it just looks a little different because the end sits at an angle.
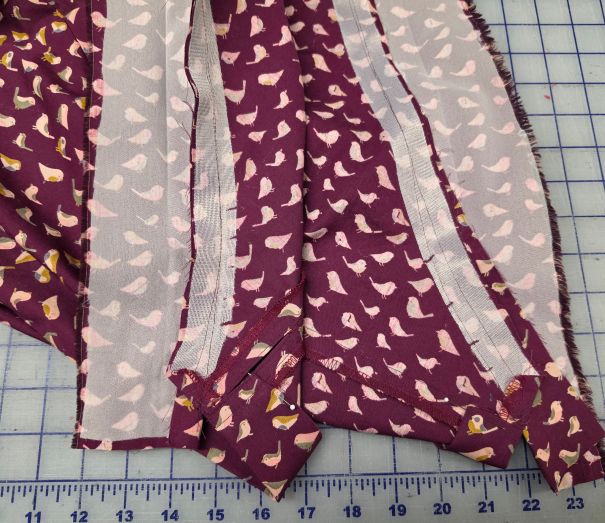
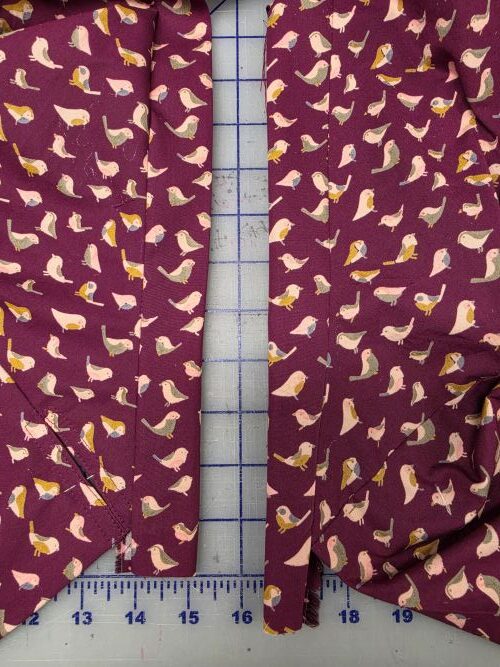
The 1¼” hem was also interfaced with Envy Silk interfacing to keep it crisp and add a bit of weight.
Final Finishes
When the top was complete, I decided it needed some definition between the band and the rest of the shirt. I found a a purchased trim in my stash that seemed to fit the bill and coordinated well with the button. There was enough to go around the neckline and along the hem of the slightly belled sleeves.
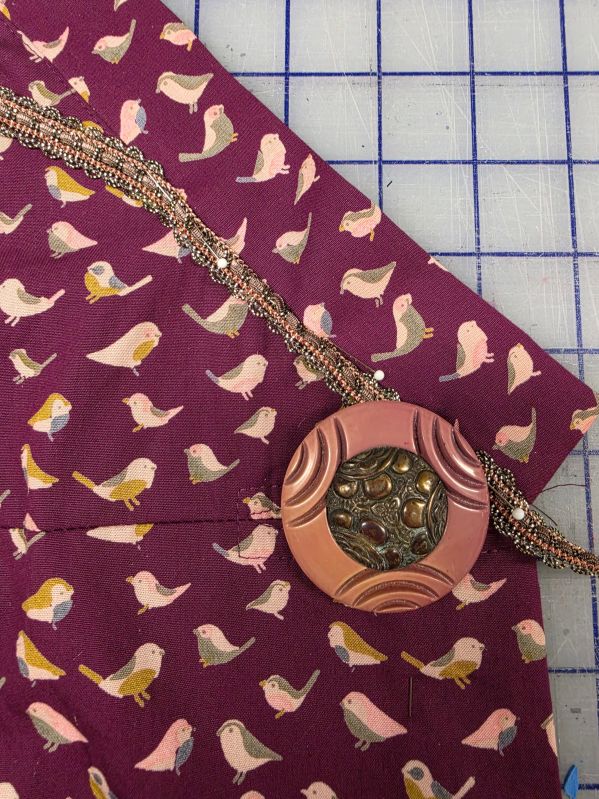
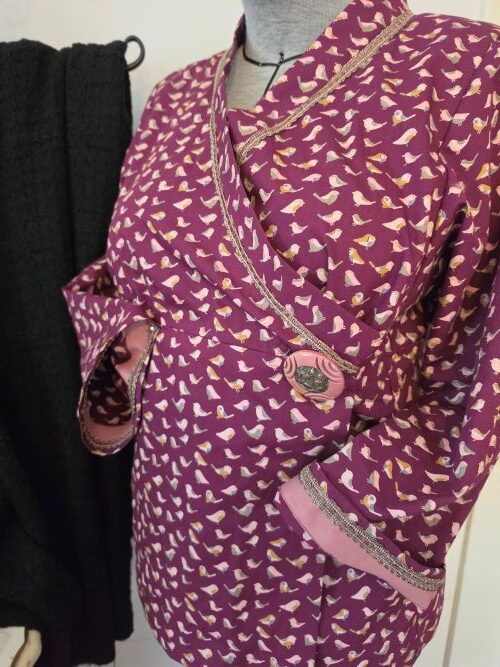
This is such a fun top and it works with many of my pants and shoes to be dressed up or down, a true Happy Birthday Shirt! Consider giving yourself plenty of time to complete a project so it does not feel stressful if life gets in the way. It is easier to find an hour a day than a couple of full days! This “slow sewing” approach permits space to make additional design decisions along the way that can really make a garment special.
The button is a wonderful closure on the outside. Inside, a large plastic snap was used to anchor the underlapping left side along the inside bodice construction line. After wearing it the first time I also added a large skirt hook and eye to keep the right front from moving. Watch social media this week to see more closure photos.