
Thanksgiving week offers those of us in the United States time to reflect on how fortunate we are. Carrie and I count ourselves so very blessed by the many members of our Fit for Art community who encourage us to bring the weekly blog, newsletters, retreats and other offerings your way. For that reason it has long been our habit to gift you a little thank you each year and this year our offering is the step-by-step directions to create scrap lace.
This post contains the step-by-steps accompanied by photos, but you can download the Scrap Lace directions in a printable PDF, too, so you can have a paper copy by your workstation while you are working. We have also added the water-soluble film needed to complete this project to our shop so you can easily order some to have on hand as you craft holiday gifts. Scrap Lace is perfect as a decorative layer on a composition book cover or a sleep mask, two of our previous year’s gifts.
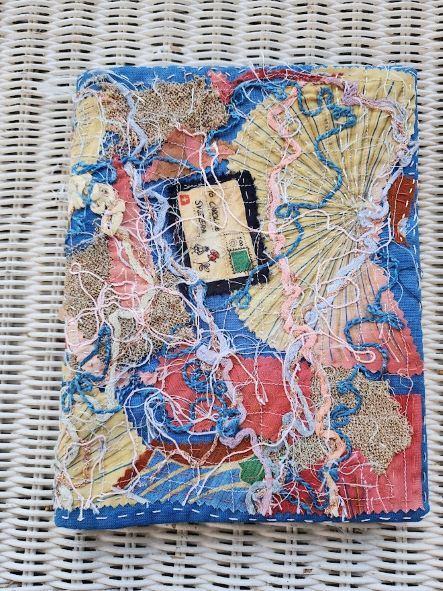
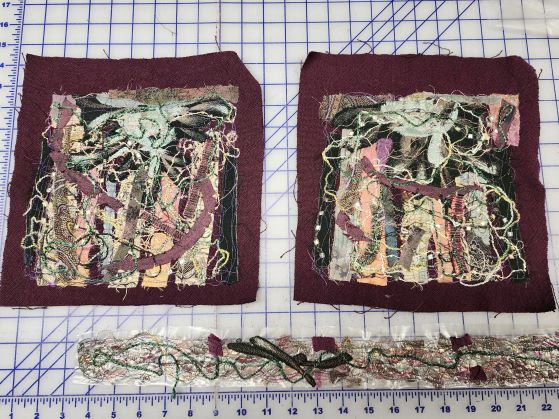
The photos show the step by steps for making some scrap lace trim that I added to a coat. I had already made the coordinating lace pieces that are decorating the pockets. A bit more of the scrap lace seemed just the thing to connect the different coat sections. At a later date, we will write about the coat, it’s repurposed sections and altered Tabula Rasa Jacket design.
Gather Materials
Collect the items you need to create the lace: water soluble stabilizer, fabric scraps, decorative cords, lace or other trims. A sewing machine is used to connect all the bits into lace. It is also helpful to have a plastic basin or utility sink and a water source.
Assemble the Lace
Cut two pieces of water-soluble stabilizer at least 1” larger all around than the finished size of your project.
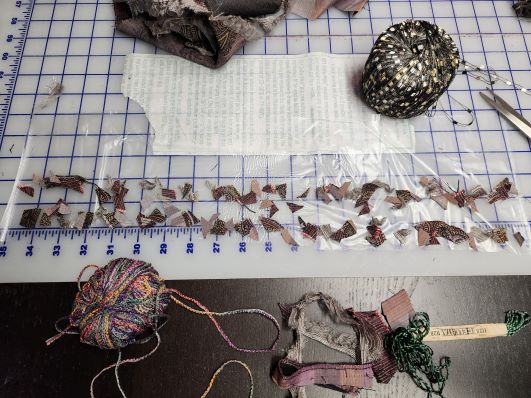
Arrange the scraps on one piece of the stabilizer in a pleasing manner. Be sure to leave some space between materials for a lacy texture.
Use cords or ribbons to connect elements, creating cohesion.
Top the composition carefully with a second piece of stabilizer. Pin in a few places if desired, especially for larger compositions.
Stitch the Lace Together
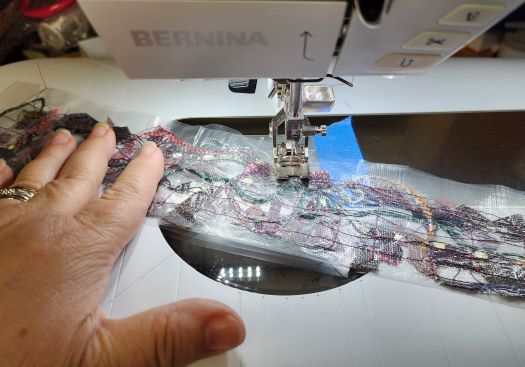
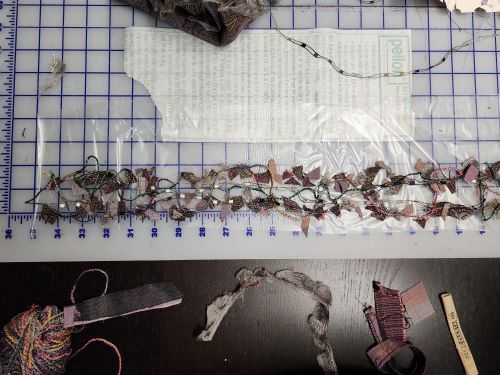
Place the stabilizer sandwich on the sewing machine table and stitch a grid of lines that captures all the small bits of fabric and trim. Sew more lines than seem necessary!
Soak away the Stabilizer
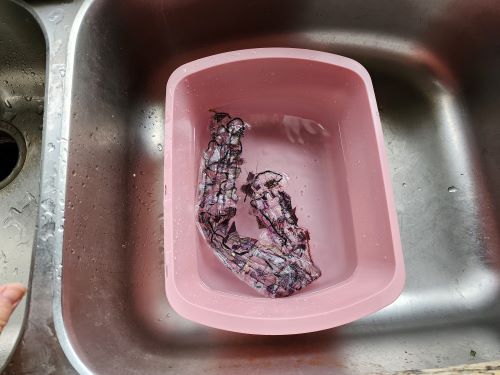

Follow the directions that came with the stabilizer to soak and rinse away the film. When it seems that all the stabilizer has been dissolved, rinse the piece again under running water to remove any additional residue.
Dry the Lace Thoroughly
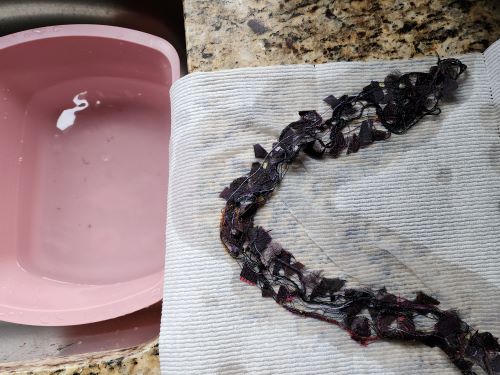
Place the damp lace on a paper towel to dry. If the lace is stiff when dry, consider a second rinse.
Make Samples
These directions are for a specific project but we advise that you just make some small sample pieces first to get the feel for the directions and find your personal style. It is also fun to do this in a group where everyone contributes scraps, trims and cords to the project.
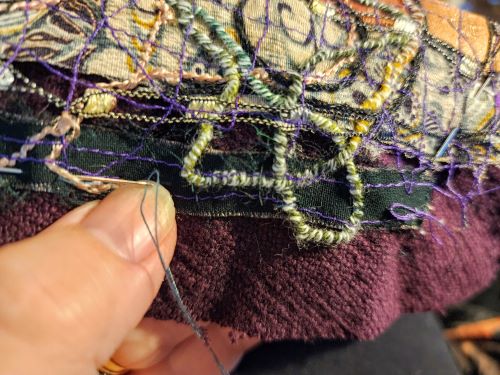
Hand stitch the finished lace securely in the desired location, attaching it all around and inside the entire piece so it cannot come apart. Press well.
Read Fit for Art’s blog posts Taking Time to Play and My Composition Book is Finished for more scrap lace inspiration. Give it a try and share photos of your finished pieces with us or use the #fitforartpatterns and #scraplace when you post on social media.

Don’t forget to print out Scrap Lace – Fit for Art Style to keep handy and to order a few yards of washaway stabilizer film to get started on your holiday projects!


