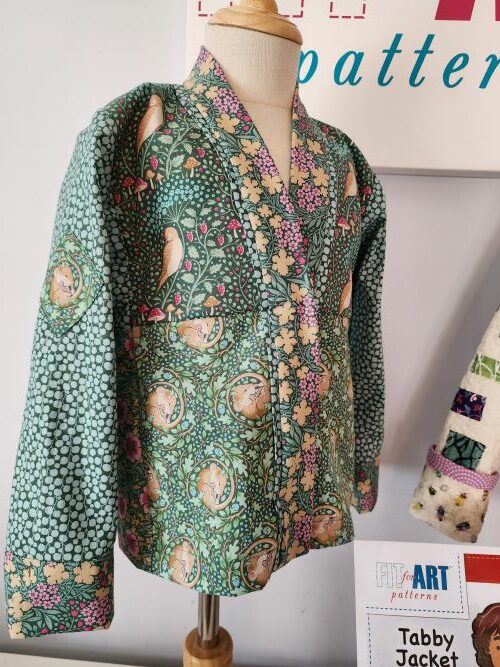
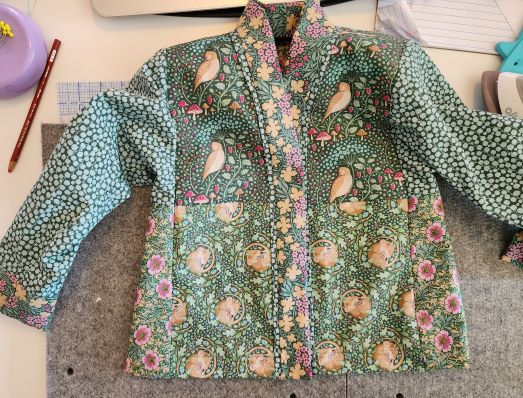
Some fabric really calls to you; Carrie and I were so drawn to the Tilda Hibernation cotton collection that we ordered up some of each of our 5 favorite prints. It arrived in late September and we have been playing with it ever since. Carrie made an adult size Tabula Rasa Jacket first and then I set out to create a kid’s Tabby Jacket using her scraps. This little size 4 Tabby is absolutely adorable and part of the reason is the simple piecing that keeps it interesting and allowed me to use up small remains from the previous project.
Try this project with a Young Friend.
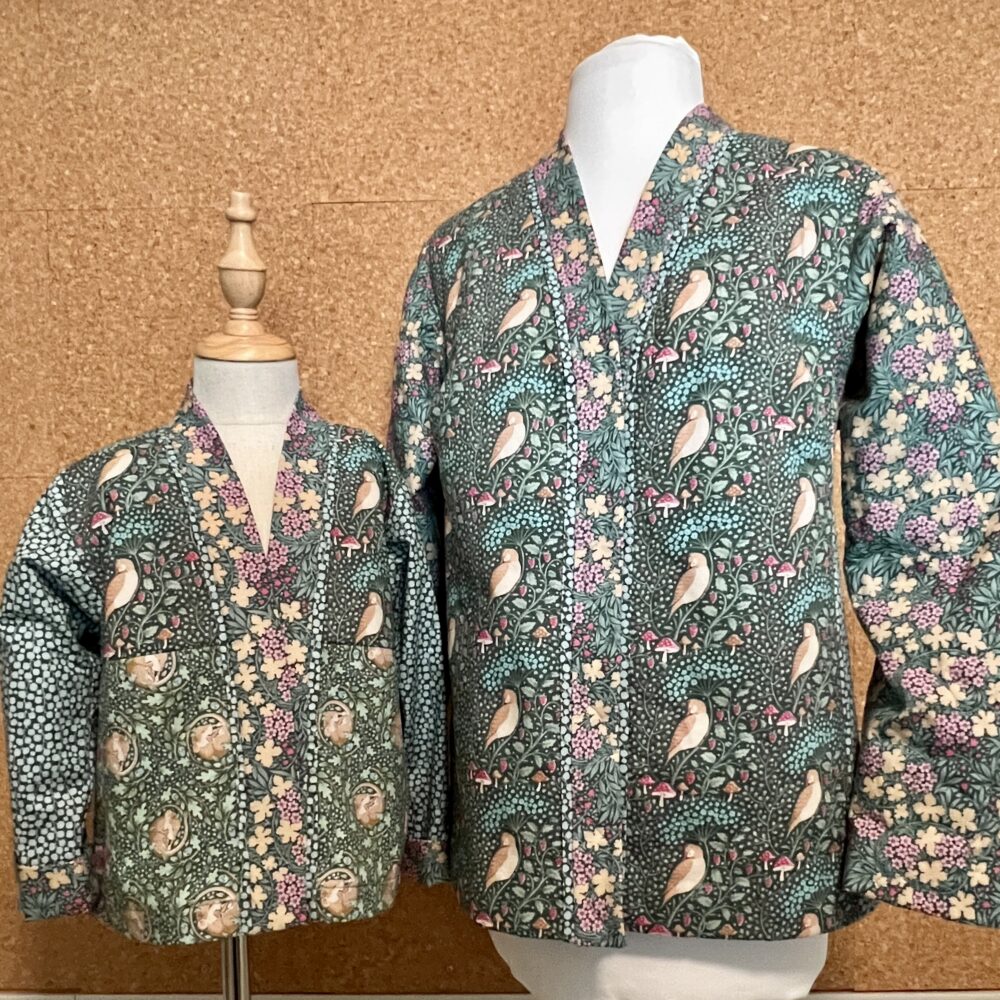
You can have this set of fabrics to play with yourself! We have created bundles with 1 yard of each print to inspire you to create a couple of Tabby jackets for kids you love or coordinating intergenerational jackets. Remember, older kids can sew their own Tabby with your help, so maybe this fabric bundle and a Tabby Jacket pattern would be the perfect Holiday gift for a crafty kid on your holiday shopping list. (For tips on sewing with kids, check out the post Look! I Made This!)
For a Beautiful Tabby, use French Seams.
While I was cutting my Tabby out it occurred to me that if I used French Seams, the jacket would be lovely on the inside too, so that is what I did.
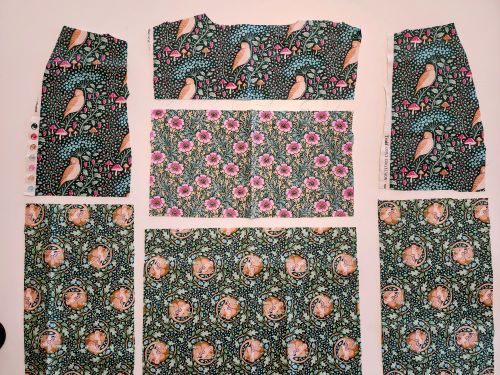
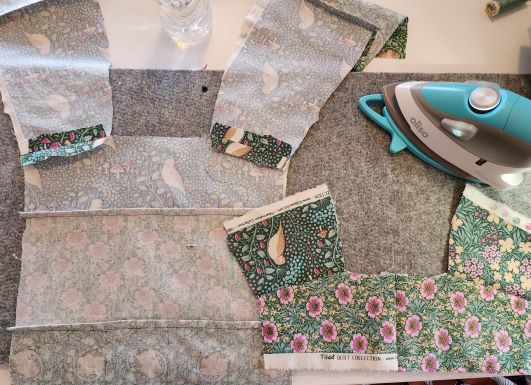
The piecing of the front and back began with a break along the pattern’s horizontal balance line and a similar parallel line was drawn higher for a yoke line. A ⅝” seam allowance was added to each side of the pattern where divided.
Sew the French Seams
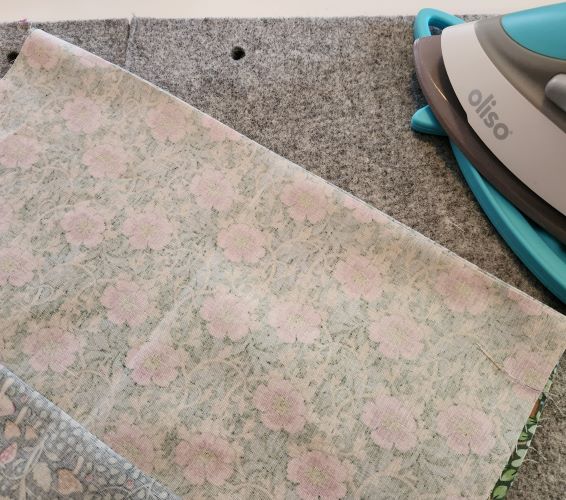
To make the first step of the French seams, pin and then sew each set of adjoining pieces wrong sides together using a ¼” seam. Press these seam allowances nice and flat and trim away any little fuzzy edges or threads that are wider than ¼”
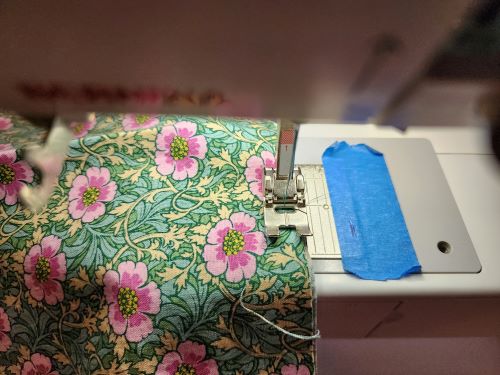

To make the second step of the French seams, turn the back and fronts to the wrong side and press each seam crisply along the wrong side of the seamline. Turn the adjoining pieces right sides together, then pin and stitch each seam at ⅜” to encase the previous ¼” seam. Press the seams either up or down according to your preference.


Once the piecing seams are finished, sew the shoulder seams. No need for French seams here because I was adding a shoulder shield, one of the extra details in the second part of the Tabby Pattern direction book. The shoulder shield is even scrappier than the jacket itself and I had fun incorporating some of the fabric selvages into the shield.
Use the same French seam technique to sew the side seams of the jacket. First sew ¼” seams with the wrong sides together, trim, and then press well to set the seam. Next, encase the first seam inside the second ⅜” seam covering the first smaller seam.


Did you notice my cute Oliso project iron and the felt pressing mats in the photos? They are so perfect for these small sewing and pressing tasks and what a great gift idea for yourself or a crafty friend or relation.
More Photos as the week moves on
Keep an eye on Facebook and Instagram this week to see more photos including some of the band making process, potential buttons and a few photos featuring an epic sewing error I made on this little jacket and how I tried to fix it.
Be sure to pick up one of these limited edition bundles and a Tabby Pattern for kids or a Tabula Rasa Pattern for adults for holiday gifting. Be sure to send us photos of the things you make so our entire sewing community can be inspired.


Thank you! French seams are good idea.
They are always lovely but if you find yourself without a serger, they are the perfect interior finish for an unlined garment.