Upcycling a finished quilt to a quilted coat or jacket is a fun way to practice sustainable sewing while creating a unique and very special garment to wear. Today we take a closer look at the Repurposed Quilt Duster, Project #6 in Sewing Quilted Patchwork Jackets. Every quilted jacket project using a quilt, or quilt top, is going to present unique challenges and considerations. We hope the examples in the book and our photo gallery will inspire and guide your decisions.
Its All About the Layout!
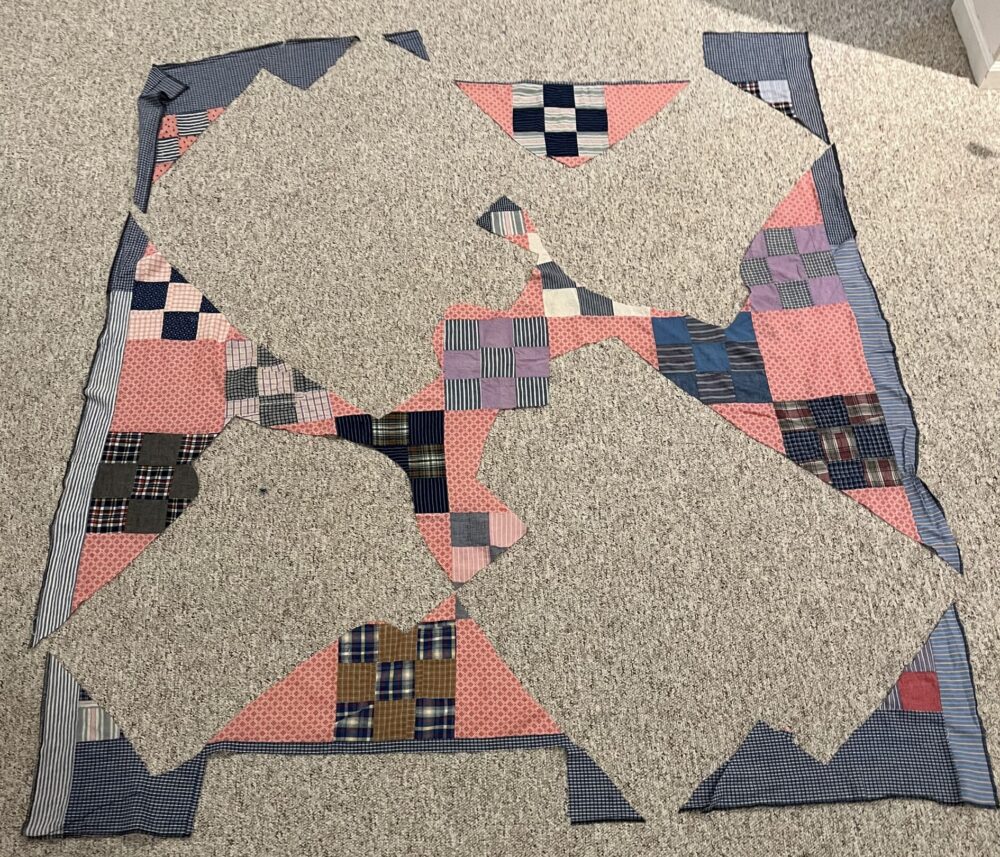
Factor in plenty of time to contemplate and experiment with the layout of the jacket or coat pattern pieces on the quilt or quilt top. For this kind of project, it is essential to make a complete set of pattern pieces, preferably cut out of tissue paper or other material that allows you to see the underlying quilt. (For the Opus and Tabula Rasa jackets, a complete pattern includes a right and left front, right and left side, right and left sleeve, full back and full collar.) Give yourself a few days to decide what design elements of the quilt to feature most prominently and to select the layout. You may also have to take areas of wear or damage into account. We typically try one layout, take a photo or draw a sketch or remember it by, then repeat until we are fully satisfied with the planned layout before cutting into the quilt.
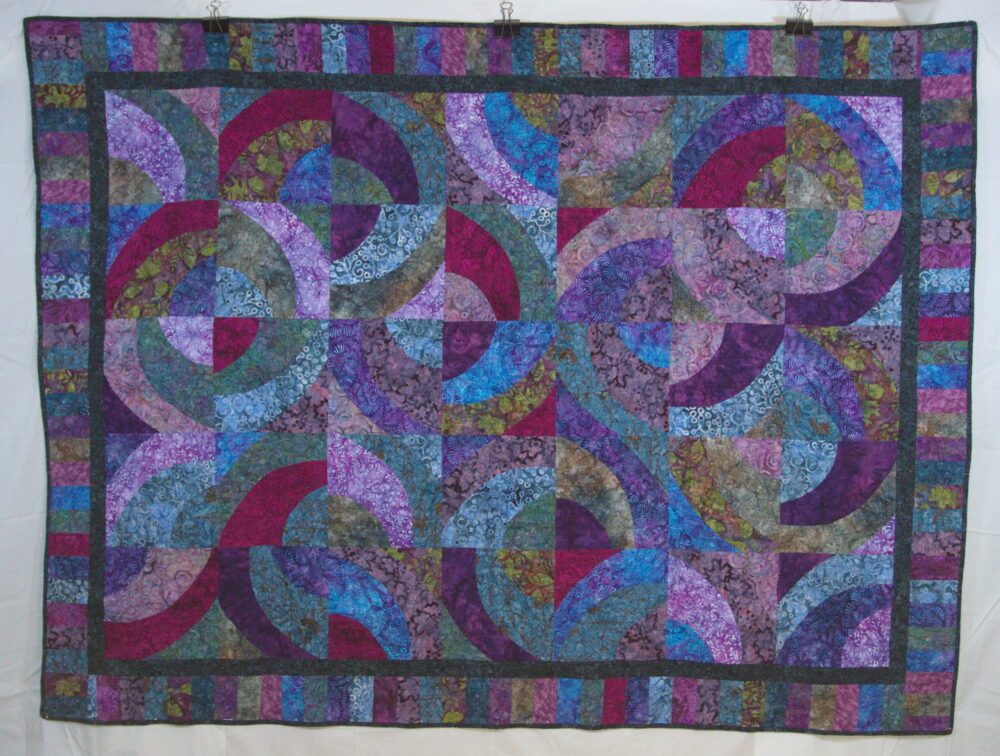
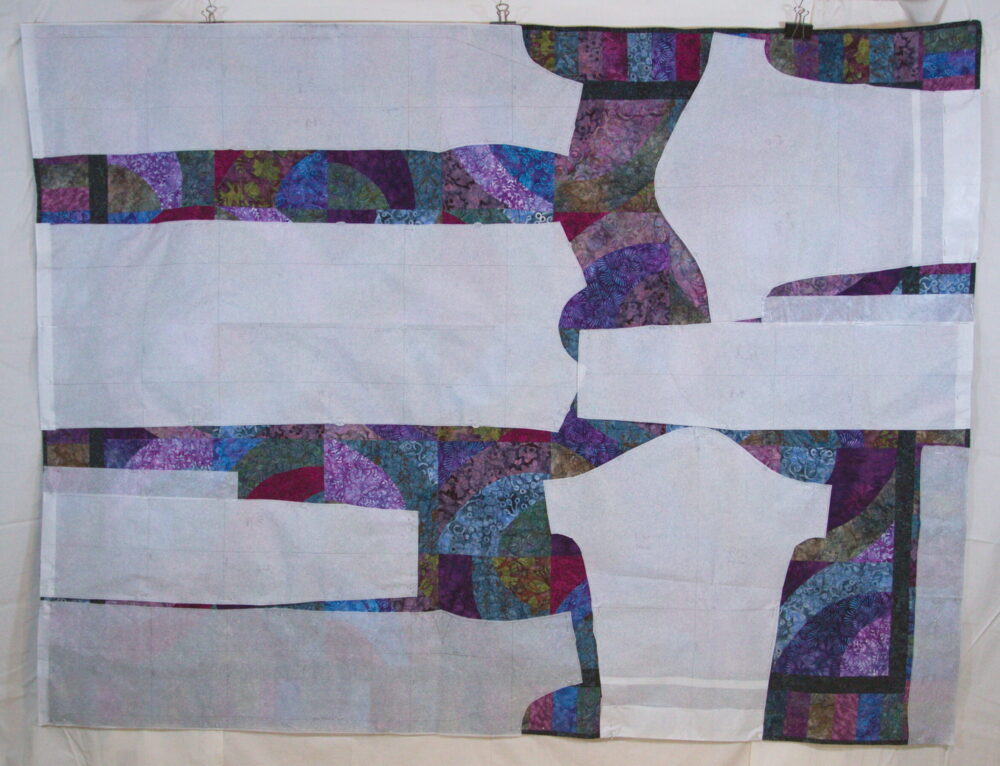
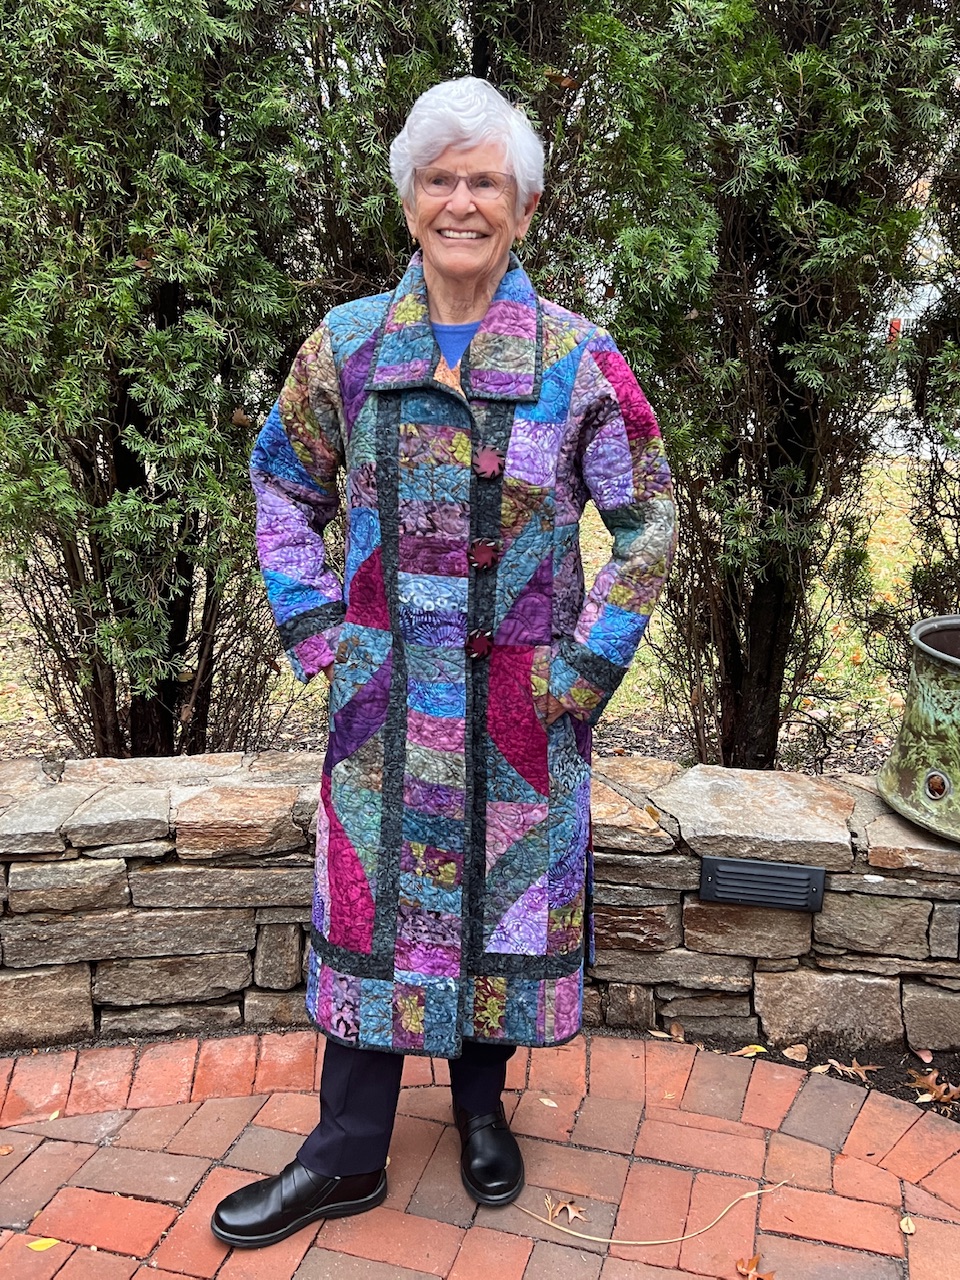
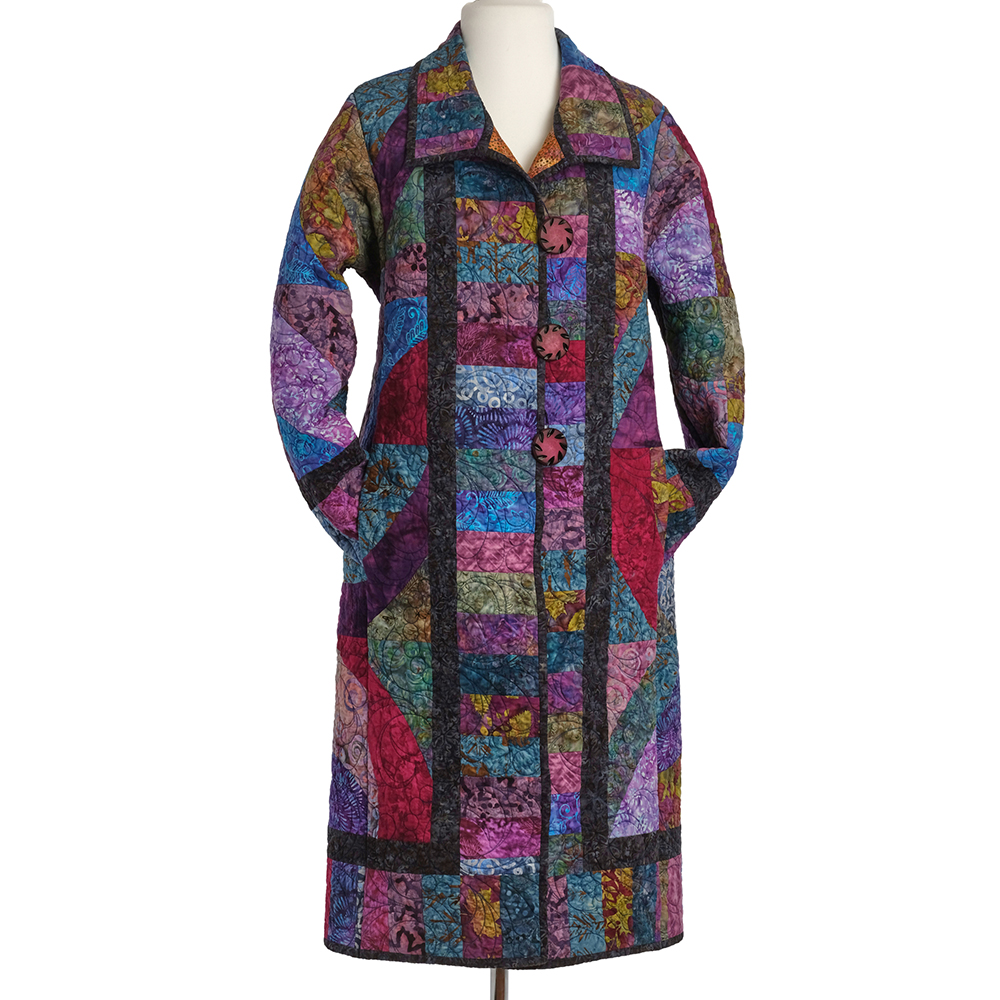
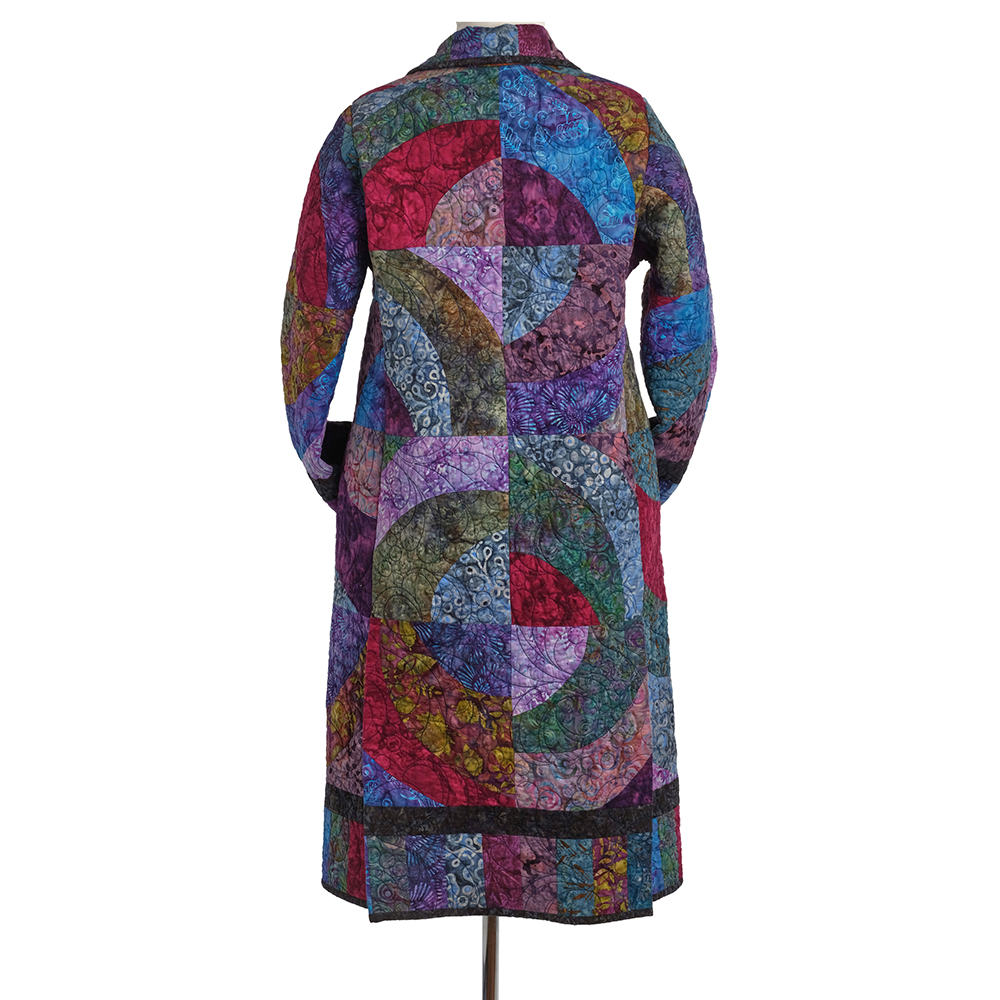
The quilt Carrie worked with for project # 6 was a modern quilt in boldly colored batik fabrics; it features a pattern known as “Red Onion” in the center surrounded with sashing and a “Keyboard” border (also sometimes called “piano keys). Carrie decided early on that she wanted to incorporate the border, sash and original binding into the design of the finished coat. Accordingly, the center fronts and the hems of all the pattern pieces were laid out along the borders. This required the patterns to be precisely the desired finished length, another element to factor into pattern preparation. Placement of the back pattern was prioritized to feature the “onion” design with greatest visual impact. The collar was also cut along the border, incorporating the original binding into its outer edges.
Jenni and Whitney of Tomkat Stitchery masterfully designed two adult Opus jackets from quilt tops and two kids Opus jackets from a finished quilt. If you haven’t already, watch TomKat Stitchery’s video about making their quilted jackets. Jenni laid her coat out diagonally on the quilt top, turning the squares on their points, to create a very original look. See how she did it in these photos of the quilt top before and after cutting out the pattern pieces (and watch for more photos in this week’s social media posts).
What if Your Quilt isn’t Big Enough?
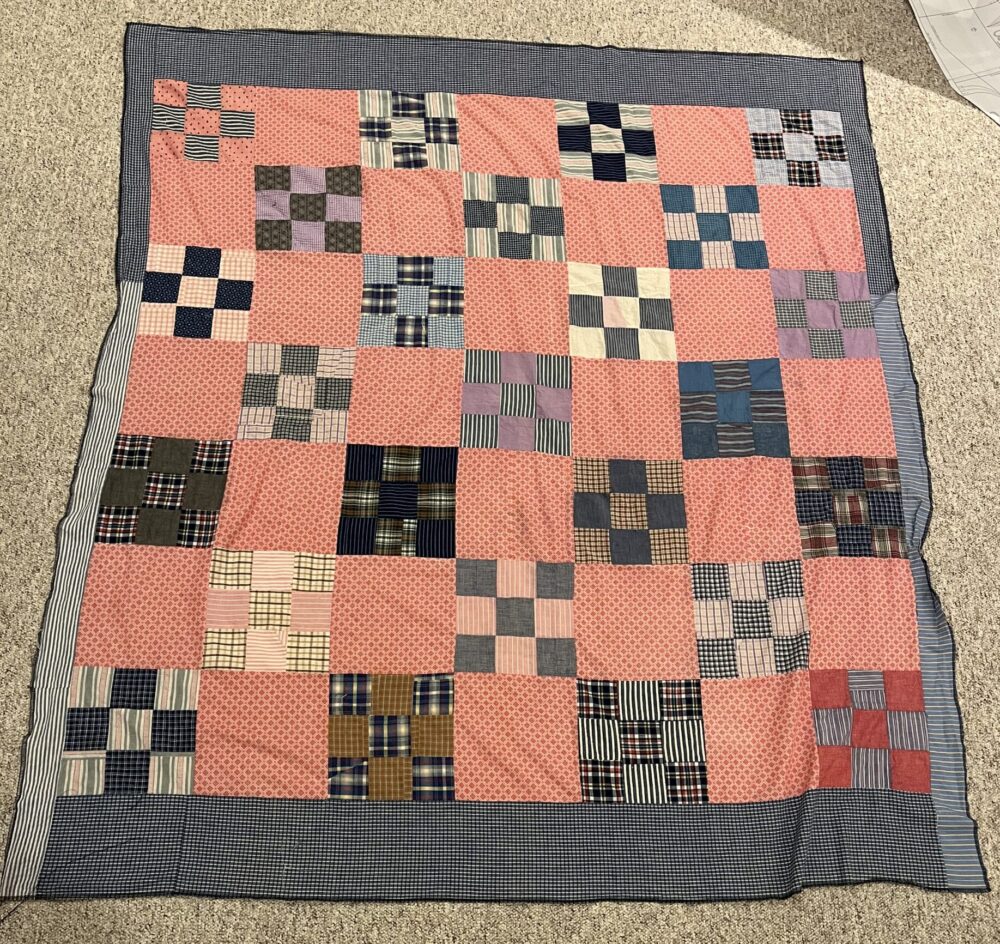
What if all the pattern pieces cannot fit completely on the quilt or quilt top? For the project # 6 Duster, Carrie had originally drafted the patterns to be 10” longer than the coat length Opus pattern, but she couldn’t find a satisfactory way to make them all fit onto the quilt. With fiddling, we eventually determined that shortening the fronts, sides and back by just one inch was enough to make it work. Other strategies to consider when the quilt isn’t big enough to accommodate all pattern pieces:

- divide pattern pieces for greater layout flexibility, such as dividing fronts and backs into upper yoke and lower body or adding a center back seam;
- cut some pattern pieces, such as the sides, sleeves, collar, or front band out of another quilt or coordinating fabric;
- try unconventional layouts, such as cutting on the bias;
- cover damaged areas with decorative patches or patch pockets.
For another example, read Whose Hands Made these Quilts to see how Rae combined two damaged quilts to create this trendy Patchwork Quilt Duster. The back was cut in two pieces which permits more flexibility in layout and also creates a vent at center back if desired.
Finishing Considerations
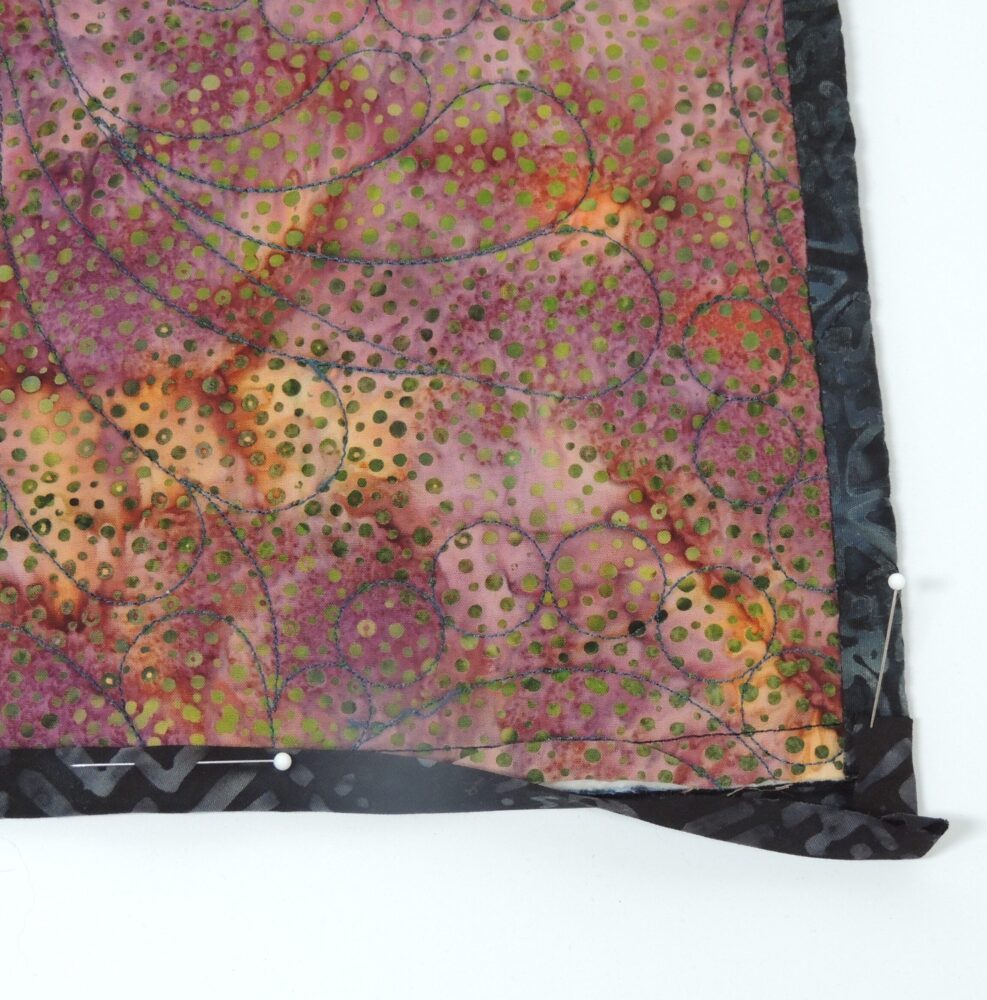
When it comes to finishing the seam allowances of a jacket or coat crafted from a quilt or quilt top, all of the techniques included in Sewing Quilted Patchwork Jackets are options. For the Repurposed Duster, Carrie chose a Hong Kong finish at the shoulder seams and the sleeve-to-side seams, areas that receive more stress and wear, but simply serged the remaining seam allowances. For a more polished finish, seam allowances could be completely encased with seam binding.
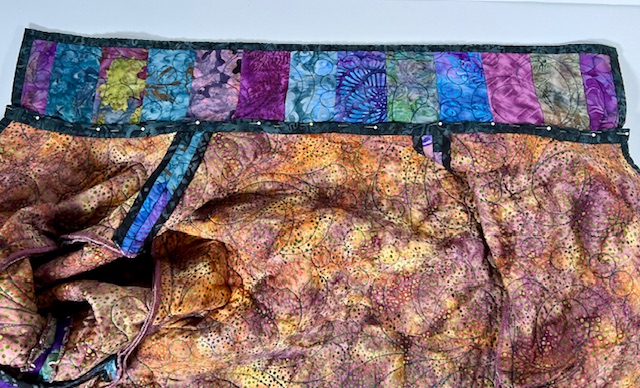
Carrie was able to preserve the original quilt binding all along the center fronts and hems, and on two of the three edges of the collar. It was challenging to find a similar fabric to bind the edges of the back vents. While the new binding fabric is not identical to the original binding fabric, its tone is similar; you have to look closely to catch the difference, especially on a garment in motion! The one place Carrie preferred not to use the new binding fabric was around the collar, it being in such a prominent location by the face. Her solution? Pieces of the original binding were detached from quilt scraps and re-applied to cover the short unbound edge of the collar and the neckline seam.
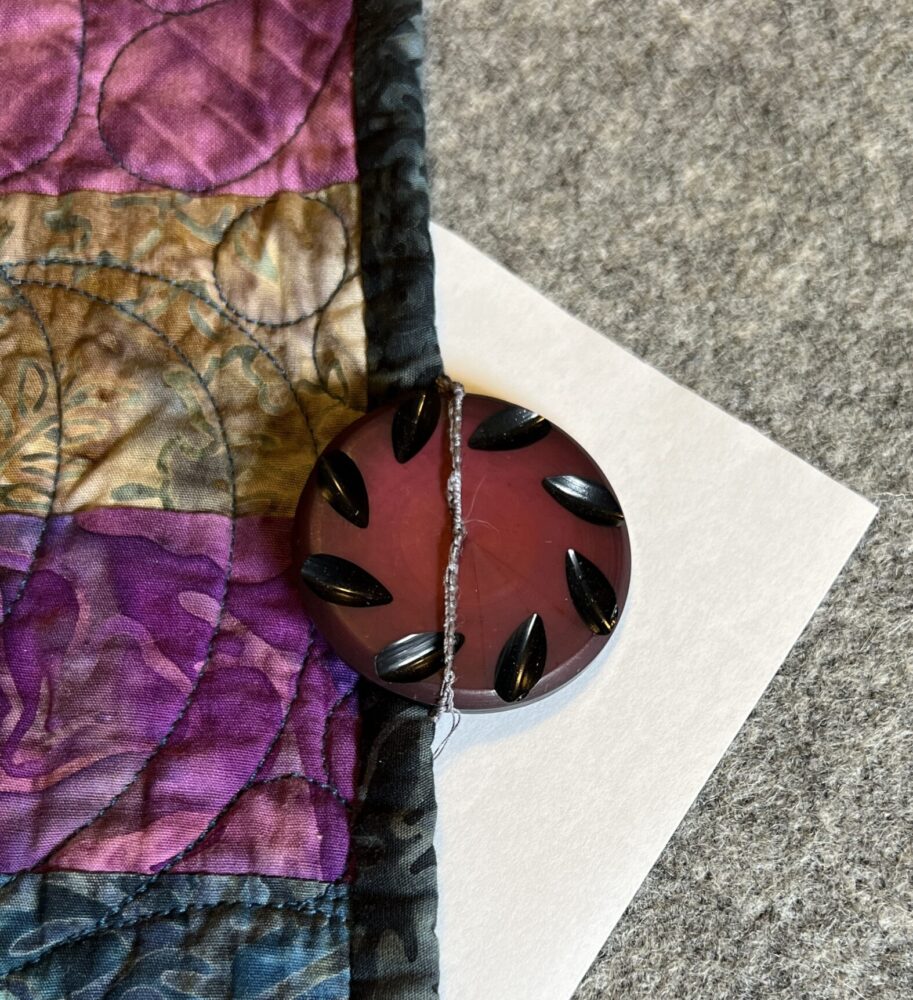
The buttons we found at Dusty’s Vintage Buttons for Carrie’s duster are quite large, 1 3/4″ in diameter. So, rather than cutting giant button holes into the quilt, we recommend a technique for hand making thread button loops was introduced.
Honor the Quilt Maker
Whether recycling a quilt that is too worn to be used for its intended purpose or bringing purpose to a pieced top that was never finished into a quilt, we believe that it honors the maker to continue to give their quilt life and love.
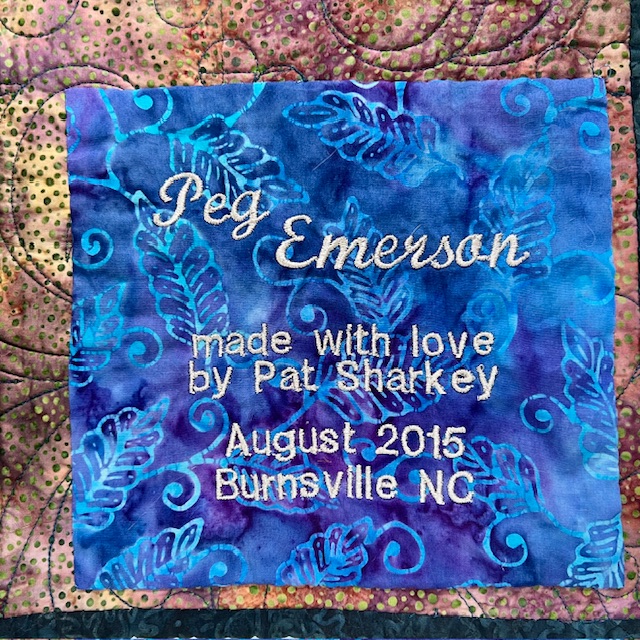
Another way to honor the maker is to give the artist credit where possible. The quilt used for this repurposed duster was gifted to Carrie’s mother when she was moving away from a community she had been a big part of for 20 years. Carrie was able to incorporate the quilt’s label, with its date and maker’s name, into the front left lining of the coat. If there is a label that cannot be captured in the layout, consider detaching the label from the quilt and restitching it to the finished garment.
If you are hesitant to cut into a quilt or quilt top, invite friends from your sewing or quilting community to help brainstorm how to best feature the quilt in a garment. Carrie and Rae give each other the confidence to move forward when in doubt on a project, and you can do the same with your sewing friends! We can’t wait to see your quilted jackets and coats that are inspired by the book.
Join Fit for Art at the Baltimore Heritage Quilt Guild’s Quilt Expo 2025 where we’ll be giving a presentation on this topic — from quilt to quilted coat or jacket — at 3 p.m. on Saturday, April 26th. Find all the details about the biannual Quilt Expo on the BHQG website.
Happy jacket making, Carrie


