
A few weeks ago I was looking for a sewing project for my mom and remembered the fabric she had dyed last year on our annual France Retreat. It was time to make it into a pastel-dyed Carpe Diem blouse! Regular readers may recall the pastel dyeing day, reported in Pastel Blue of Occitanie France, as one of the highlights of our retreat during Enchanting France – Embellishing Fabric.
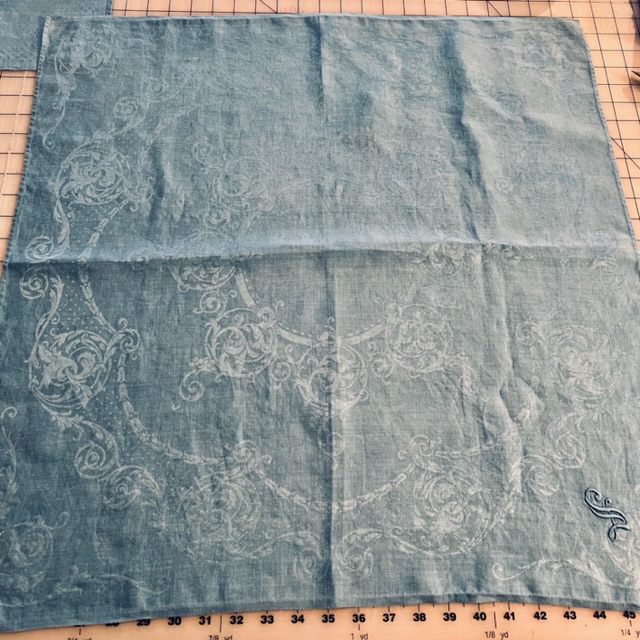
Peg (my mom) brought 4 large white cotton damask napkins with her to the retreat for pastel dyeing. She says they had belonged to her mother and she guessed that they were probably a wedding gift, which means they were likely from the 1920’s. They were quite large, about 28” square, and dyed beautifully, suggesting they had not gotten a lot of use. By contrast, the vintage pillowcases that I brought for the pastel dye bath emerged very unevenly dyed, and I know that they had received a great deal of use! I will be taking this into account when I choose fabric to take for this year’s pastel dye day.

Planning a Pastel Blouse
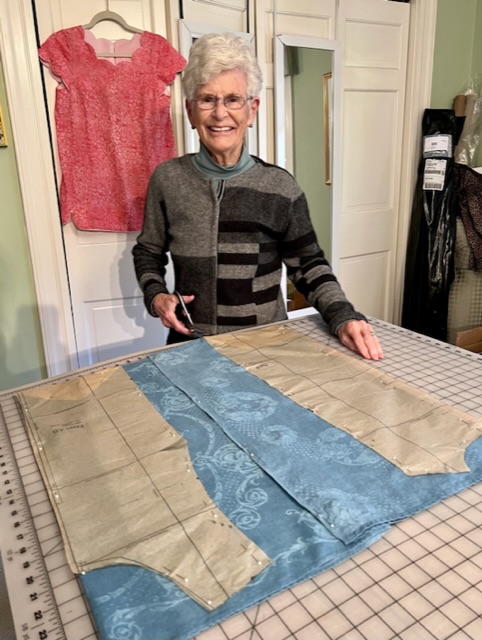
We decided to make Peg a Carpe Diem blouse for spring with the pastel-dyed fabric. Of the 4 pieces, two matched with the same damask design and the other two were different from each other. We spent some time deciding which napkin to cut for each pattern piece, deciding to use her favorite damask design for the front, the other single for the back, and save the 2 matching pieces for sleeves and sides. Here you can see Peg ready to cut out the front and back.
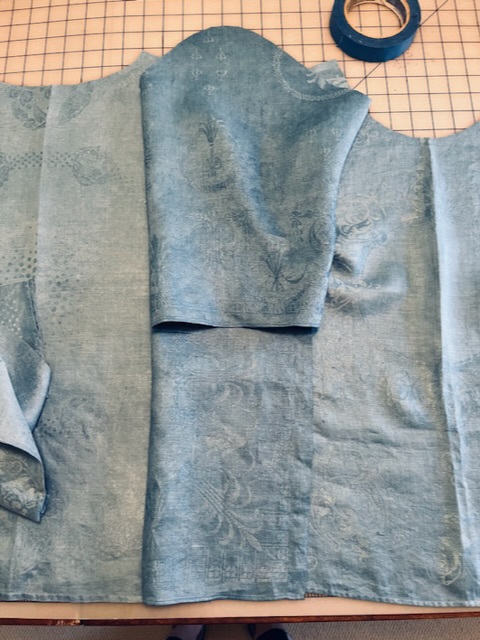
After choosing an elbow sleeve length, we found we were able to cut both sleeves and side panels out of a single napkin by staggering the sleeves on opposite sides of the square. This worked out just fine with the damask design, as I hope you can see in this shot. I also love that we ended up capturing the embroidered initial “C” (for Carolyn, my grandmother’s name) on one of the sleeves.

Finishing Details
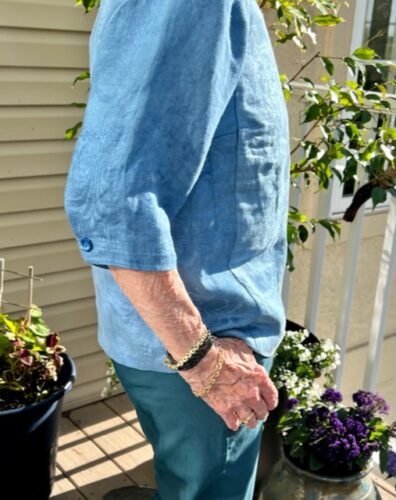
Peg did not want to fully face the neckline, so we bound the neckline with a lovely scrap of light weight Liberty of London cotton. Bias cut strips were pressed in half the long way and stitched to the right side of the neckline. After trimming and clipping the seam allowances, the binding was turned inside the garment and topstitched in place. Another way of applying binding to the Carpe Diem neckline, visible as a decorative edge, is covered in Finish a Carpe Diem with Binding.


All of the pattern pieces were cut with their bottom edge along the napkin hem edge. While we eventually decided to shorten the blouse with a 1” deep hem, the sleeves were just the right length. However, Peg felt that the sleeves were too loose. This fit issue was resolved by folding one pleat into each sleeve and securing the pleat with a decorative button, a charming detail!
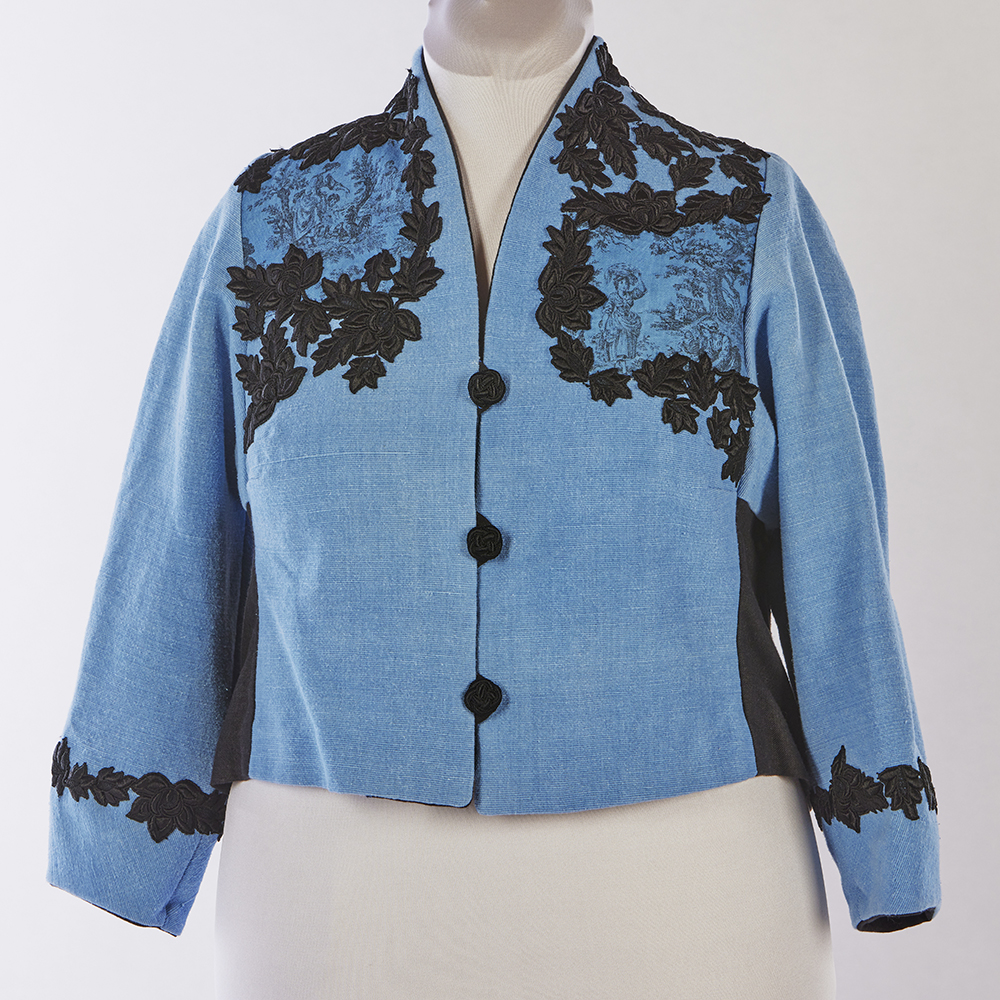
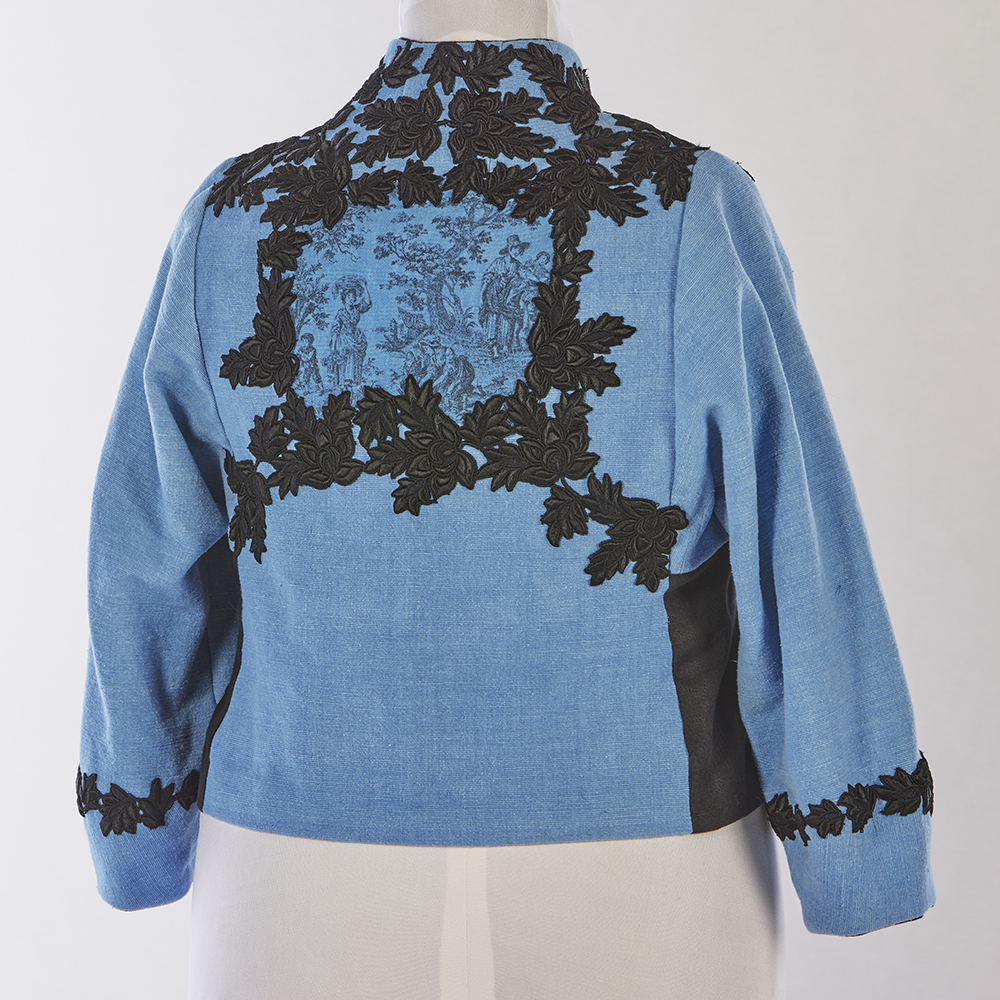
A Pastel-dyed Jacket
Rae took a large piece of heavier weight pastel-dyed cotton faille home from France with her. It became this dramatic short jacket, incorporating a print scrap of toile from the dye bath and black lace from her stash. Read more about Rae’s process in creating the funnel neck jacket in Funnel Neck Fit and Fun and find more snapshots in Fit for Art’s Instagram and Facebook posts.
Now I am looking forward to our next pastel dye day while on retreat in France and eyeing my stash for appropriate fabric choices. It was educational to see what each of the retreat participants had brought with them and how the different fabrics, weights and textures emerged from the dye bath. I was particularly intrigued with the results on printed fabrics and with laces and crocheted pieces.
It is not too late to join us this August 2-9 in southern France! Read more about the retreat in Enchanting France – Embellishing Fabric and register online. Please contact rae@fitforartpatterns.com if are interested in the trip and have questions. We’d love to see you there!
Happy Sewing, Carrie


