Sewing Eureka! Pants that Fit for winter is on our current agenda. Maybe you are thinking about it too. Your personalized Eureka! pattern can be made in cozy winter fabrics like wool or corduroy and can certainly be lined if you live in chilly climates. Read about making velvet holiday pants in last year’s Sew! Let’s get Dressed Post.

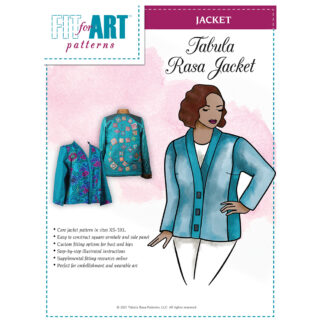
Another staple of my winter pants wardrobe is tightly tapered pants to wear with long Tabula Rasa Jackets, tops, Shirts or Knit tunics. Balance is so important in relation to your outfits and when you have a long top, a narrow pant is your best choice. These snug pants are most comfortable when made with fabric that has been woven with spandex (often called by the trade name Lycra).
Here are the steps to follow to narrow your Eureka! Pants pattern from the tapered slack shape to a skinnier leg that will complement your tunic top ensembles.
- Begin by tracing off your personalized front and back pant pattern pieces. Be sure to include the grain line, darts, and the knee line so you can easily plot your adjustments.

Plotted side seam adjustments on traced pattern - Begin with the changes to the side seams. On both the front and back side seams place a dot 1/8 – ¼” inside the cutting line at the waist. Below the hip fullness and at the knee, place dots that are 3/8” inside the cutting line. At the hemline, place a dot at ½” inside the cutting line. Use a fashion ruler or hip curve and echo the side seam cutting line of the front and back pants while creating a new cutting line that connects the dots you just plotted.
- Next, adjust the inseams. For the front and for a back #1 and a back #2, begin at the notch and narrow the inseam to ¼-3/8” at the knee and ½” at the hemline. For a back #3, begin at the crotch curve plotting a dot 1/8-1/4” from the cutting line, then ease to ¼-3/8 at the knee line and ½” at the hem line. Again, use the fashion ruler or hip curve to create a new cutting line inside the original cutting line, connecting the newly plotted dots.

Inseam adjustment for #2 back that starts at the notch. - Trim away the excess pattern paper so the new cutting lines are the edge of your pattern. Label the pattern pieces, front for narrow pants with spandex and back for narrow pants with spandex. I also always put the date so I can remember when I made the changes.

Labeled pattern with new lines. - If you have adjusted the waist at the side seams, adjust your waist treatment pattern so it reflects the changes. I like to stabilize my waist bands and faced waist pants with interfacing or other structure so they are not stretchy, even though the rest of the pant stretches. You will not need to alter the waist treatment placement unless the fabric has lots of lengthwise stretch in addition to the usual width wise stretch. If that is the case, cut and assemble the pants and the waist treatment then try on the pants and pin the waist treatment in the desired location, before you sew it into place. On my pants, I find the waist treatment needs to be dropped about ½” in the front, but it is comfortable in the usual location in the back.
- Cut out, mark and stitch up a pair of these narrow pants and test the fit by putting them on. Have a friend help you pin out any additional fabric for your desired fit. Do remember that you need to take out the pants equally on each side from the knee down to the hem for the pants to remain on grain.
This is a great formula for pants that will be worn with comfort shoes, like Dansko’s, hemming with a slight break on the top of the shoes.

If you want to tuck your tight pants into boots, narrow the pant leg below the knee an additional ½” at the hemline on both the inseam and the side seam of the front and the back, easing the adjustment up to the knee line.

You can make detachable stirrups for pants that will be tucked into boots like I did a couple of years ago. Read about them in the 2015 blog post.

Perhaps you are reading this and wishing you already had a Eureka! Pants pattern developed to fit your curves and fit preferences? There are still places available in the Capital Quilts pants class next week and in our Eureka! Pants Retreat in March. At the retreat, you will be able to develop a basic pattern, or work on a variation if you are already set with your personalized Eureka! Pattern.
Happy Pants Sewing, RAE

P.S. It is # Giving Tuesday. Don’t forget to honor your love of sewing with a contribution to a sewing related charity. May I suggest the ASDP Charitable Foundation. ASDP has made it easy for you to contribute and we are very grateful for each and every contribution.


