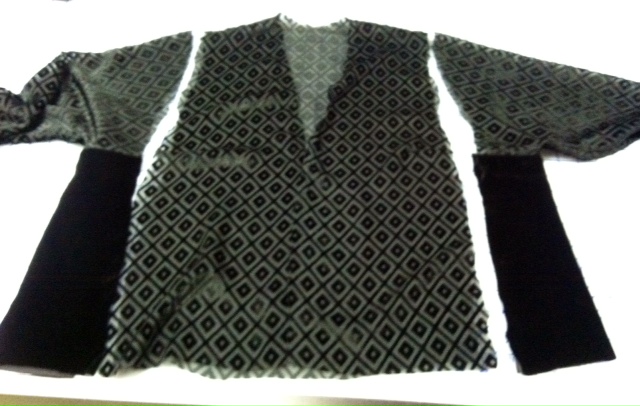
It is time to sew up a sheer holiday jacket using your Tabula Rasa Jacket Pattern(TRJ). Now that you know how it goes together, you can try out a challenging fabric or seam technique, both of which are featured in this sample. It is made from 3 fabrics: a geometric burn-out velvet, a solid silk velvet and a silk faille. The jacket pattern (front, back, and side pieces) were shortened about 3” so the jacket would have a sassy look when worn with a coordinating faille A-line skirt.

To keep the jacket elegant, I stitched it together with French seams. They are fairly easy to use when constructing a TRJ because of the relatively straight seams.
Before sewing, I put a new #70 needle on my machine. After making a quick test seam with scraps, I decided to change from my basic presser foot to the walking foot for smoother sewing.

Let’s review the order of construction for the French seam so you can try this too. We will begin with the shoulder seam since it is short and easy to manage.
- Pin the seam with wrong sides together. This seems wrong to an experienced stitcher, but it is the right beginning when constructing French seams.
- Sew a ¼” wide seam on the machine.
- Trim the seam ever so slightly, removing any stray threads and the notch marks.

Trimming the first pass of the seam. - Turn the fabric to the wrong side and gently press the seam flat and to one side.

Press seam to one side - Then fold one side of the fabric back along the seamline and gently press the seam in preparation for the second pass of stitching.
- Pin the seam into place to keep it from shifting while you sew.

Seam prepared for the second pass. - Stitch the seam’s second pass 3/8” from the edge. This plus the previously stitched ¼” adds up to the 5/8” seam allowance allowed by the pattern.
- Press the seam toward the back and continue with construction, using this method for each seam.
- On the underarm seam, you need to aggressively clip and trim the underarm curve in the first ¼” seam line so the seam will press flat at the end.
Another fun detail on this jacket is the stacked cuff. It offered a chance to use the faille and the solid velvet one more time and add some drape to the lengthened Summer Sleeve.
Create the cuff by measuring the sleeve circumference and adding 1 ¼” for your 5/8” seam allowance. Cut the two cuff bands the desired width. I cut the velvet 3 ¼” so it would make a 2” band. The faille was cut 5 ¼” so it would wrap around, mimicking the front band, finishing the sleeve with a 2” band.

Stitch the two bands together and then use a French seam to create the circular band.

Attach the stacked band to the jacket sleeves using a French seam.

Offset the sleeve seams so the bulk of the french seams is spread out.

Once the sleeve band was turned for finishing, I decided it looked too heavy. It was cut off to create a minimal 5/8” finish for a lighter look on the edge of the sleeve.

The hems and bands were finished by hand so the top has a very dressy look.
Press lightly from the back so the velvet pile does not get flattened. Read more about sewing on velvet in our previous post on sewing velvet pants.
Tell us about your festive TRJ’s and send us photos. Are you using on trend velvet or brocade? Visit the photo gallery to see some of our other dressy tops that are perfect for the holidays.
Happy Holiday Sewing, RAE


So very elegant. Nice.
Thanks Nancy, try it yourself! RAE
Beautiful. Thanks for sharing your beautiful jacket.