V-Neckline Variations for the Carpe Diem Dress & Tunic pattern includes a fun Tie Sleeve which is a cheerful detail for any new Carpe Diem. Here are some step-by-steps so you can add tie sleeves to Carpe Diems using three different methods of finishing the outer edge of the ties. These sleeves look best when the fabric on the inside is not too different from the fabric on the outside.
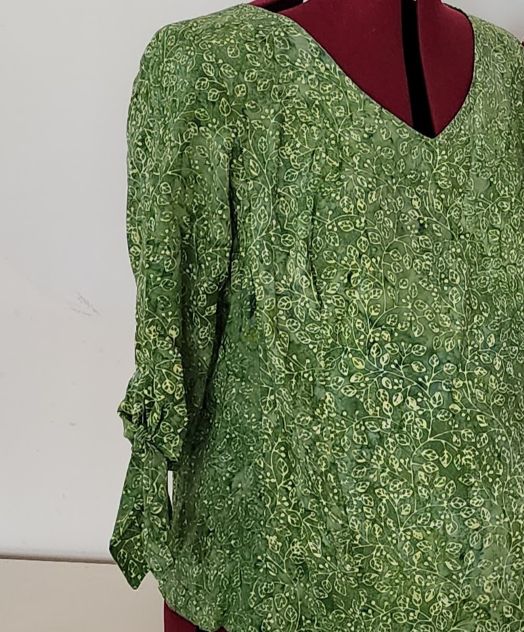
Rae made this Green Sew Batik Rayon V-neckline Carpe Diem for a Threads magazine article in the 2025 Summer issue; it was about creating a top to fit a mother-to-be! This V neckline was finished with facings. See detailed step-by-seps for facing the V neckline in this blog post from last fall.
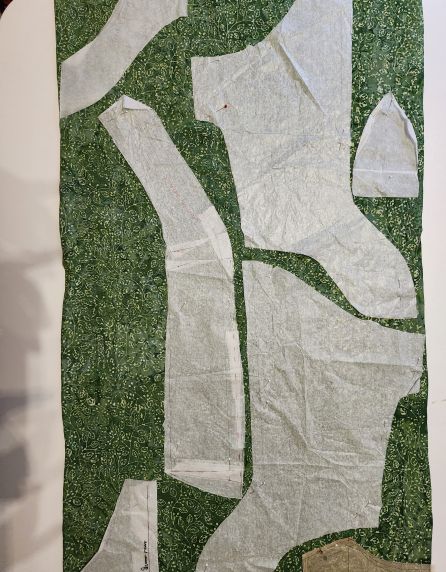
To create the sleeve, cut out 2 front sleeves and 2 back sleeves using the patterns found in the V Neckline Variations pattern. Be sure to make any changes you have made to your basic carpe diem pattern before cutting the fabric.
After you cut, mark the dot on the seam but above the tie, from the pattern on each side of the sleeve to indicate where you stop stitching to smoothly create the tie and tie opening.
Finish Neatly with a Double Turned Hem
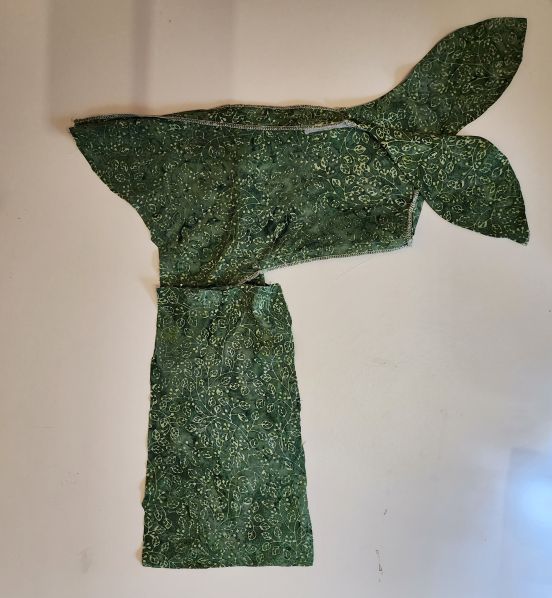
Stitch each sleeve together along the sleeve’s center seam as shown in the photo. Stop stitching where indicated on the pattern, leaving the ties hanging freely. Press the seam open.
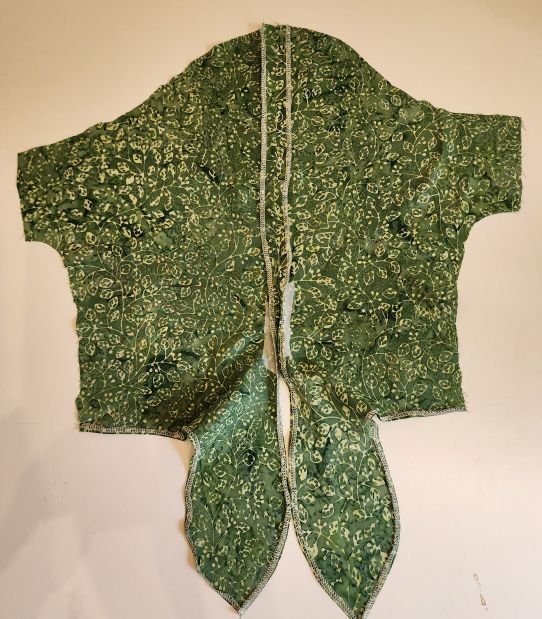
Pro Tip: If you stress your sleeves sometimes when wearing the top, fuse a bit of interfacing to the sleeve seam on the front and back to support the backstitched stitches and the sleeve opening that allows for the tie.
Rae says that for this double turned hem it is easier to work with the sleeve flat, and sew the underarm seam after finishing the tie’s edges.
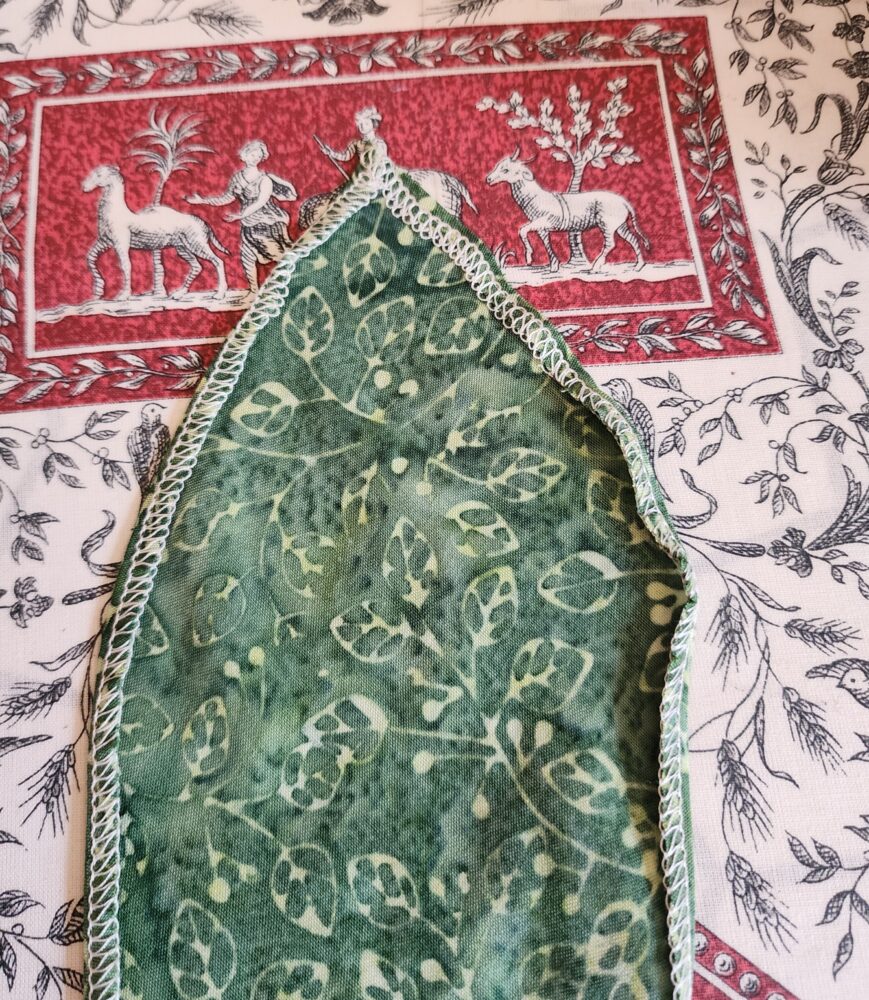
Finish the edges of the sleeve’s center seam continuing around the ties and hemline. Rae serged these rayon sleeves with a 3 thread overlock.
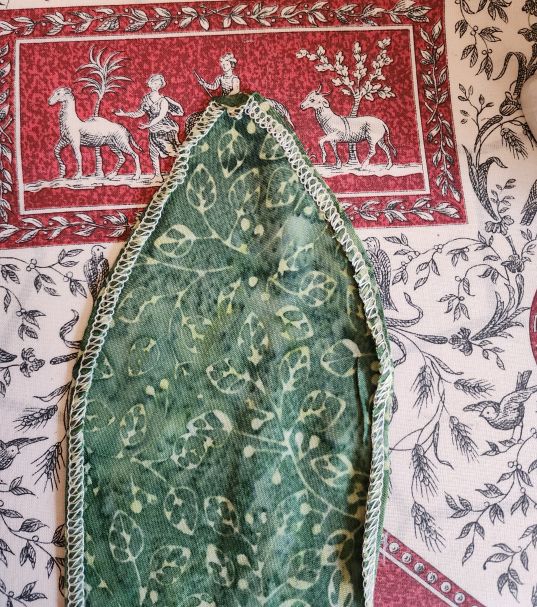
Press the hem all around to accommodate a double turned hem. The width of the overlock finish is an easy place to press the first turn, turn it again for the final finish. This was not too difficult except at the point of each tie where she pressed firmly and put in a pin to set the second turn. Begin at the sleeve seam, working from the wrong side and stitch around the point and to within 1” of the side seam. Stitch the second side by the same method.
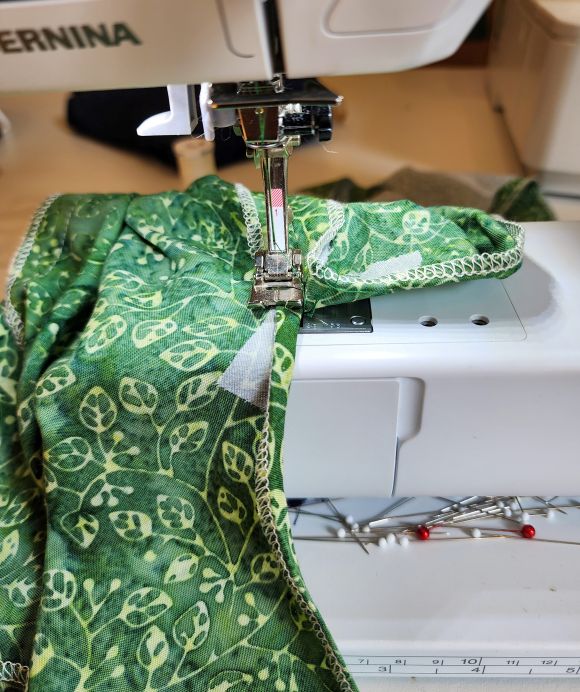
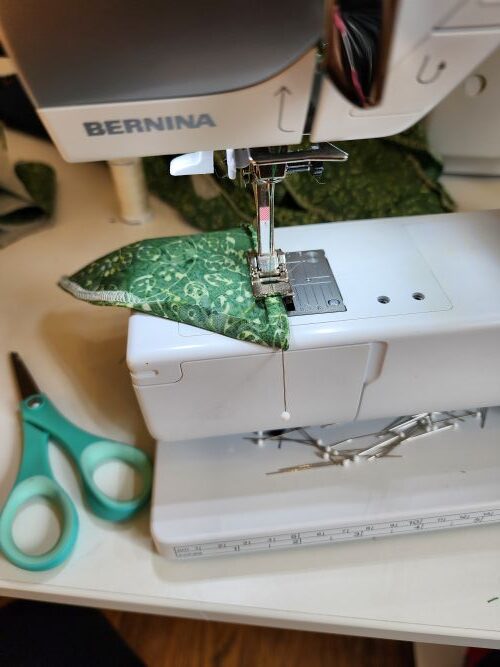
Finally, stitch the underarm seam, clean finish the seam allowances, turn up and connect the stitching to complete the hem. Then add the side panel, and finish the construction.
For Lofty or Thick Fabric, Choose a Single Turned Hem
Here is a photo of a double gauze top Rae made for her daughter Anna when she was expecting. In this case, the fabric was thick, so she serged the raw edges in a closely matching thread then turned and pressed the edge up just once to create the hem. Like the double-turned hem, finish by top stitching the hem in place.

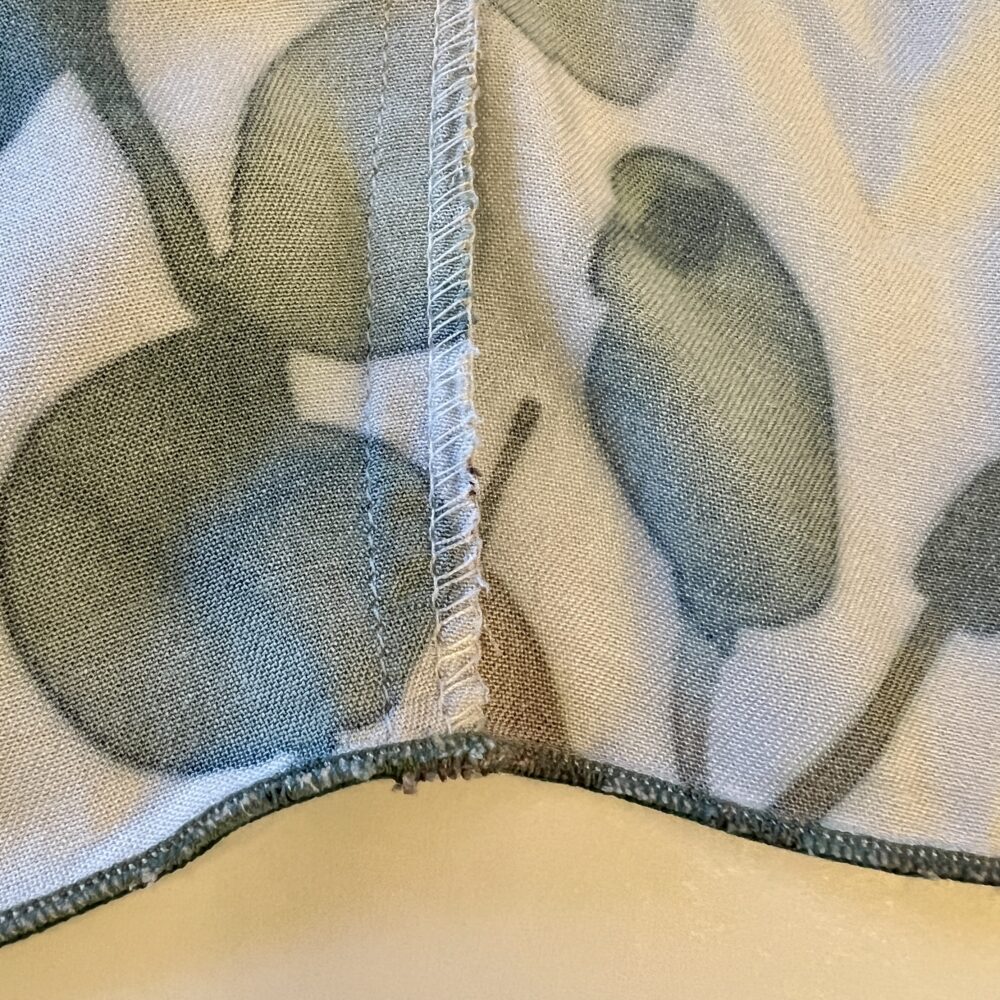
Use the Serger for a Quick Rolled Edge Finish
Carrie used an edge finish on the serger to complete her ties. This is another great way to finish the ties and eliminates the need to press those small edges in place before stitching. Be sure to change the serger settings and make a sample or two, especially testing the best way to stitch around the point of the tie.
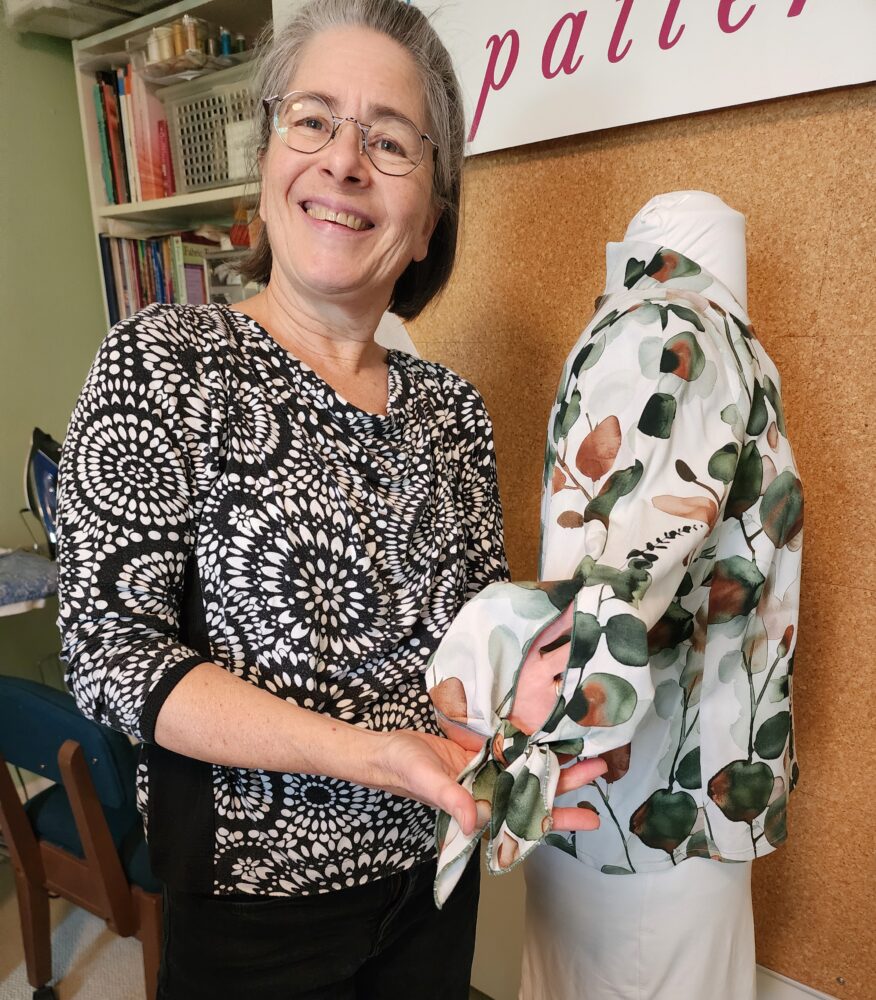
Pro tip: Carrie says that she sometimes finds that the narrow hem setting makes a prettier finish than the rolled edge setting, so test both to find out which looks best on your fabric. The narrow hem setting was used for this Eucalyptus top.

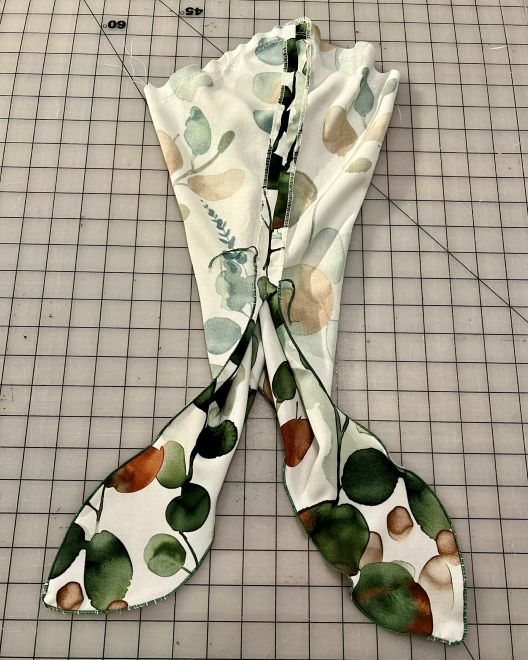
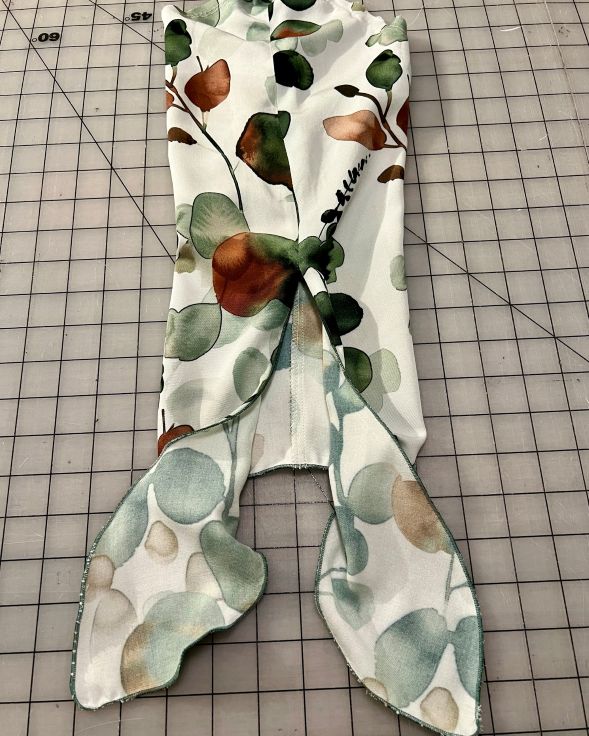
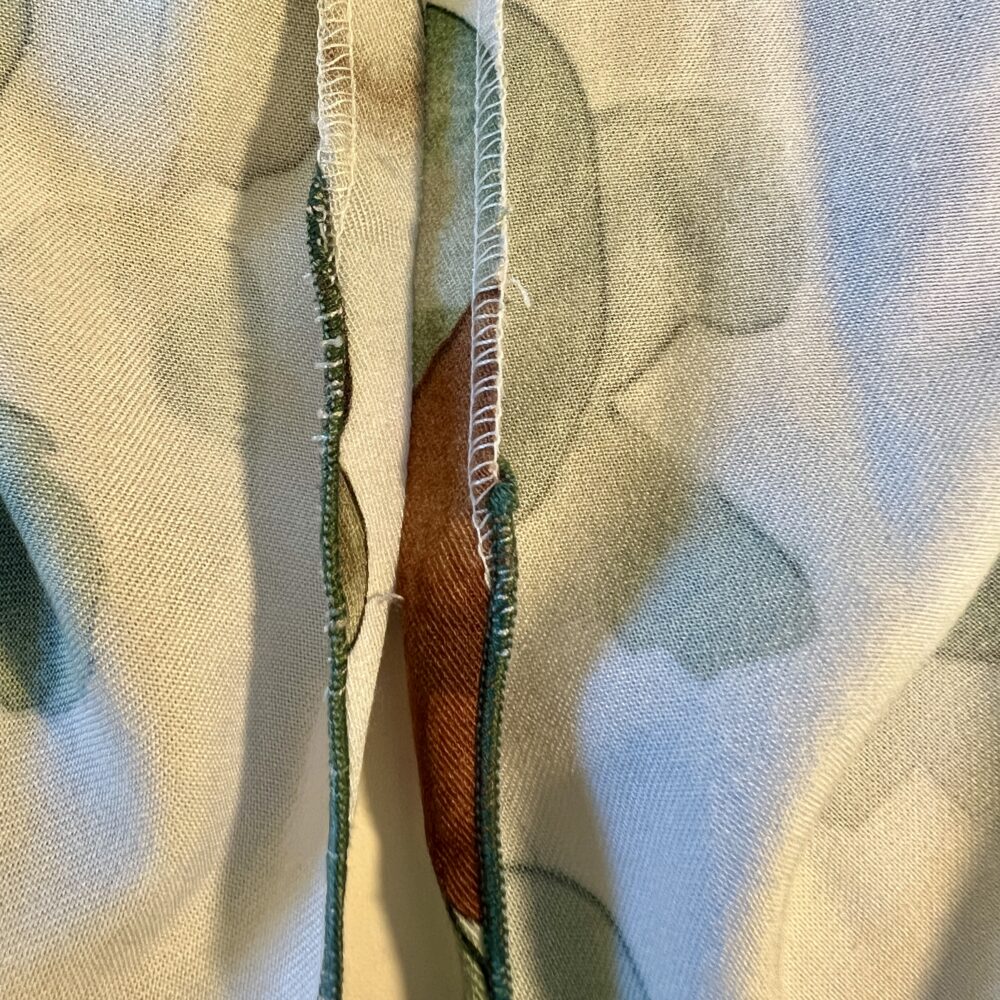
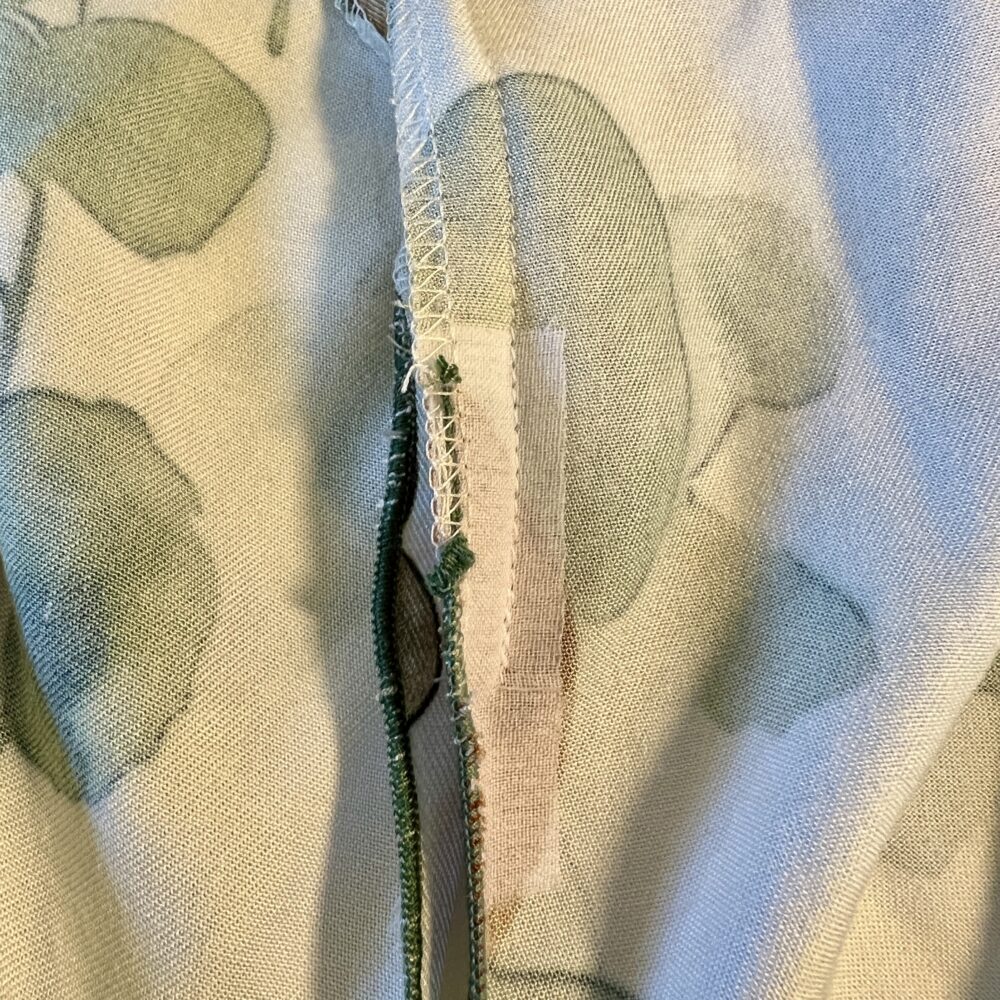
For this finish it is best to sew and clean finish both the sleeve’s center seam and underarm seam before rolling the raw edge. Beginning an inch or so before the center seam ends, serge around one tie, across the hem, and around the other tie, ending back at the center seam’s other side (photo 1). Put a drop of Fray Check on the beginning and ending stitches, or pull the tails through the seam finish as Carrie did here (photo 2). Pay attention while sewing over the layers of underarm seam allowances (photo 3)!
Have fun as you add tie sleeves to your Carpe Diems! Choose the finishing method that you think is best with your fabric. The tie sleeve is really graceful and looks great with the V neckline curved collar too.
Be sure to send or post photos of your Carpe Diem makes. If you want help stitching your first Carpe Diem, sign up for the Carpe Diem Class at Artistic Artifacts on June 12 and 13th.


I really am confused on putting sleeves in…..I have and made the dress and trying to figure the sleeve portion….can you send me something more/different. Thanks Christine
The two sleeve patterns, the front tie sleeve and the back tie sleeve, graded for every size, is found the the V neckline variations packet, a digital product. It also includes the various neckline templates for V necklines, facing patterns, etc, needed to cut and sew all the designs on the pattern cover. We made several iterations of the tie sleeve before choosing one we thought was not too floppy, not too long and grading it into a Fit for Art pattern.. It sits into the Carpe Diem armhole and side panel perfectly and there is a direction book to guide you through creating the sleeve, but with less detail than we have provided in this post. I have added some of this into the text and another photo which I hope helps answer your questions.