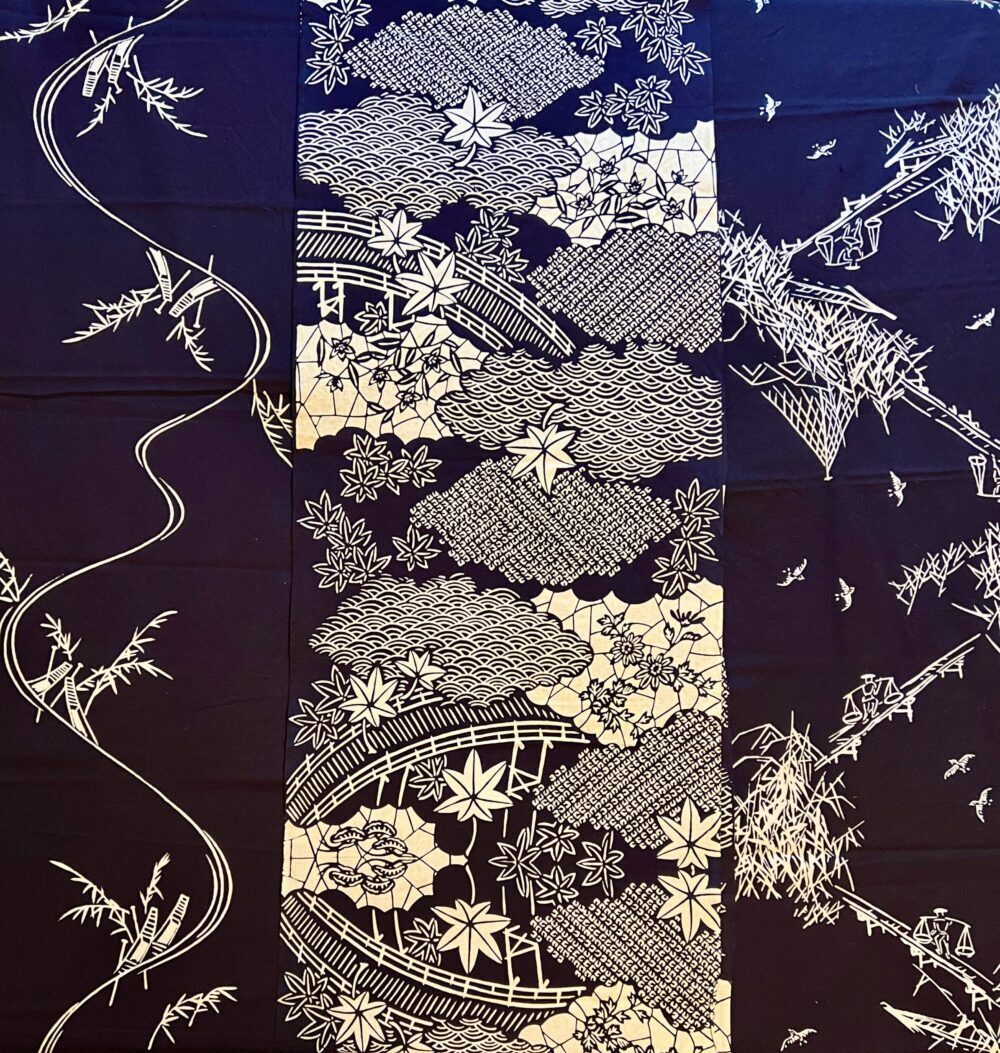
Carrie has been playing with a group of 3 very special Japanese indigo fabrics gifted to Fit for Art several years ago by our friend Julie B. The group includes 3 different motifs in white on indigo-dyed cotton fabric; each length of fabric is just over 14” wide. Curiously, the motifs reverse direction at each repeat. Together, the fabric’s narrow width and alternating design orientation made for a challenging layout, just the kind of project Carrie enjoys. Can’t wait to hear what you think of the results!
Design – the Big Picture
After a bit of study, Carrie decided to make a Carpe Diem top, adding a yoke in front and back to create more spaces for featuring the different designs. The pattern work for the yoke had been done when Carrie made her Plum Dobby Tunic a few years ago. Because this fabric is narrower than most of the pattern pieces, the fronts, backs and sleeve sections would all require some type of piecing. Rae suggested using the two piece Tie Sleeve from V Neckline Variations for the Carpe Diem Dress & Tunic, substituting a cuff for the tie finish. From there it was a matter of deciding which motif was best suited for each pattern section, and how to cut out with the designs all oriented in the same direction.
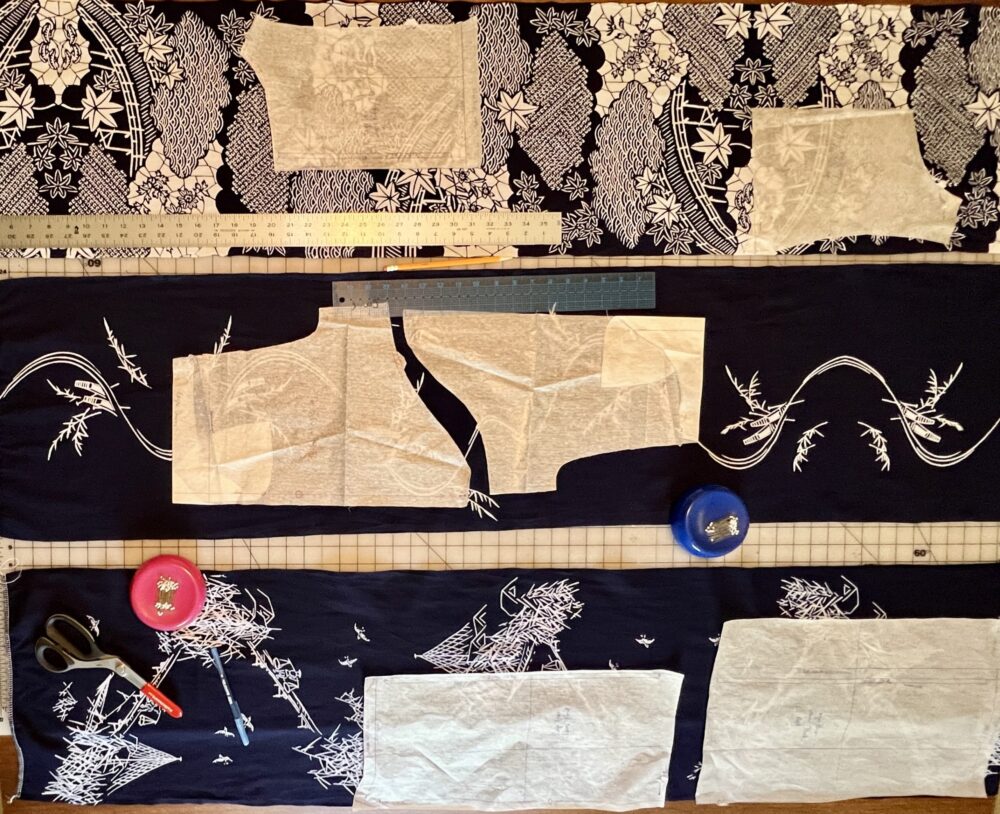
To help envision the motifs on the Carpe Diem tunic, Carrie turned to pencil and paper sketching with her MyBodyModel croquis. In addition, at each step sections were pinned on her dress form to confirm the orientation and design placement.

Design – the Nitty Gritty
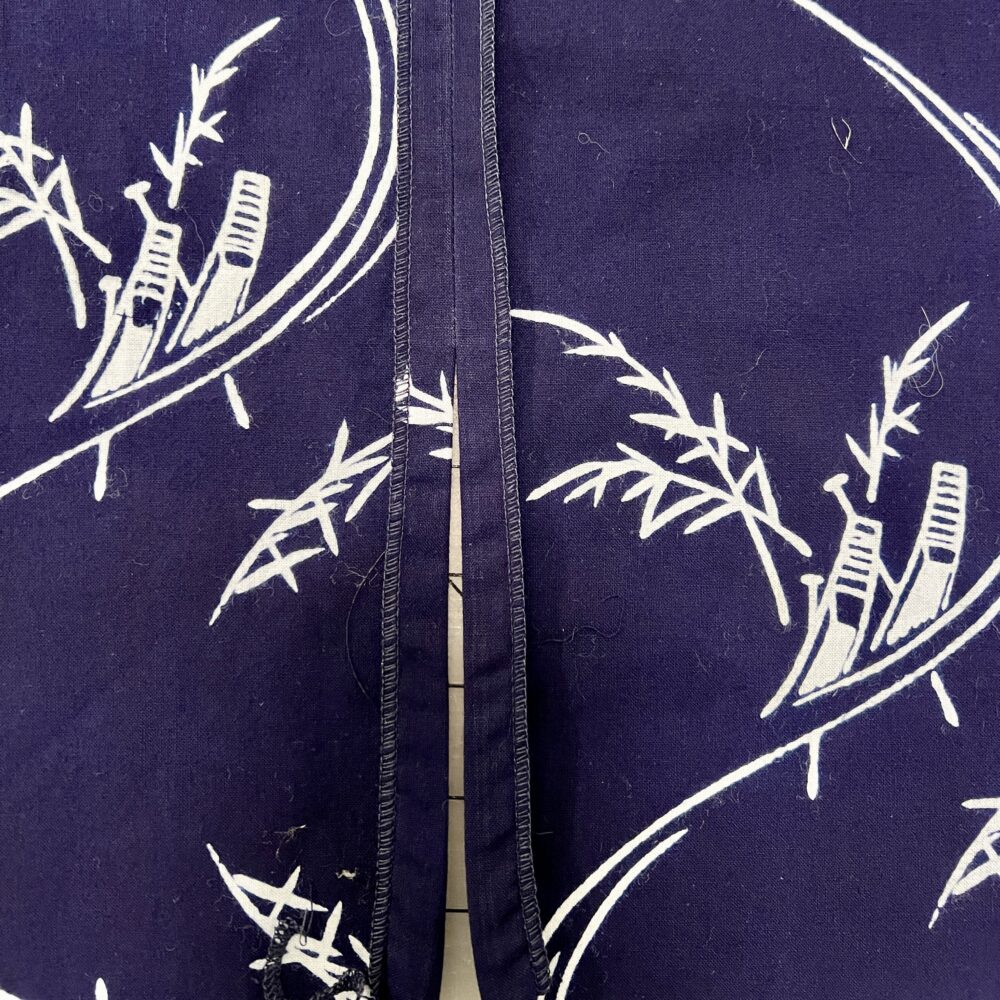
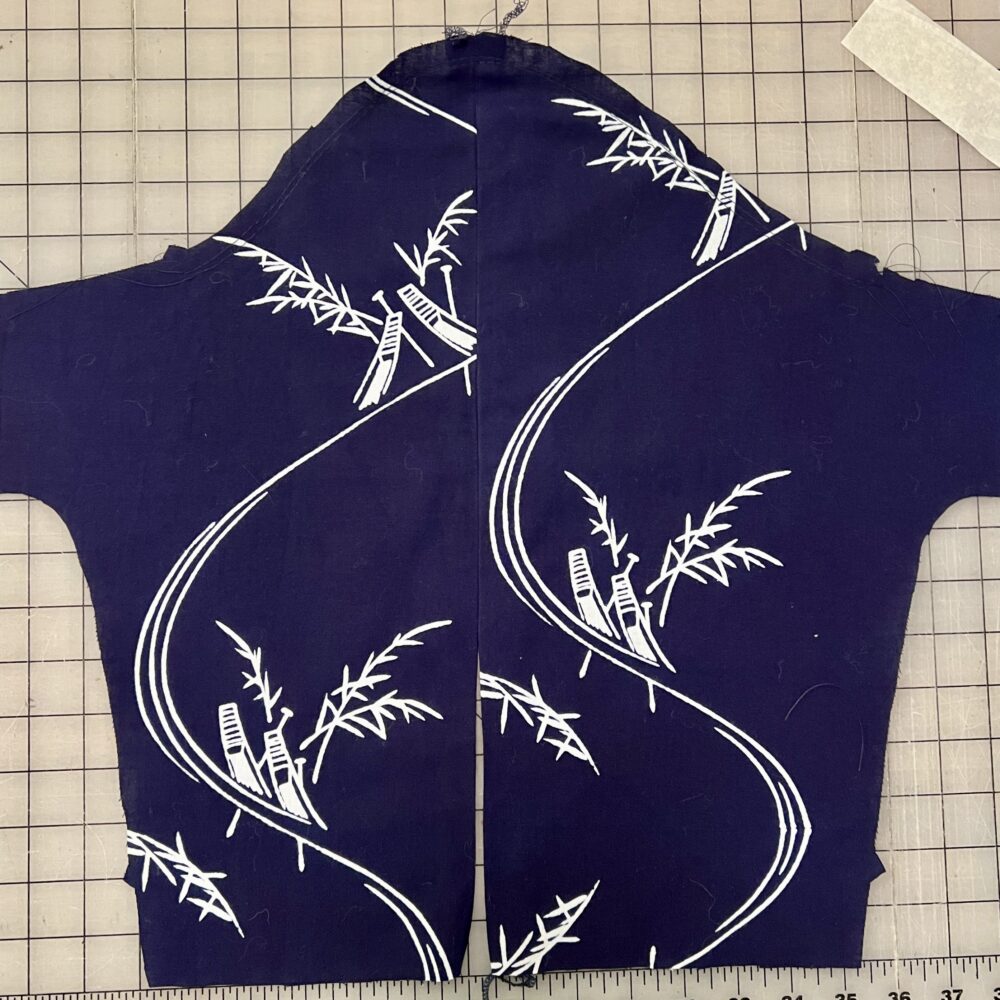
The narrowest design, boats on a swirling wave, was chosen for the two-piece sleeves. The sketch helped to determine where to place the boats and which direction the swirl should travel relative to where the 2 pieces would meet at center seam. Here is one of the sleeves stitched together before adding a cuff.
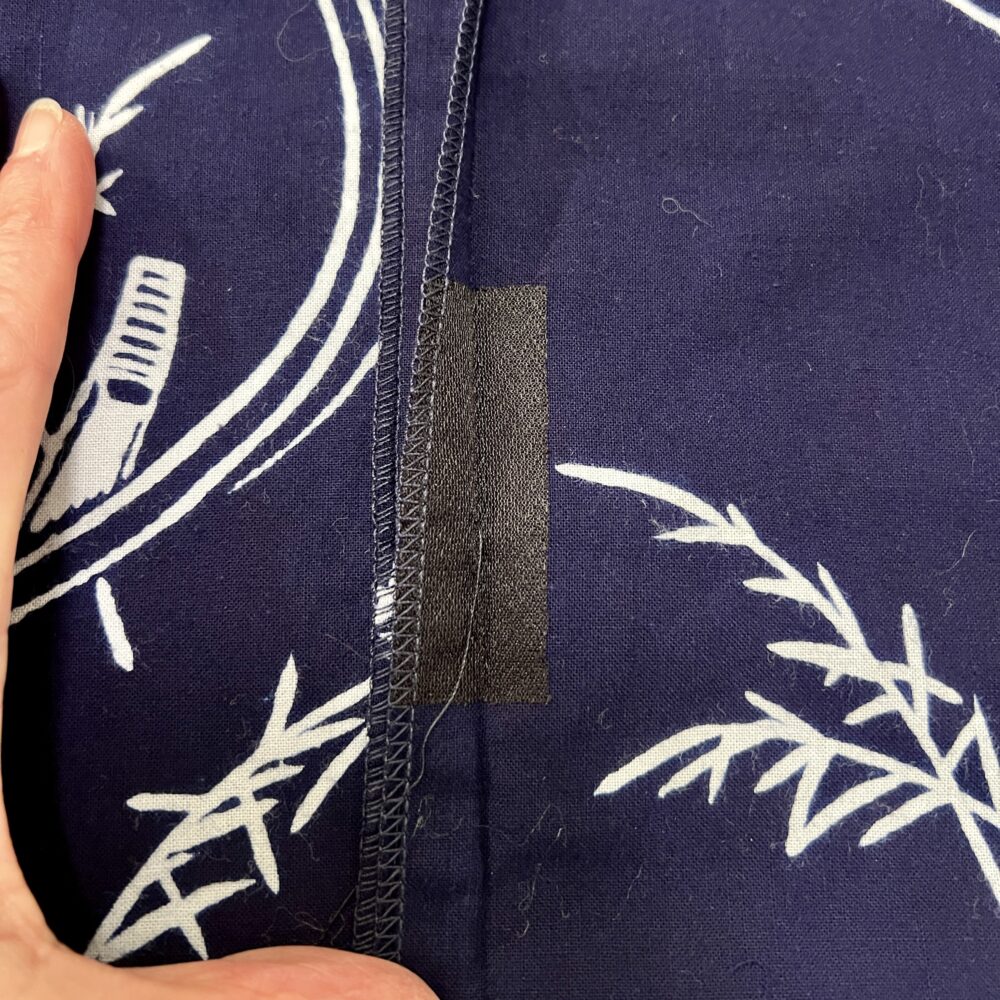
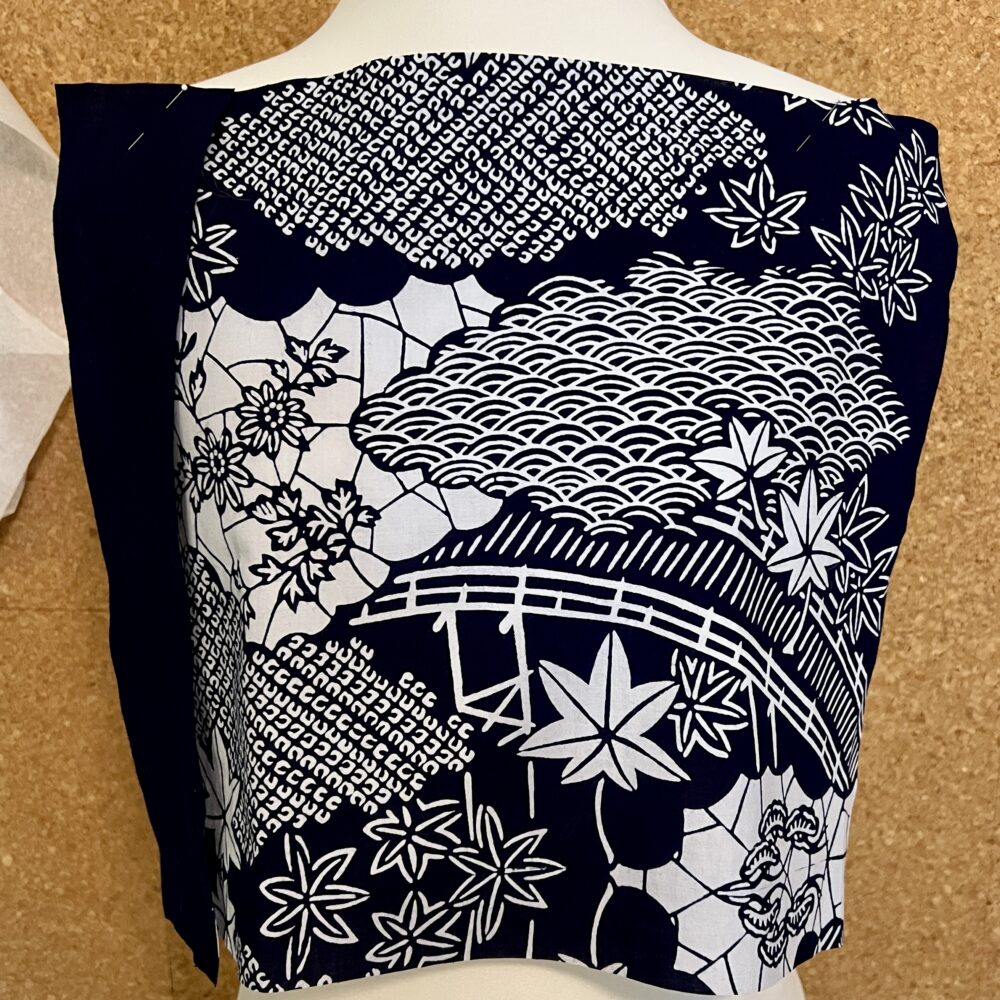
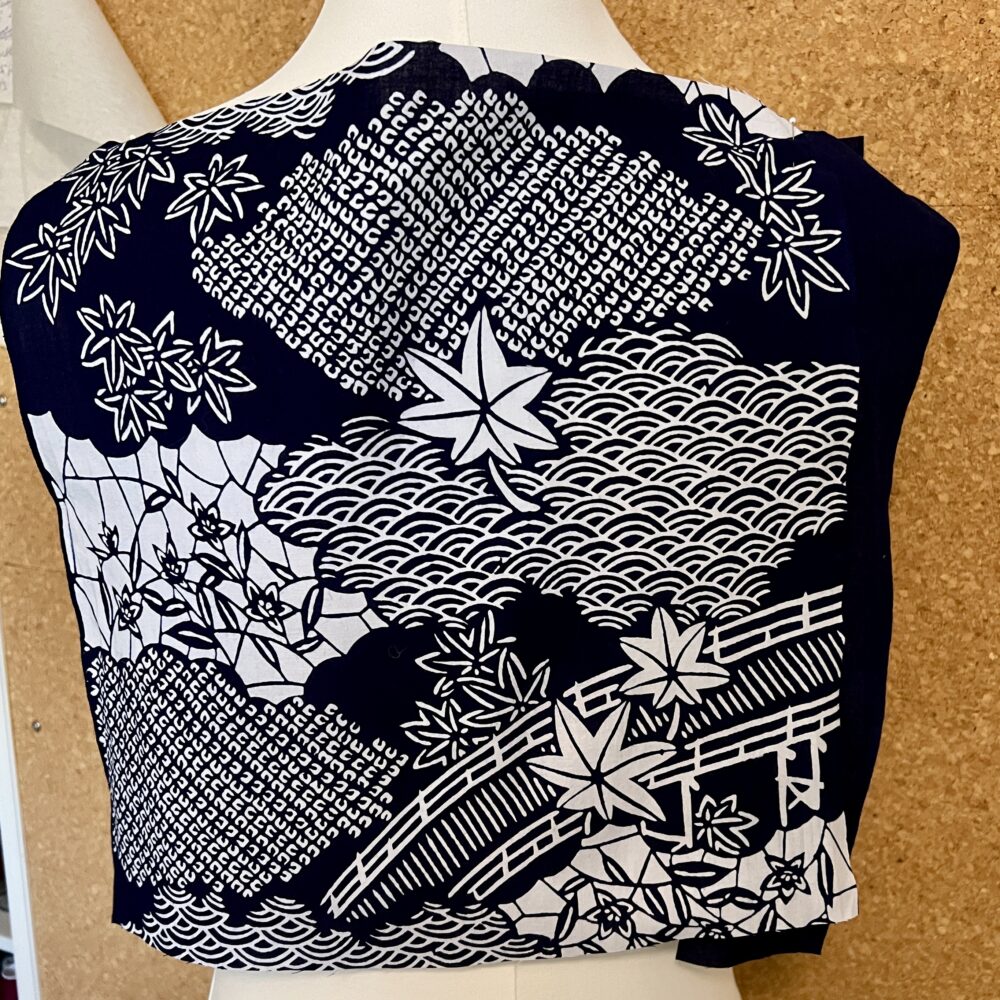
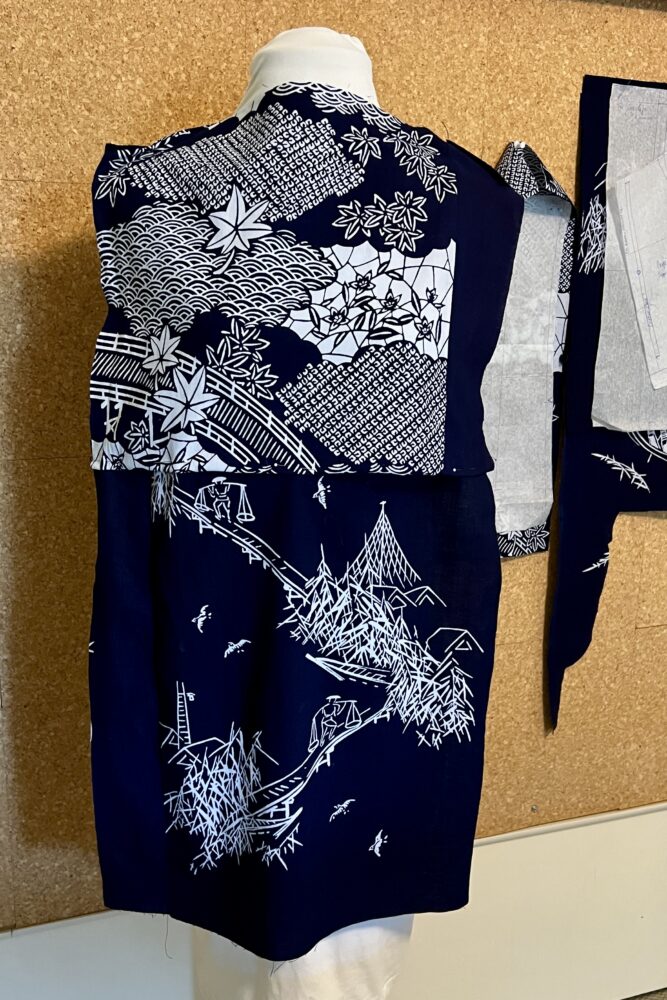
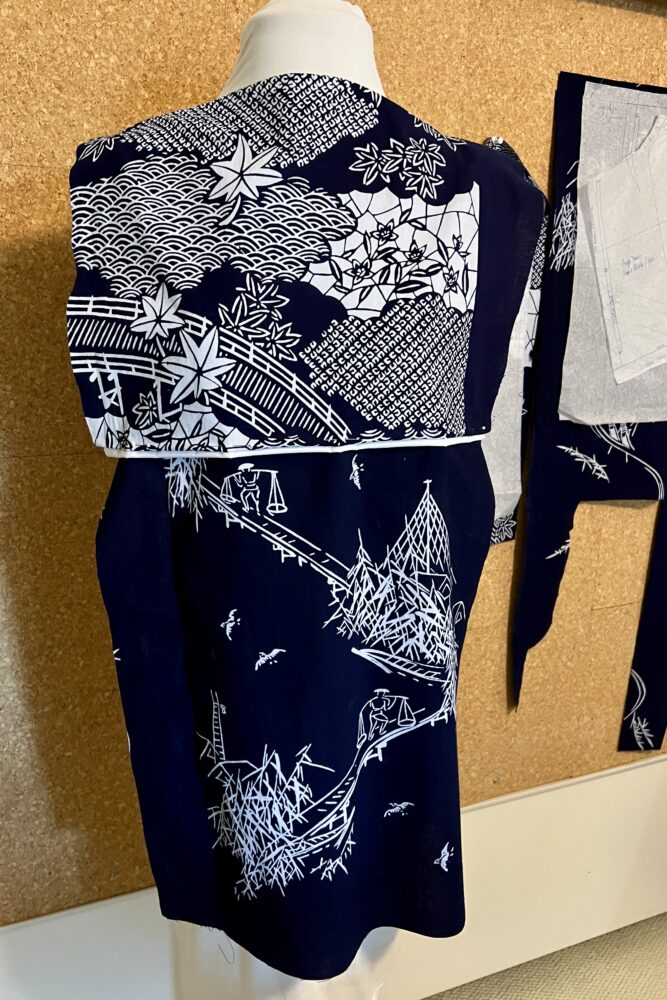
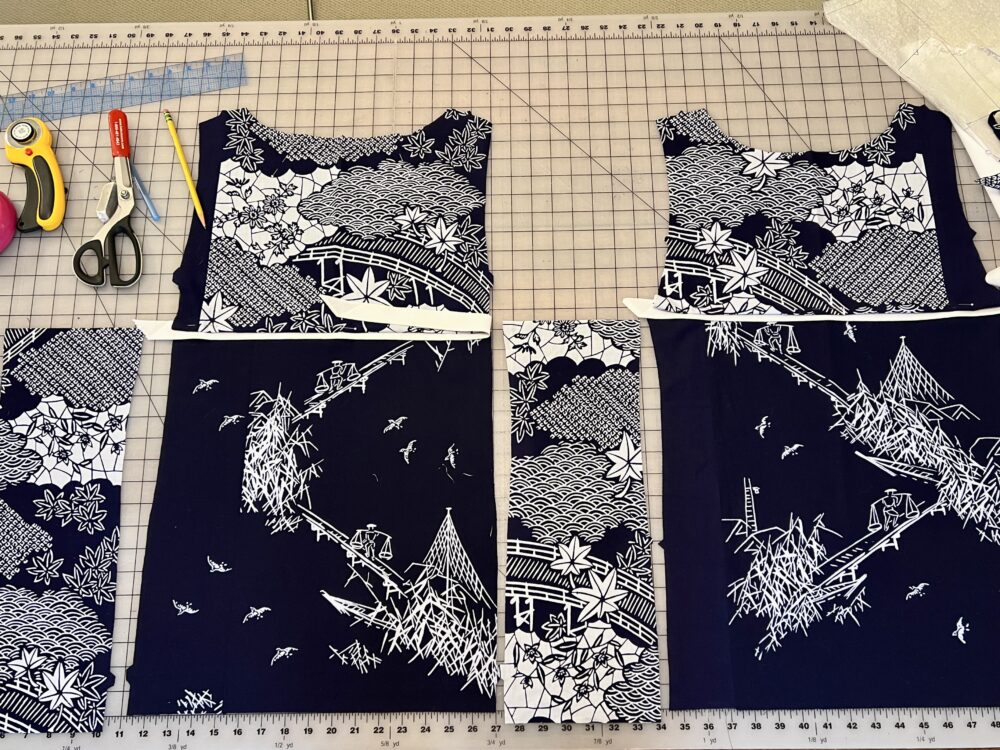
The busiest design, with clouds, bridges and flowers, is prominently featured on the yokes. To create the necessary width, Carrie was able to add a 3” wide strip of solid indigo left over from cutting out the sleeves to each front and back yoke section. She took advantage of the fabric selvages to minimize the need for clean finishing those piecing seams. The side panels were also cut from this fabric, primarily because it was the only length of fabric big enough to accommodate them after everything else was cut out.
The bold diagonals of the third fabric design, featuring human figures crossing bridges between leafy islands, was well suited for the lower front and back. Like the yoke, the width needed for the lower front was achieved by adding a strip of solid indigo. For the lower back, Carrie decided to cut two overlapping sections to create more ease in the tunic. Here, the sketching indicated it would be difficult to coordinate a pair of diagonal motifs. So once the right lower back section was cut, she was able to try out several combinations for the left lower back:
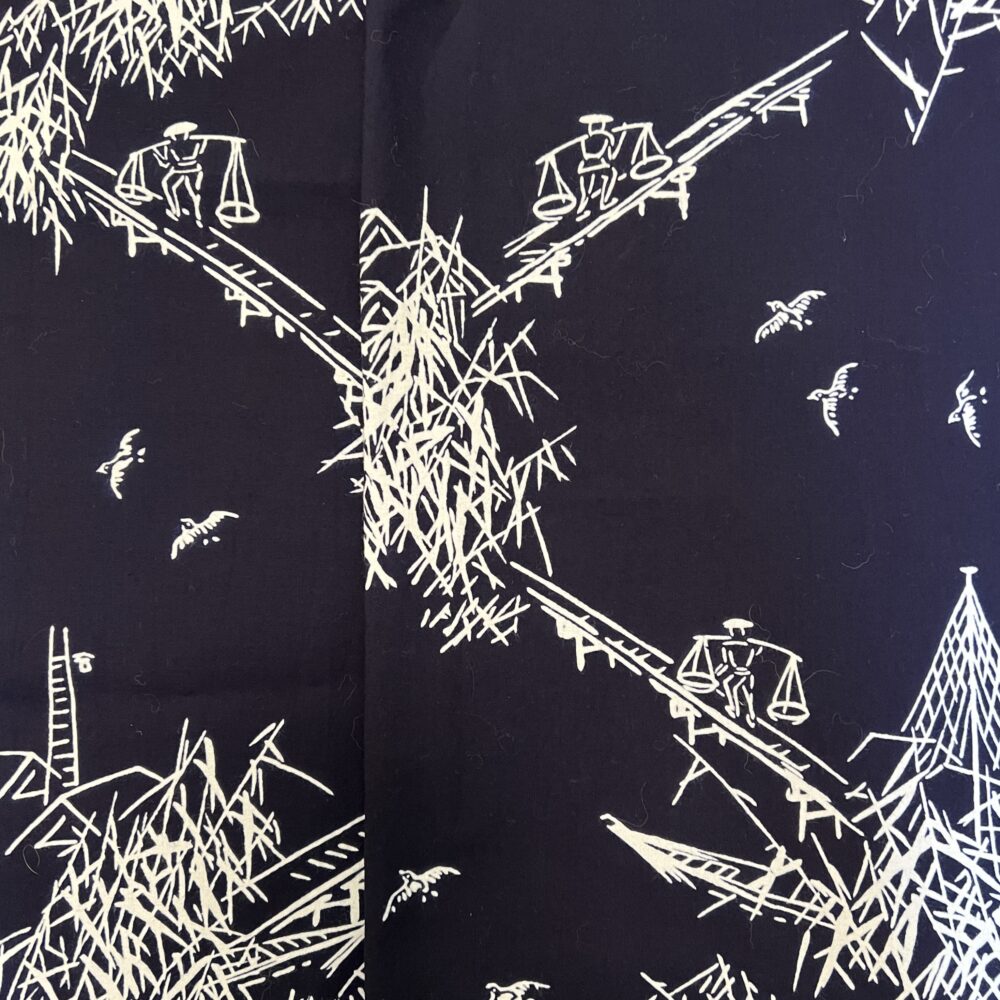
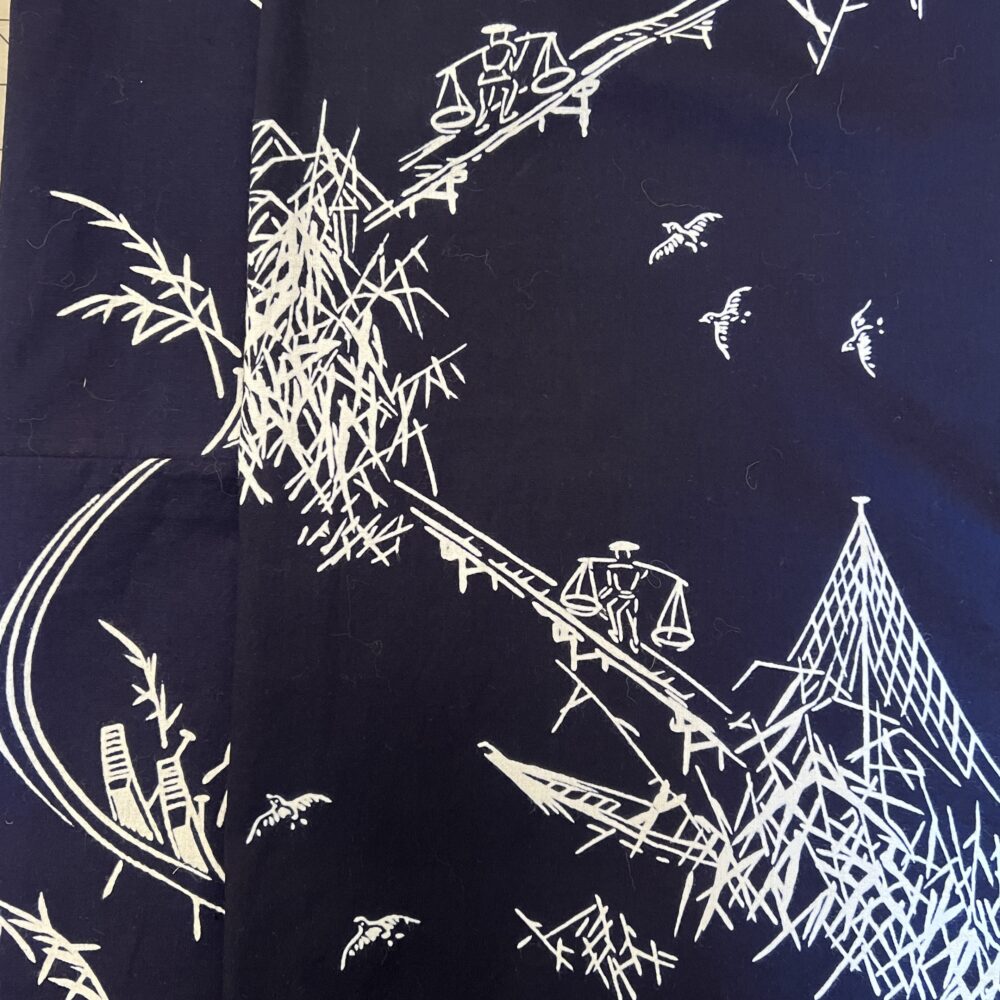
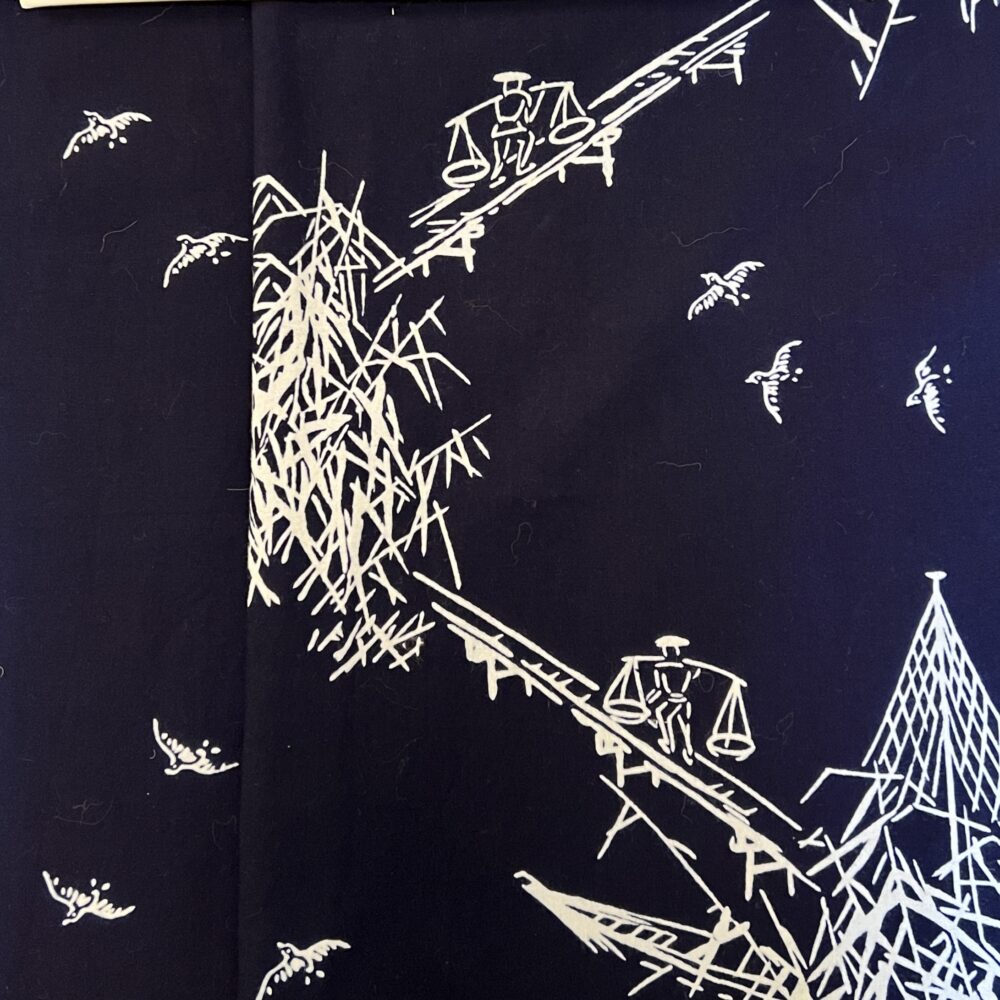
Which combination would you have chosen? After much fiddling, Carrie finally discovered she could capture a mostly indigo section with flying birds by cutting between two repeats and flipping the diagonal motifs. She hesitated to “waste” fabric by cutting through full repeats, but Rae reminded her that the scrap scan be someone else’s inspiration. (Participants at our La Cascade retreat can look forward to playing with the motif scraps!)
As the sections were pieced and pinned to the dress form, Carrie felt something was needed to create definition between the yokes and lower sections. Some bright white cotton-poly broadcloth in her stash proved to be just the thing for brightening the whole composition!
At the time of this writing, the tunic sections were ready but not yet assembled. You know how it is; life commitments get in the way of sewing! Watch our social media this week to see it all come together.
Thanks for the inspiration from Japanese indigo fabric, Julie! Some of Julie’s gifted fabric also made its way into Rae’s Inspired by Ruth Tabula Rasa Jacket. We wish we knew more about how these fabrics were crafted and how they were originally intended to be used. If any of our readers are familiar with this type of fabric and its manufacture, we’d love to learn more about it!


Hi,
The 14″ width and the reversing motifs are hallmarks of Japanese kimono fabric. The kimono is made out of sections of fabric folded at the shoulder, and the reversed motifs mean that the design isn’t upside down on the back half of the garment. One length goes from hem to hem, folded at the shoulder to make the right side, one length makes the left side, two shorter lengths are the sleeves, folded at the top and seamed at the bottom. The remainder is pieced and folded to make the collar.
Thank you Stacia and Donna for sharing this info! Searching the term Yukata opens up more history and, of course, online purchasing opportunity. I didn’t have enough of any one fabric to create a yukata, so I hope that cutting it up this way doesn’t offend. If any of our readers have worked with Yukata fabric before, we’d love to see it!
This is Japanese fabric used to make the traditional Yukata summer kimono, an unlined summer kimono made of breathable cotton. Your fabric was dyed using the traditional Shibori method.
I’m excited to see Carrie’s finished top and I had never seen Rae’s ‘Inspired by Ruth’ jacket-Wow. I really enjoyed reading the history of kimono construction. I have several beautiful vintage kimonos a friend gave me & these are both inspirational for their future repurposing.
PLEASE check out Ann Williamson Art to Wear. NO ONE works with oriental kimono and silks finer than she can create with them. She is OUTSTANDING.
We know and love Ann Williamson’s beautiful work. So glad you have found her!