We have come to the final post in our series featuring extra bites of information we wished we could have included in Sewing Quilted Patchwork Jackets. Rae’s grandest Opus project was this reversible collage coat incorporating a series of lovely Asian inspired fabrics. This was the first project for which we purchased fabric once we had been engaged to write the book. It was the last project to be completed, just a couple of days before our deadline in mid-March of 2024.
This is the most complicated of the projects especially if you are inclined to fret about how the collage is designed. Rae is the first to admit, this can be an obsession for her. Good thing there were deadlines!
In Project #5 we advise the artist to arrange the elements until you have a pleasing picture. So here is Rae to tell you about creating a pleasing picture on the collage sides of the reversible coat in this post Secrets of the Book – Project 5.
Creating the Scene with Pieces of Fabric
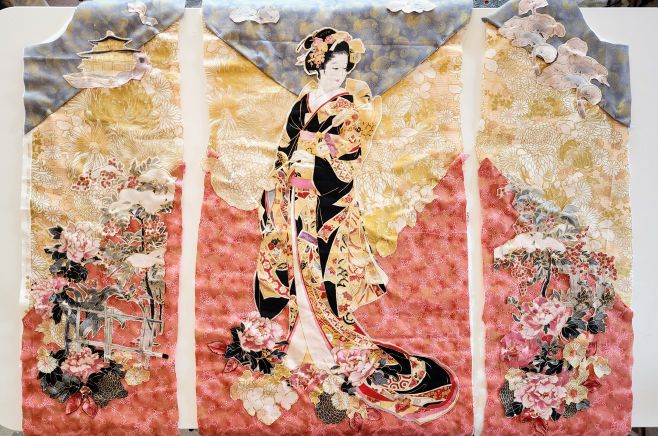
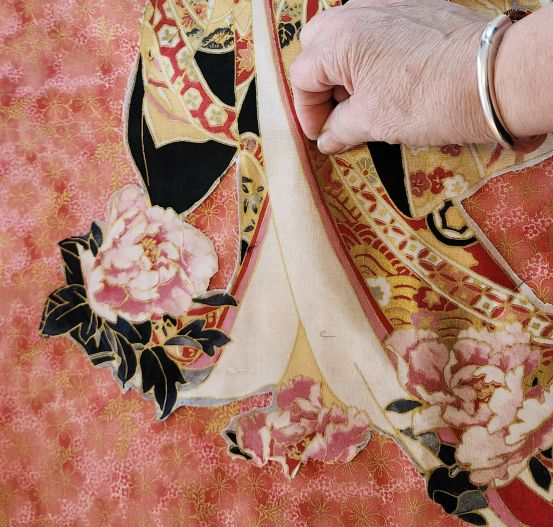
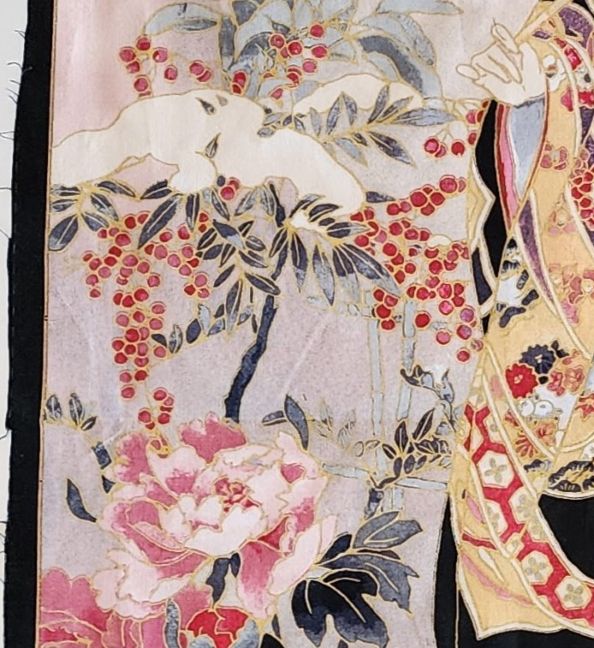
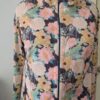
The assignment was simple, cut out elements of the asian-inspired fabric panel and create a little design with them. (Rae started with two identical panels, viewing the second as an insurance policy of sorts, which can be seen in its entirety on page 84 of the book.) If it had been a straightforward assignment, the technique would be called “broderie perse,” which involves cutting shapes from one cloth and applying them to a second, different background cloth. Rae treated her project more like raw edge collage than traditional applique. Pieces were cut, some into very small elements from several different fabrics and rearranged into a different picture, on a pieced background. Of course the large Asian lady on the back remains the same, but her surroundings are different. I was surprised by the lovely new fabric that resulted for the jacket’s two fronts using the secondary elements and flowers from the border print of each original panel.
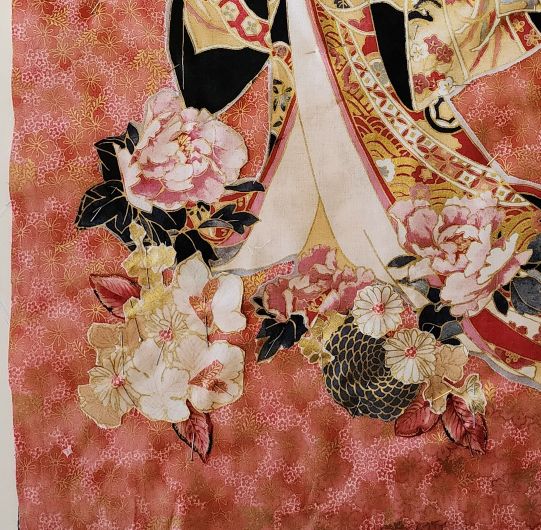
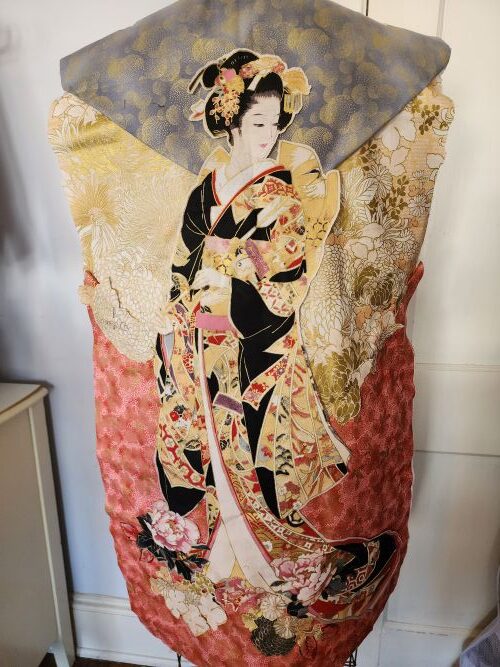
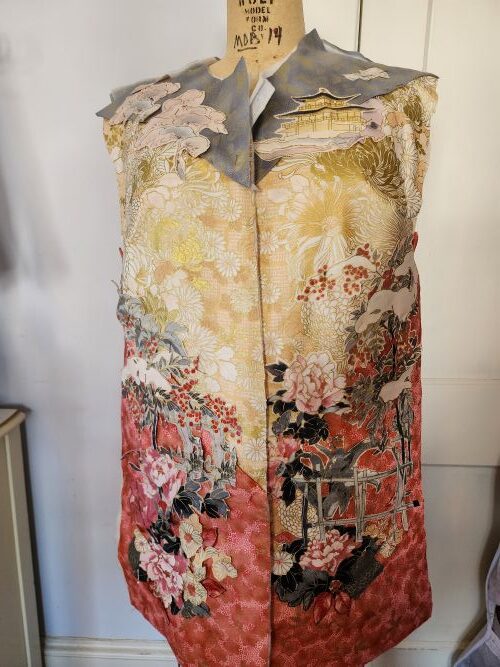
We used the mock-up made for this coat length XL size Opus to position our lady before she was carefully cut out. She turned out to be just the right size. A group of flowers were cut out to soften some of the black sections that surrounded the hemline, adding in grey flowers from the panel’s border and other elements from the background fabrics and stash.
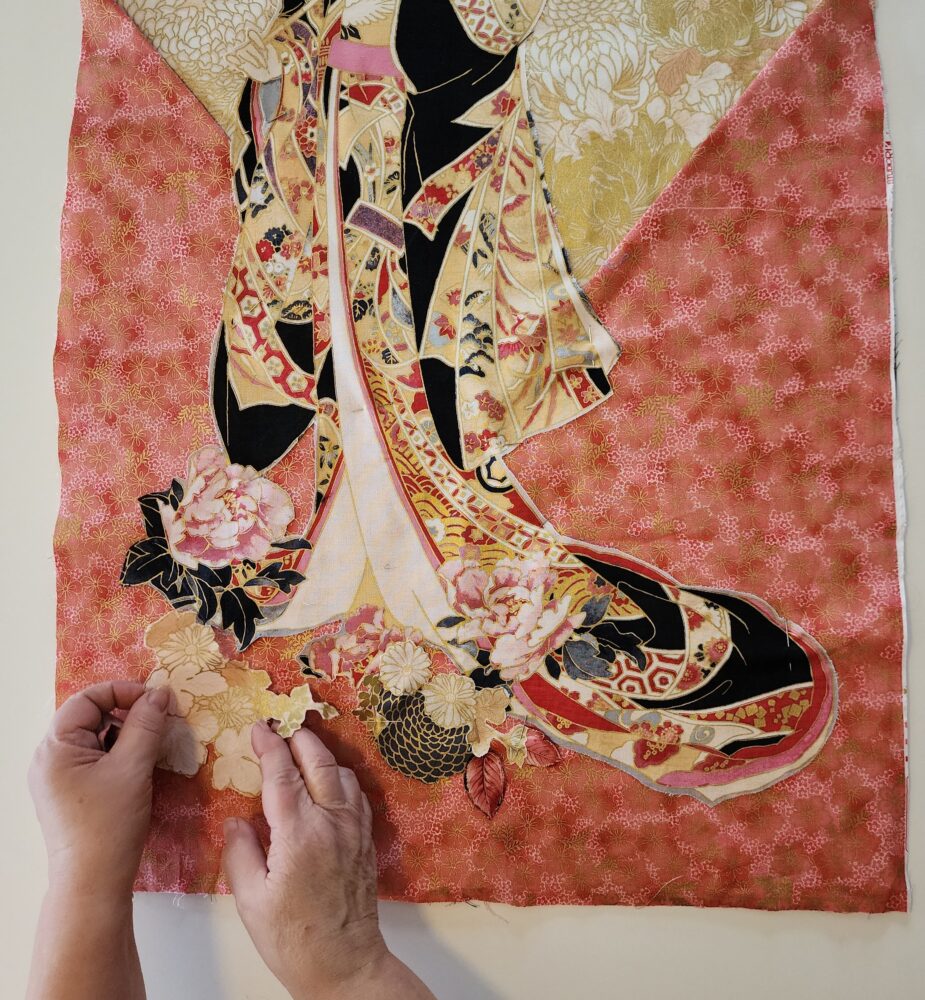
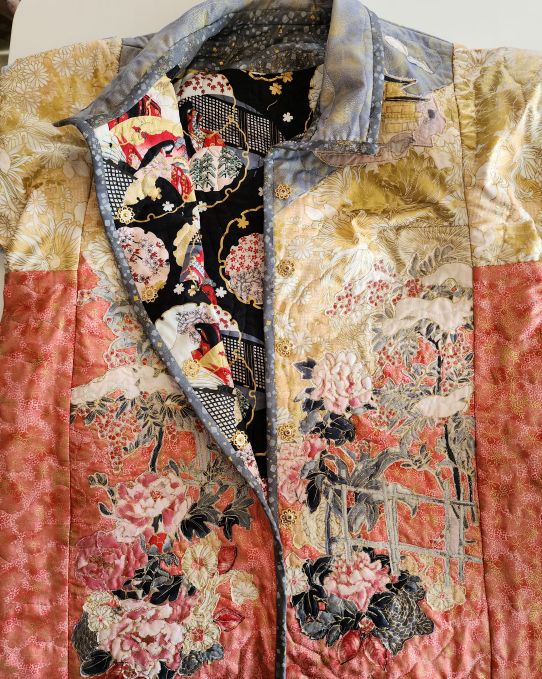
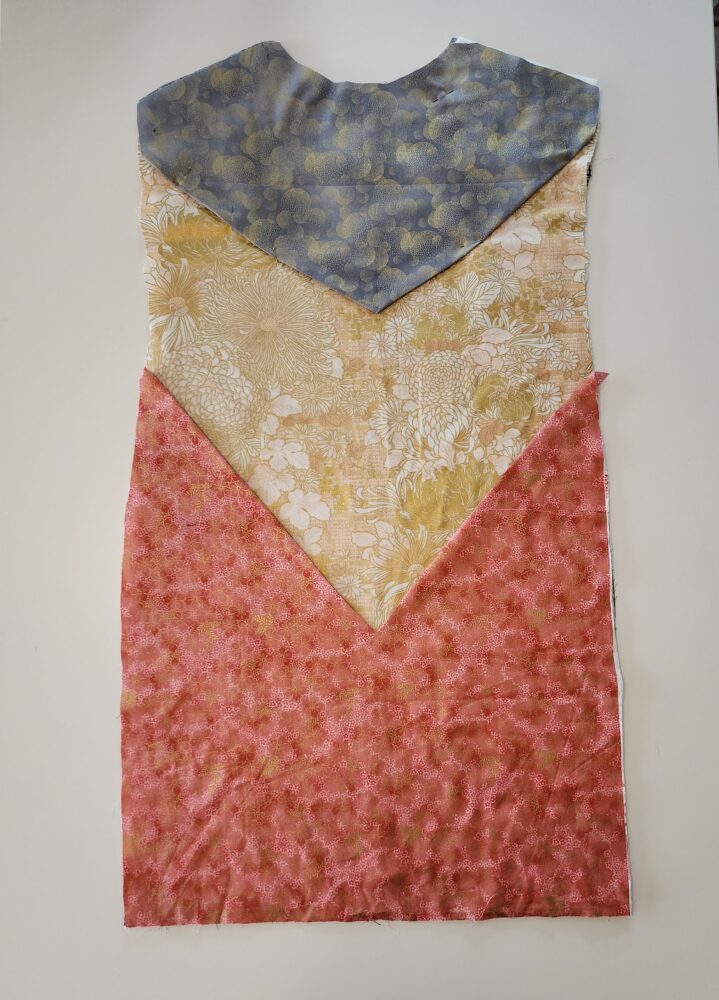
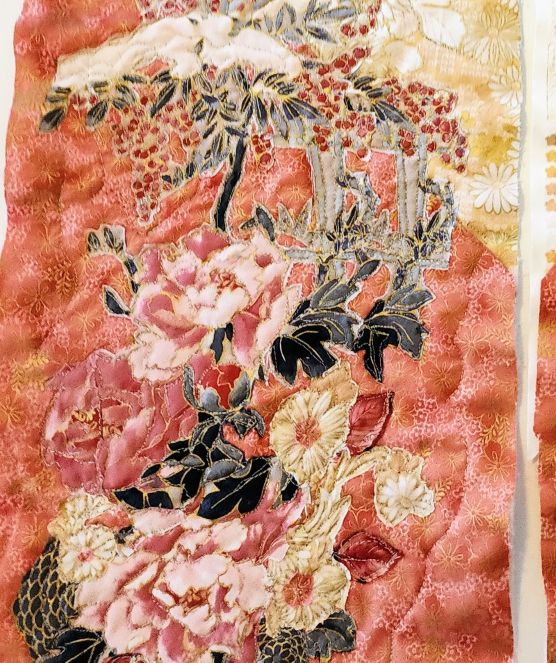
Creating a scene on the front was a bit more complicated. The two sides of the panel that had been cut away from the lady were pinned to the stacked backgrounds. They too had lots of very dark elements that needed to be softened and they did not really work well together.
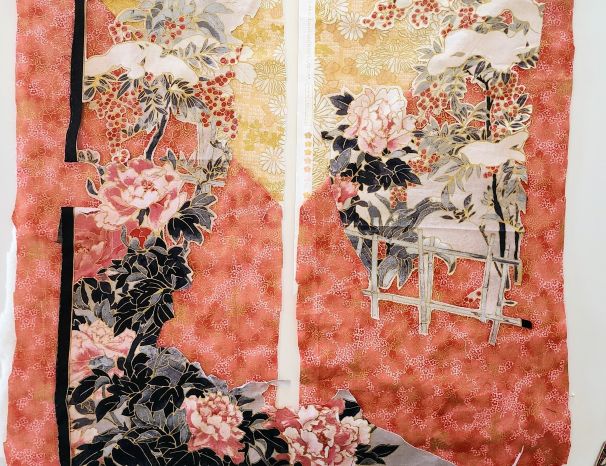
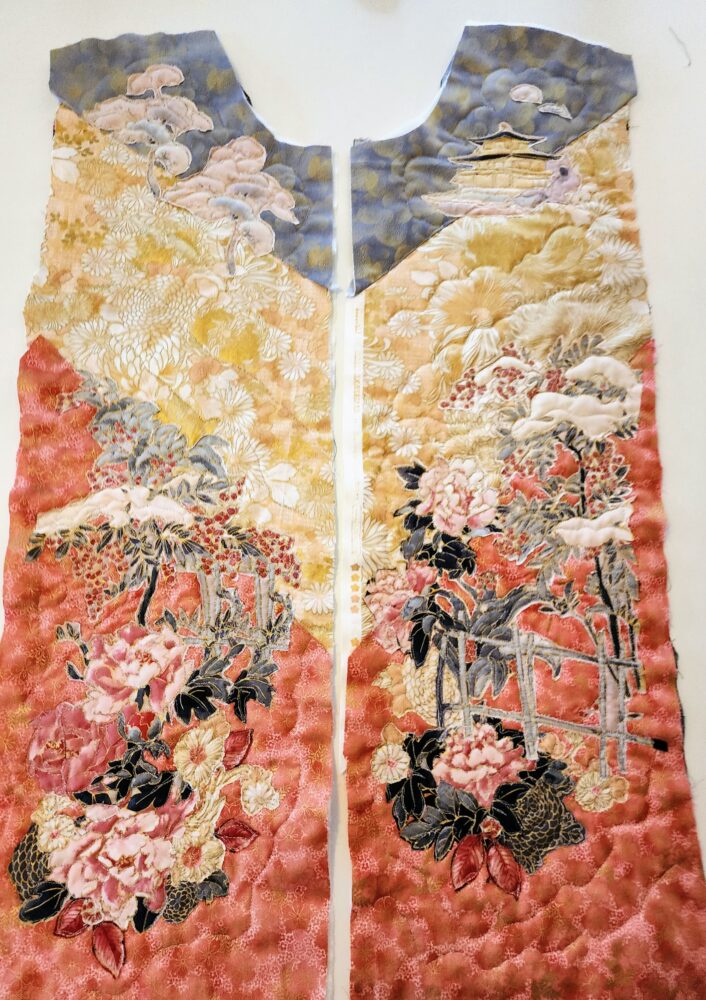
After several trial rearrangements, my eye told me that the fence needed to be strengthened on the right side to balance both sides. Fortunately, I was able to cut out the fence section and some of the other floral elements from the second panel that had not yet been cut apart. By the time it felt balanced and pleasing, there were so many little pieces and pins everywhere that I asked myself, will it even work?
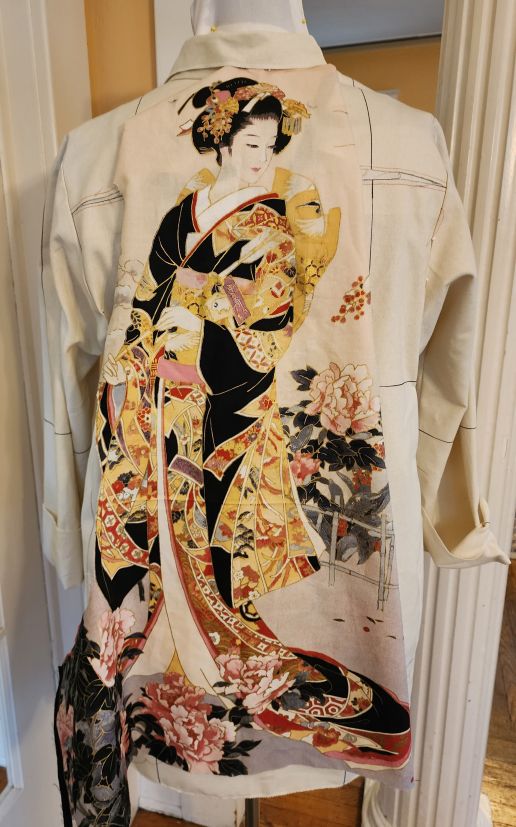
I hung the pinned collage pieces on the dress form while preparing the batting and coat sections for the reverse side. I continued to study the three decorated pieces of the coat on the 3-dimensional form. This was very helpful too.
Stitch the Elements into the Quilt Sandwich
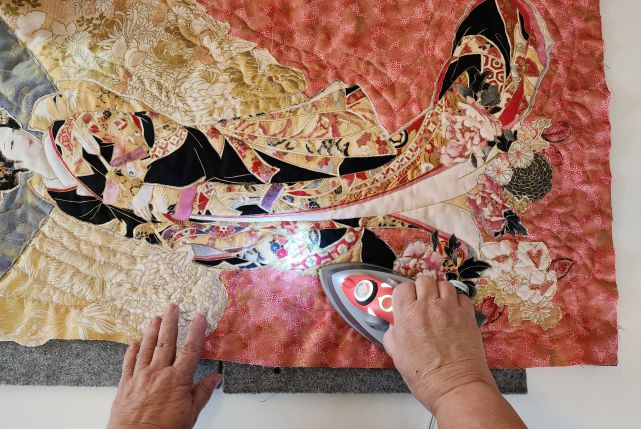
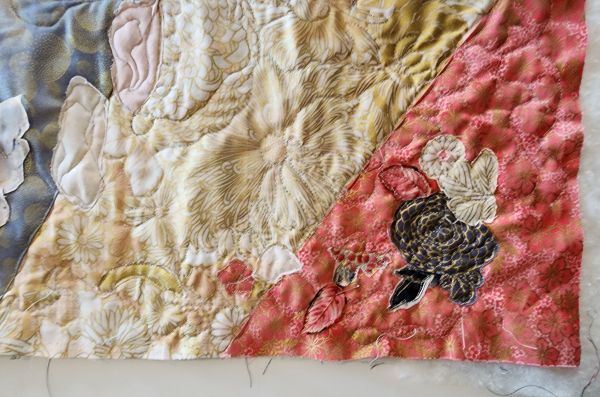
The back was stacked, pressed and free-motion stitched first, pretty straightforward and I thought it was quite lovely. Around the collage, echo quilting was added to hold all the layers together.

Then the Fronts were stacked and pressed for stitching. These scenes needed so much quilting to capture each little element, I had to work in small sections and take breaks. Boy was I nervous! But it worked and the end result, so dreamlike and textural. I was really happy.

This collage process from start to finish began on February 5 and the 3 pieces were stitched by February 12, 7 days of intense deliberation. It had to be done because on the 13th I was teaching a video class and that evening my family would begin arriving for my mother’s Memorial Service weekend over Presidents Day Holiday 17. The room where I was making video, photographing and sewing needed to be a bedroom.
By the 23rd, I was back at work, quilting the sleeves, sides, and collar so the coat could be assembled and finished.


This collage was not my first rodeo, as they say. I had made the reversible Our Lady of Guadalupe coat years ago and the Wabi Sabi Vest during the pandemic. Each started with panels that had tempted me for years and were lonely in my stash for a long while before being made into a garment. At Fit for Art we stay pretty busy and making time for such projects requires a bit of planning. If you are interested, one more Jacket that started with a panel is the In a Japanese Garden where the panel is cut into squares. Read more in the blog Quilting Connections.
Plan your Own Beautiful Coat
If you want to play with this process, make a very large sample. Because the thread on the reverse side was black and the thread on the front was gold, every time I changed the needle, refilled the bobbin or rethreaded the needle the tension had to be rechecked on the sample. The sample gives you the confidence to make the coat a reality!
Be sure to have a copy of our book to serve as a construction, finishing and design companion during the rewarding process of creating your jacket. Plan to attend one of our Sew Successfully retreats for 3 days of encouragement and assistance with any complex project or fitting challenge. We still have a few spaces for the upcoming retreat on March 20-22, so register now.


I would love to make a jacket like this. I purchased the book last year and first of all was very disappointed that the patterns were not actual paper patterns supplied. I borrowed a phone to download the patterns but was unsuccessful. I am not technologically gifted when using a mobile phone, I can use a PC.
I have not been able purchase the patterns in paper format.
So I look at your posts and wish for the impossible.
Hi Marnie, So sorry you are struggling with this new technology of downloading and printing the pattern. I appreciate your frustration. Here are a couple suggestions. You could use the Tabula Rasa Jacket Pattern to make any of the kimono band style jackets. Add the Shirt Variation pattern and you could also have the collar version. These patterns are available on our website for purchase in tissue form with a very thorough direction book.
If you want to get the Opus pattern downloaded and then sent to the printer, why not get a young friend, grandchild or neighbor who is good with computers to help you. Because it becomes increasingly difficult and expensive to have patterns printed in bulk, this is the wave of the future so it might be good to try to figure it out. If you are a member of a sewing group or Pattern Review, somewhere in those groups can help you too.
All the best, I hope to see a photo of your jacket later in the year. RAE
I live in a very small town, but we are lucky to have a printing business here. They do flyers, pics, newsletters, etc. I am technically challenged so I took my iPad to them and they transfer it to their system and print it for me. Good luck with your sewing adventure.