As Fit for Art celebrates its 15th year, we are revisiting some of our most read blog posts from our 10+ year archive. So starting with the #1 most popular post, we remind you: Redux – Grainlines on Pants Patterns are so Important!
Making a Case for the Humble Grainline
Sewing bloggers and writers all seem to have strongly held opinions about grainlines on pants, and often they are at odds with one another. That adds up to lots of conflicting information popping up when you search online to find the perfect solution to a pants fitting problem. In hopes of cutting through the noise and confusion, today we focus on Fit for Art’s philosophy about pattern adjustments that affect the grainline on pants. It’s not a very glamorous topic, and there is no eye candy this week, just pure pattern adjustment and fitting suggestions based on years of experience fitting pants on all types of bodies.

Our Pant Fitting Philosophy
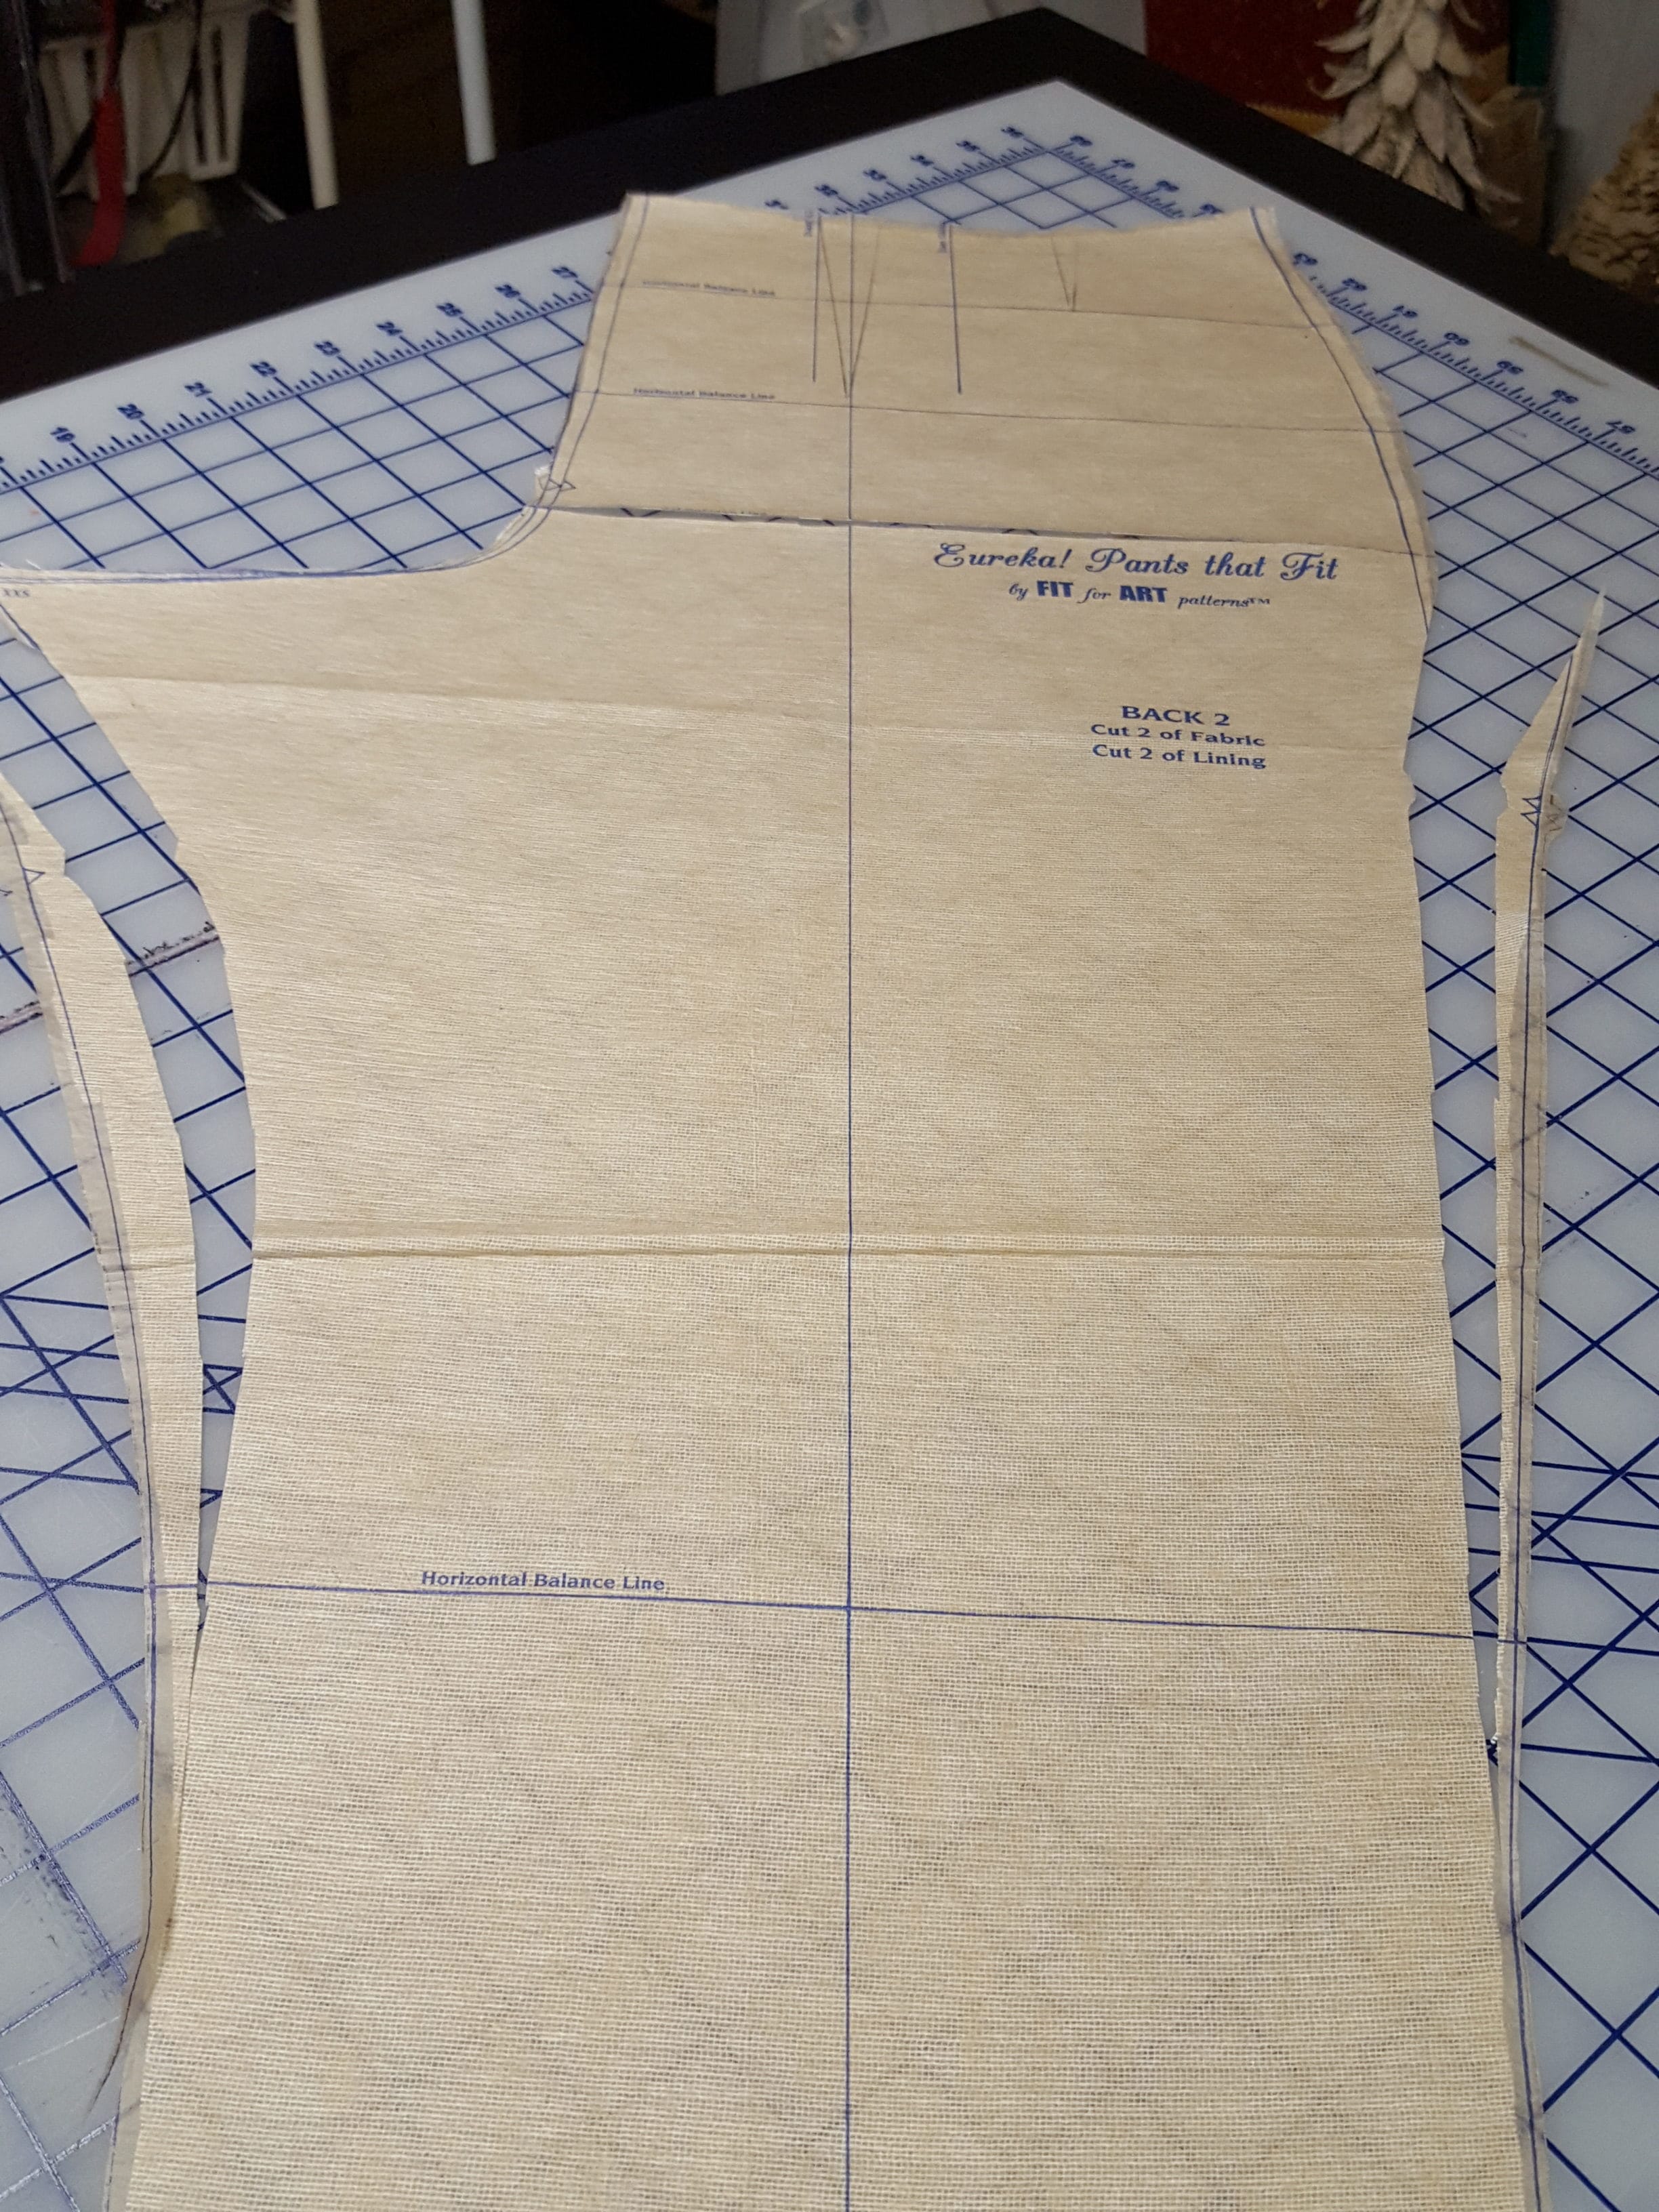
Fit for Art Patterns travels around the country fitting stitchers in our pants samples and offering pattern adjustments that work successfully with the Eureka! Pants that Fit pattern. Our system presents a new paradigm, essentially draping a pant mock-up on the body so the crotch curve is addressed first and foremost with the number 1, 2, and 3 back options in each size.
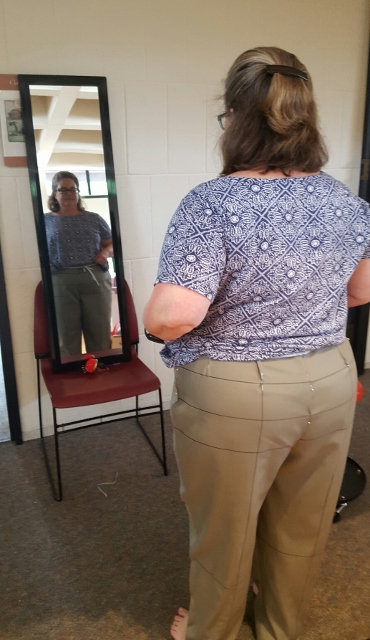
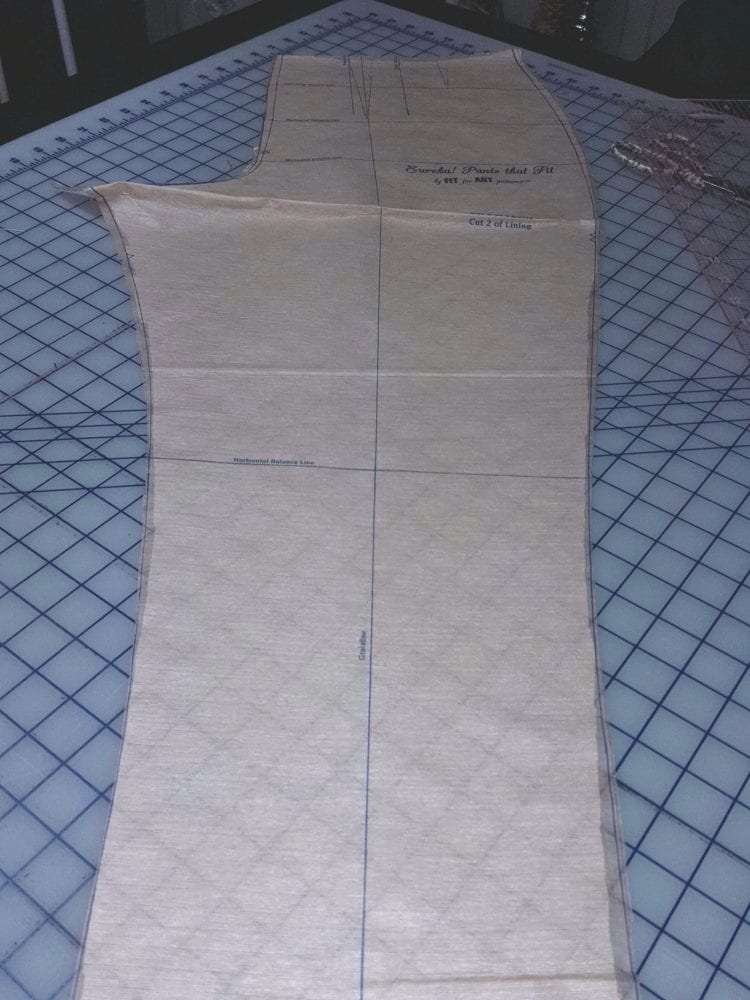
For this method to work successfully, the grid of vertical Grainlines and Horizontal Balance Lines (HBLs) must stay parallel and perpendicular to the floor. This is why we draw the lines on the patterns and on the outside of our fitting samples. They are our reference point for achieving a balanced fitting pant on any shape body.
This is a process, though, and the need to have quick results leads stitchers down the dangerous path of wedge adjustments that are suggested in many places on the web. I am here to tell you these changes do nothing but throw your pants out of balance with only a modicum of cosmetic improvement. These warnings come from experience and I beg you to run fast and far from those “easy” adjustments.
It is not our habit in these posts to tell you what not to do, but this is an exception. I am going to show you just what havoc two such wedge adjustments can have on your pants. I will also show the Eureka! Pants fitting alternatives. Even if you have always done these wedge adjustments in the past, please give our Eureka! adjustments a try. With patience and incremental changes, you will end up with the best fitting pants you have ever had, standing or sitting.
Removing Excess Fabric below the Derriere
The “under the rear end wedge” is often suggested to reduce excess fabric below the derrière. As you can see from these photos, if you fold a wedge out of your pattern, you throw off not only the grainline, but also the inseam, the tilt of the waist and darts, the curve of the side seam and the angle of the crotch curve.
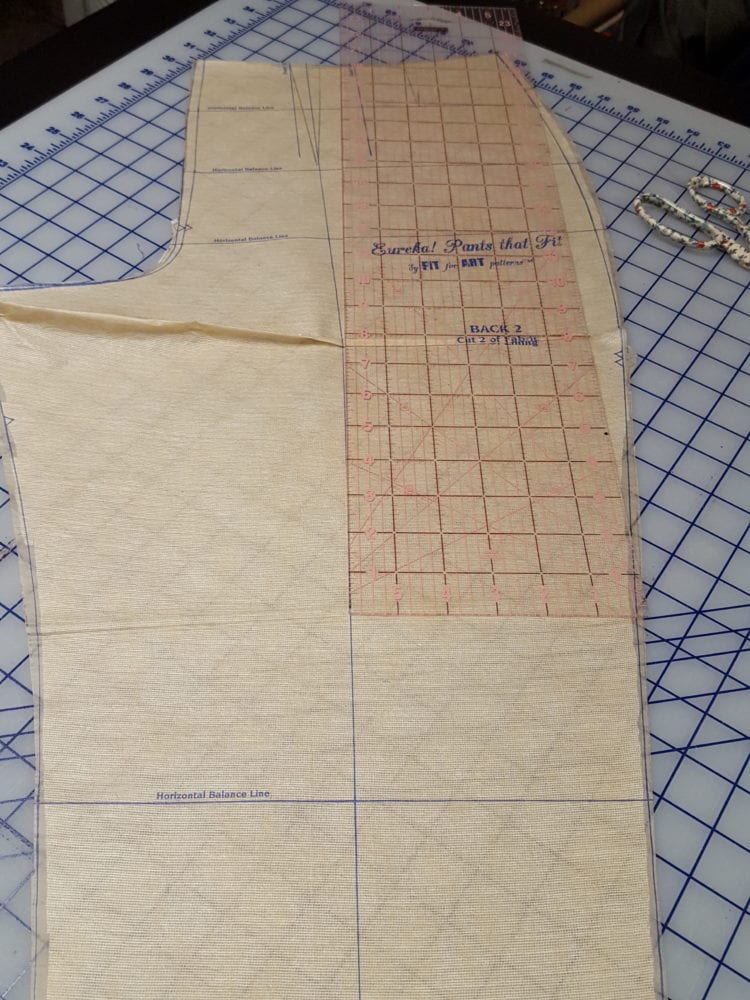
While you can straighten the grainline, all the other difficulties remain. Even if you succeed in eliminating some fabric below the derriere, you will create other problems that are difficult to adjust.
By contrast, the Eureka! adjustment is to establish the appropriate crotch curve and length by observing the grain lines and HBLs. Then, take in the inseam and side seams below the crotch to shape up the leg tand achieve a closer fitting leg silhouette.

Lengthening the Crotch
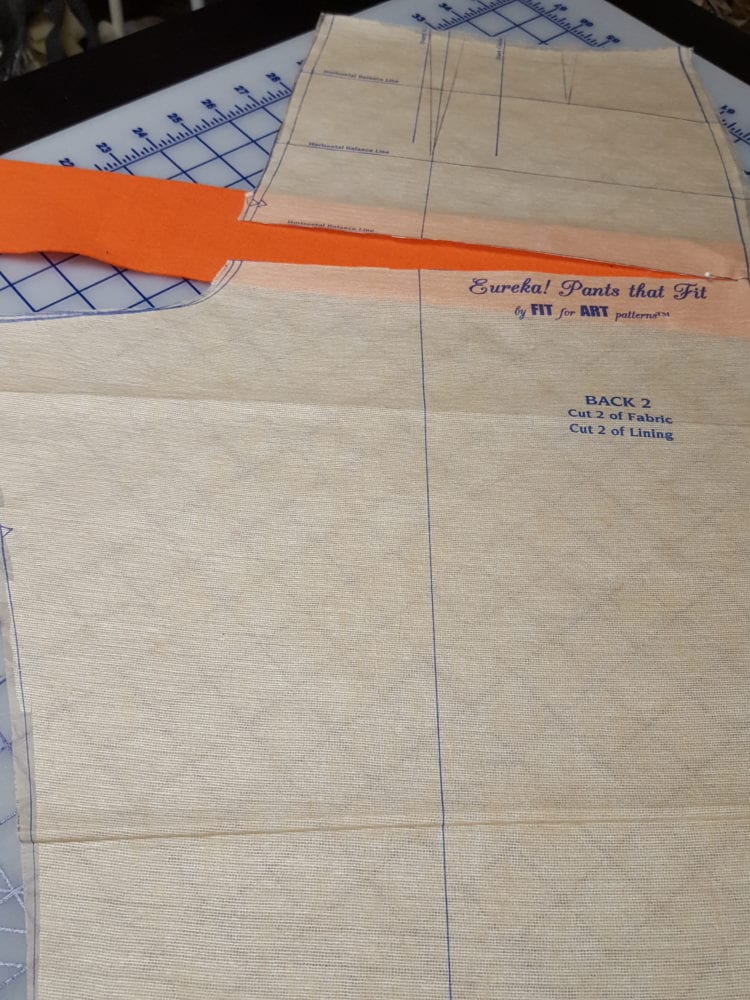
The “HBL crotch adjustment wedge” has been used since women began wearing pants to provide length in the crotch curve. As you see in these photos, inserting a wedge adjustment at the crotch level HBL throws off the grainlines, the tilt of the waist and darts, the curve of the side seam and the angle of the crotch curve. The grainline, when straightened, falls very close to the center back. These pants could not possibly hang correctly on the body!
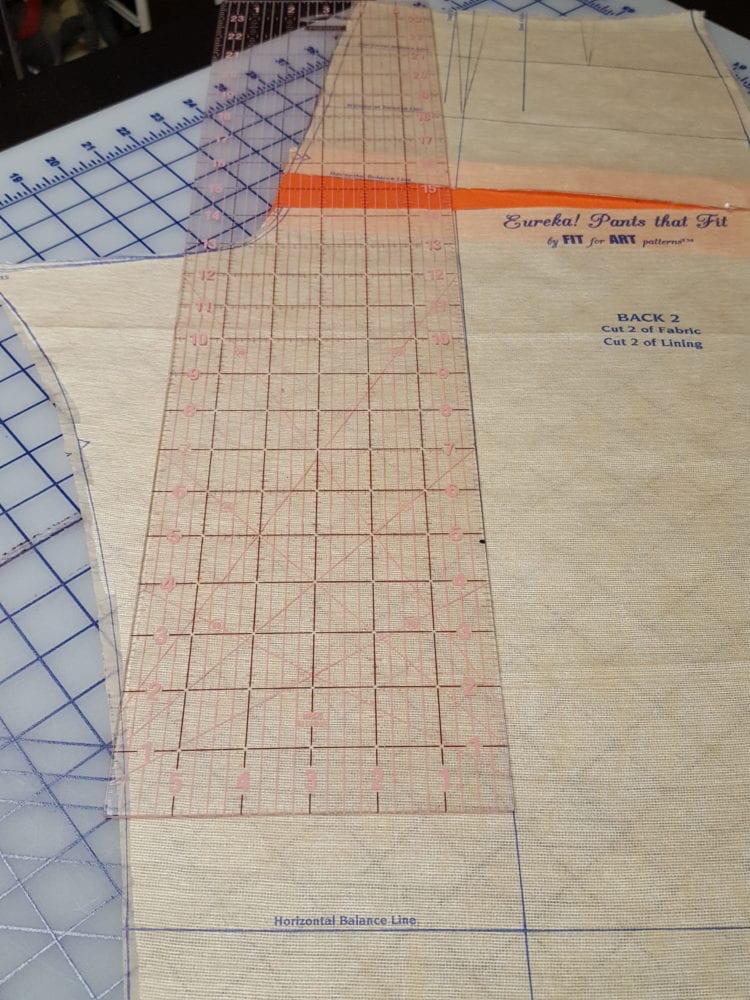
Instead, for the Eureka! adjustment, we lengthen the crotch extension where the extra length is actually needed. This also necessitates blending the crotch extension to the notch along the inseam. After making these changes, try on the mock-up to observe the grainline/HBL grid and reshape the crotch curve if needed.

In an effort to get a fashionably form fitting pant, do not distort your pants pattern in unproductive ways. Remember to keep those grainlines straight on your sample pants and your patterns my friends. They are your north star as you move toward pants perfection!
More Pant Fitting Resources from Fit for Art
You will find more pant fitting guidance in the Eureka! Pants instruction book on page 6-8 and links to additional helpful information from the Pants Help page of our website. Read more stories about the Eureka! pants fitting process by following these links:
You’ll find many more blog posts about adjusting the Eureka Pants pattern for fit, style, pocket details, leg silhouette, and more by clicking on the Pants category in our blog archive. Glad you came back with us to Redux – Grainlines on Pants Patterns are So Important.
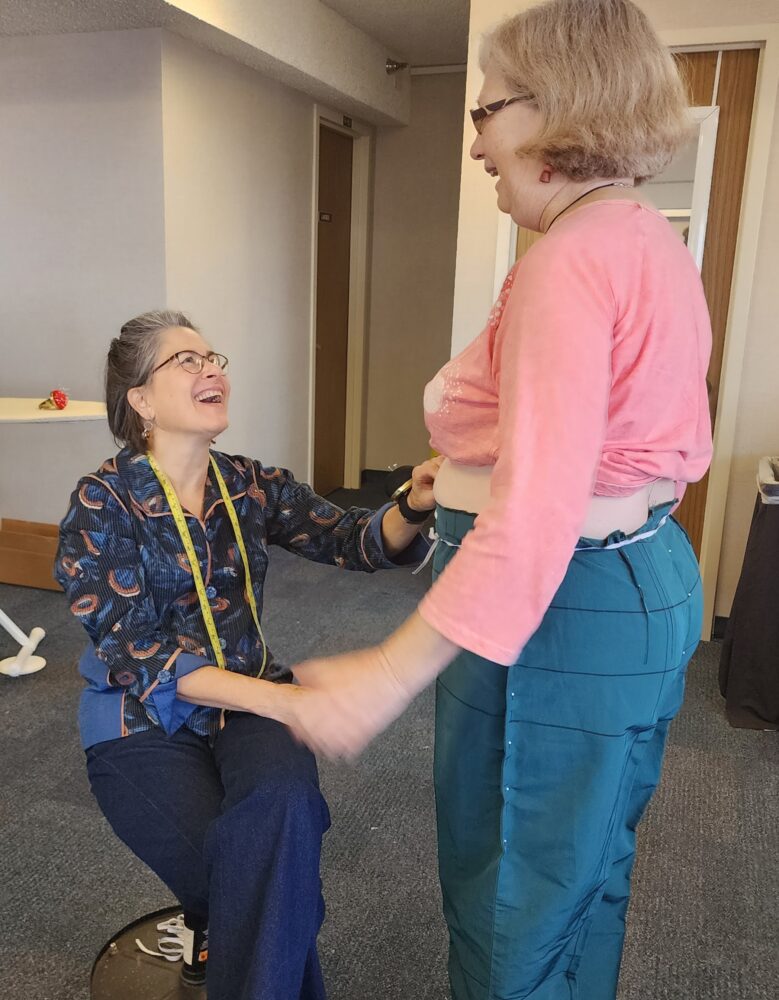
If you’d like more personalized help with fitting your pants pattern, consider scheduling a virtual consultation with Rae for one-on-one assistance. Our semi-annual spring and fall 3-day Sew Successfully Retreats at the Maritime Conference Center near BWI airport also present an excellent opportunity to work through the pant fitting process with Rae and Carrie to help you each step of the way. We have a retreat coming up in just a few weeks (March 20-22, 2026) and in the fall (Nov. 13-15, 2026), so register here.
Happy Sewing, RAE


Rae & Carrie,
Even after watching all your Eureka Pants that Fit videos that led me to your 3 day retreat where you fit me with a perfectly fitted pants pattern, I didn’t completely understand why the pattern from an unsuccessful fitting experience never fit.
Now I do. I pulled out that pattern (not sure why I kept it!) and found all the adjustments were the wedge method!
Thank you for reposting this Blog.
Linda