
We were recently asked to discuss how to design a short sleeved knit top with the Tabula Rasa Knit Tee & Tunic pattern. The commenter particularly wondered how to determine where to fold up the sleeve pattern for a short sleeve. What a great question, and one we are happy to address! As always, we encourage you to select a style – in this case sleeve length – that pleases you!
While the example in this blog post is a knit top, the same techniques would apply to making a short sleeved woven top with the sleeve pattern for the Carpe Diem Dress & Tunic or Tabula Rasa Jacket and variations.
Choose the Right Length for You
There are several ways to go about working out your sleeve length preference and translating it to the sleeve pattern.
Begin by trying on some short-sleeved garments in your wardrobe. Where do you like a short sleeve to hit your upper arm? Does it vary with the type of fabric or garment style?
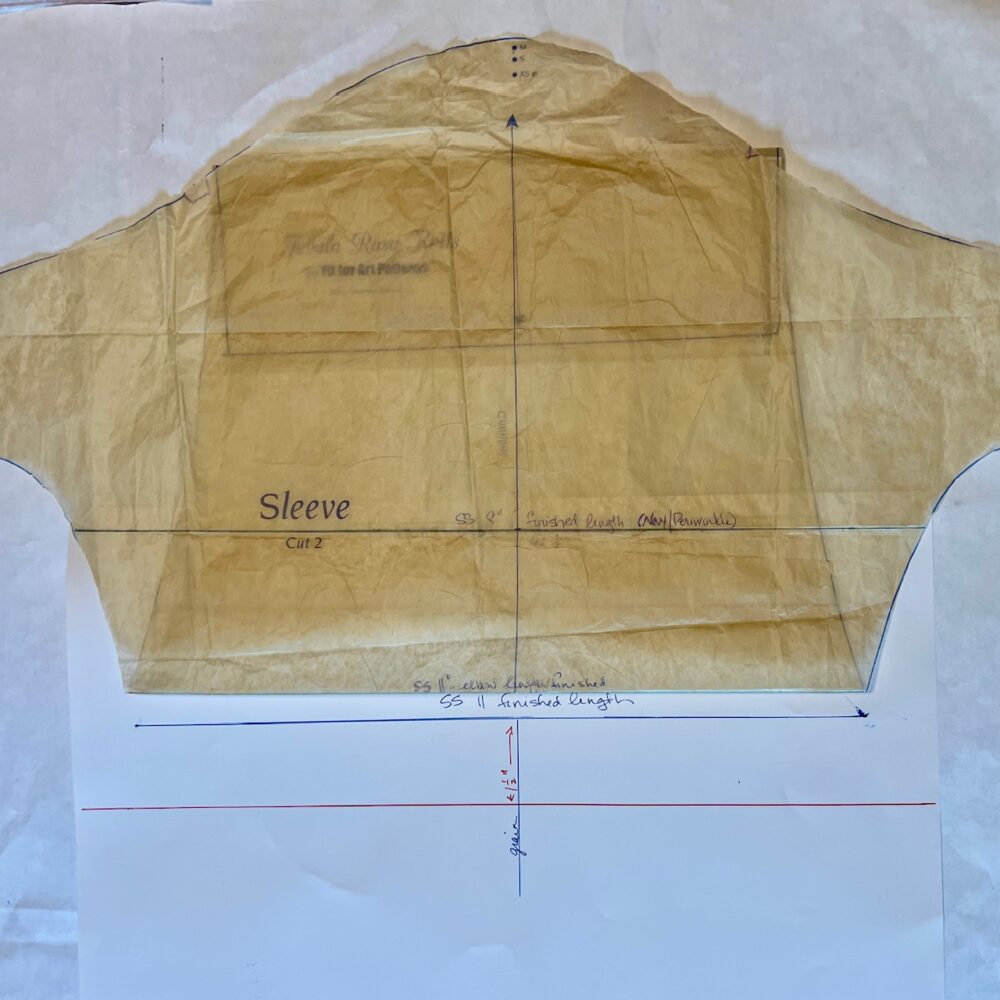
If the shoulder seam of garments you’re trying on lands at the same point on the shoulder as the Knit Tee & Tunic, measure the sleeve’s length from the shoulder seam to the hem. Mark that measurement on your sleeve pattern starting at the dot in the sleeve cap and measuring along the grainline to the determined length. Draw a finished length line across the sleeve parallel to the Horizontal Balance Line (HBL) and perpendicular to the Grainline. Label the line appropriately, such as “finished length for short sleeve” or “finished length for 11” sleeve”.
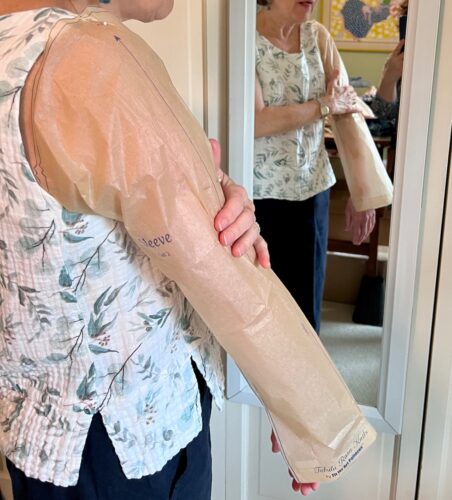
Alternatively, determine desired length by tissue fitting the Tee & Tunic sleeve pattern. Pin the tissue’s underarm seam closed above the HBL. Then carefully pull the sleeve on one arm, placing the dot at the top of your shoulder with a pin. Hold the pattern against your arm to determine where your preferred length falls on the sleeve pattern and mark with a pin or writing tool. (This is easier and more accurate with a helper!) Unpin the sleeve pattern and draw a finished length line across the sleeve pattern where marked, labelling it as described above.
Short Sleeve Trial during Construction
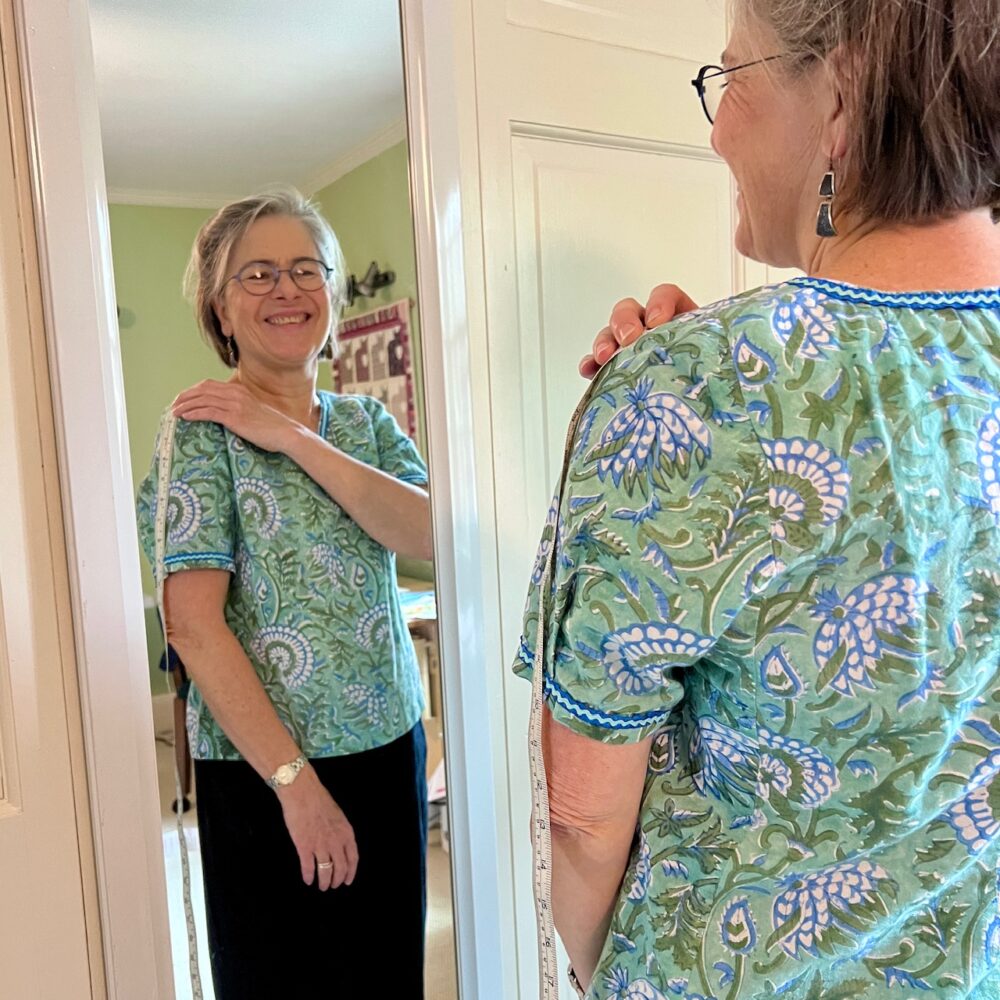
Knowing that she was about to write this blog post, Carrie went about selecting her preferred short sleeve length for a new knit top during construction. If you have enough fabric to cut the sleeves longer than you think you will ultimately want, this is another approach to try. Or if you have an older Tabula Rasa Tee that you like to re-fashion into a short-sleeve knit top, use it!
Carrie started by holding the Knit Sleeve pattern up to her arm to determine a length just above the elbow. She drew a line recording 11” as “finished elbow length” and cut the sleeves out with an extra 1½” for a hem. After the top was assembled, Carrie pinned one sleeve up to 11” and the other to 9 ½” for comparison, then tried the top on. Here you can see the results.


By then she had decided she wanted shorter sleeves and would be finishing the sleeves with a contrasting band, so she cut a few inches off one sleeve to try out still a shorter length. (It had become unwieldy to turn more fabric up inside the sleeve!) The third try, at a finished length of 8”, was just right! A rotary cutter and ruler cut each sleeve to the desired length below the shoulder cap and parallel to the original cutting line.


Keep a Record
Your preferred sleeve length, whether short, elbow, three-quarter, or wrist, is likely to change from project to project. Take the time to record sleeve lengths you’ve used on your Tabula Rasa sleeve pattern. It’s helpful to include notations identifying the garment and date in case you ever want to re-create a style used in the past.
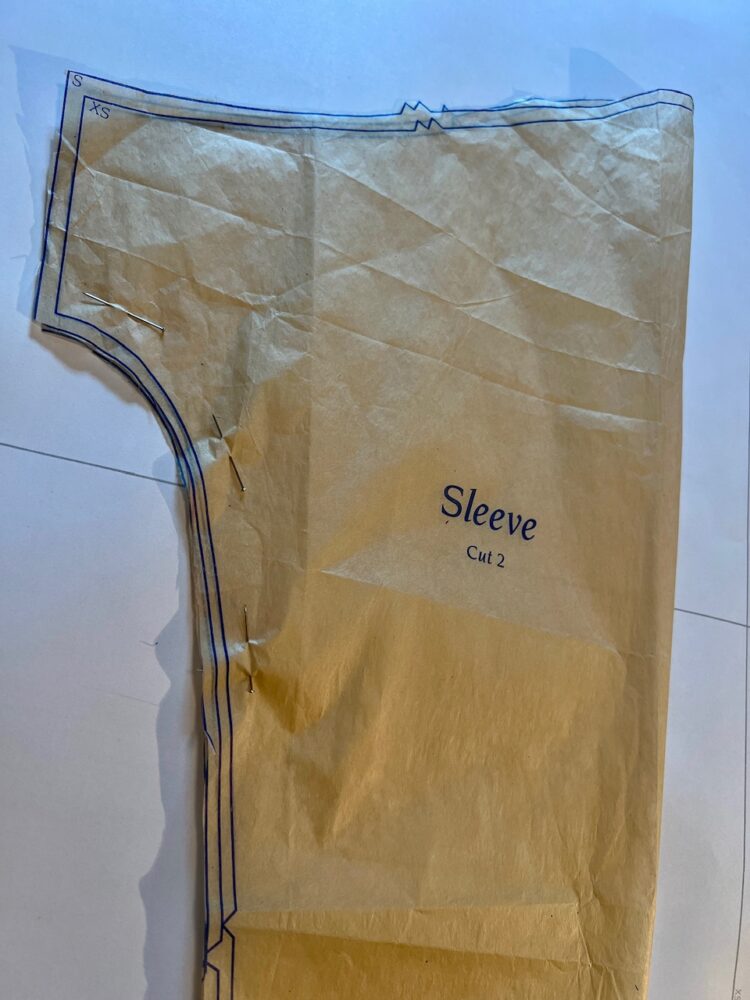
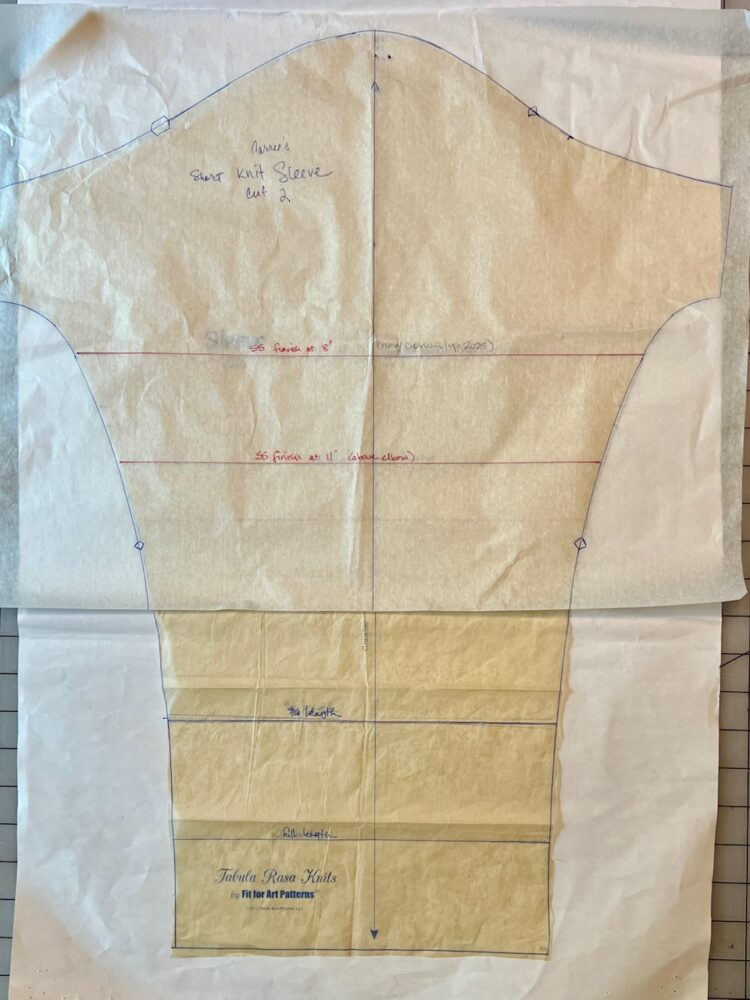
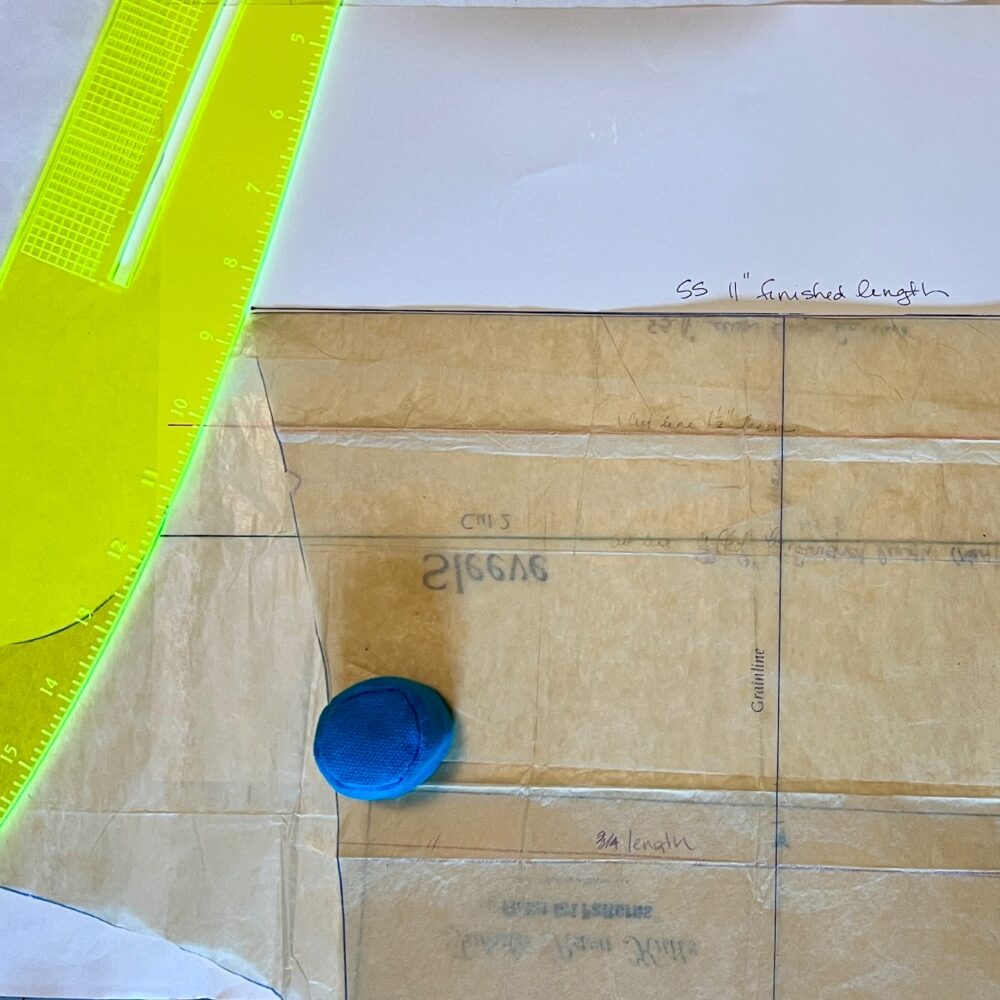
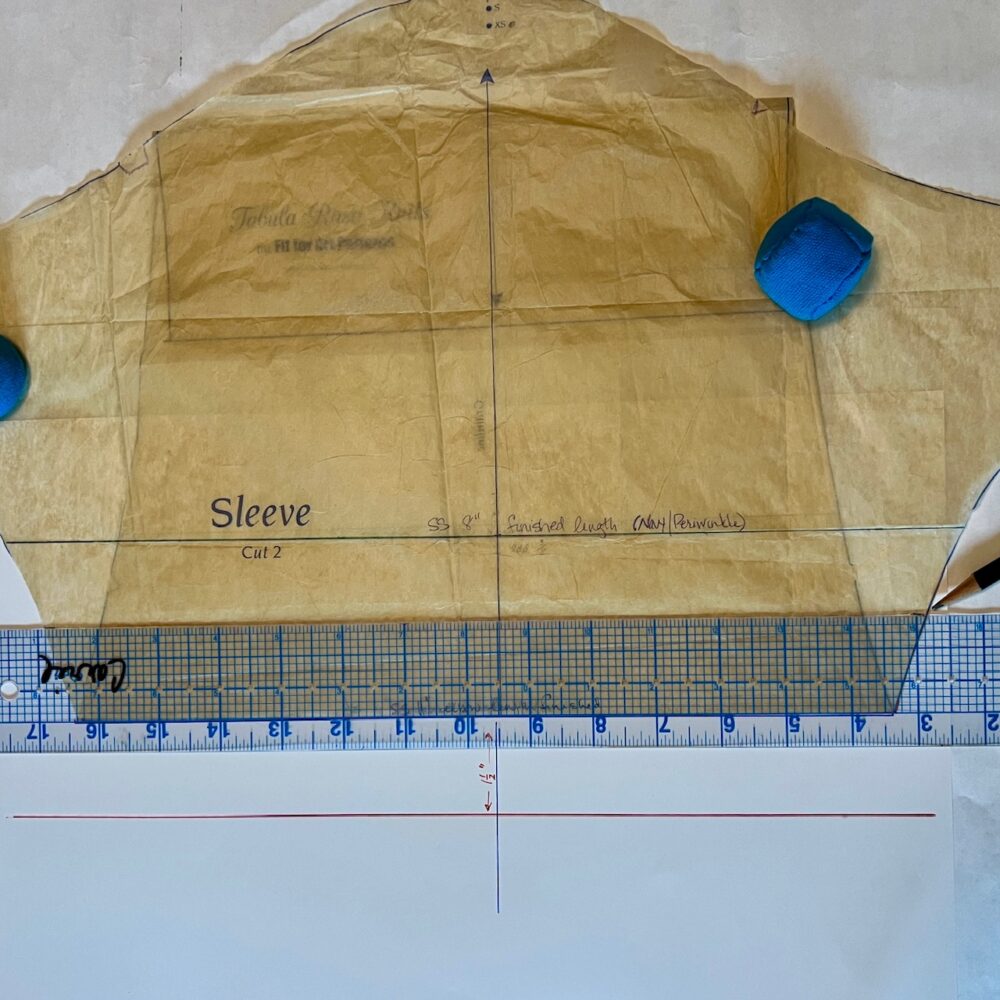
To reduce wear and tear on the sleeve pattern, consider tracing off a partial copy of the sleeve pattern from cap to notches on which to record above-the-elbow finished lengths, as Carrie has here. Use the full-length sleeve pattern to record below-the-elbow finished lengths.
Finishing the Short Sleeved Knit Top
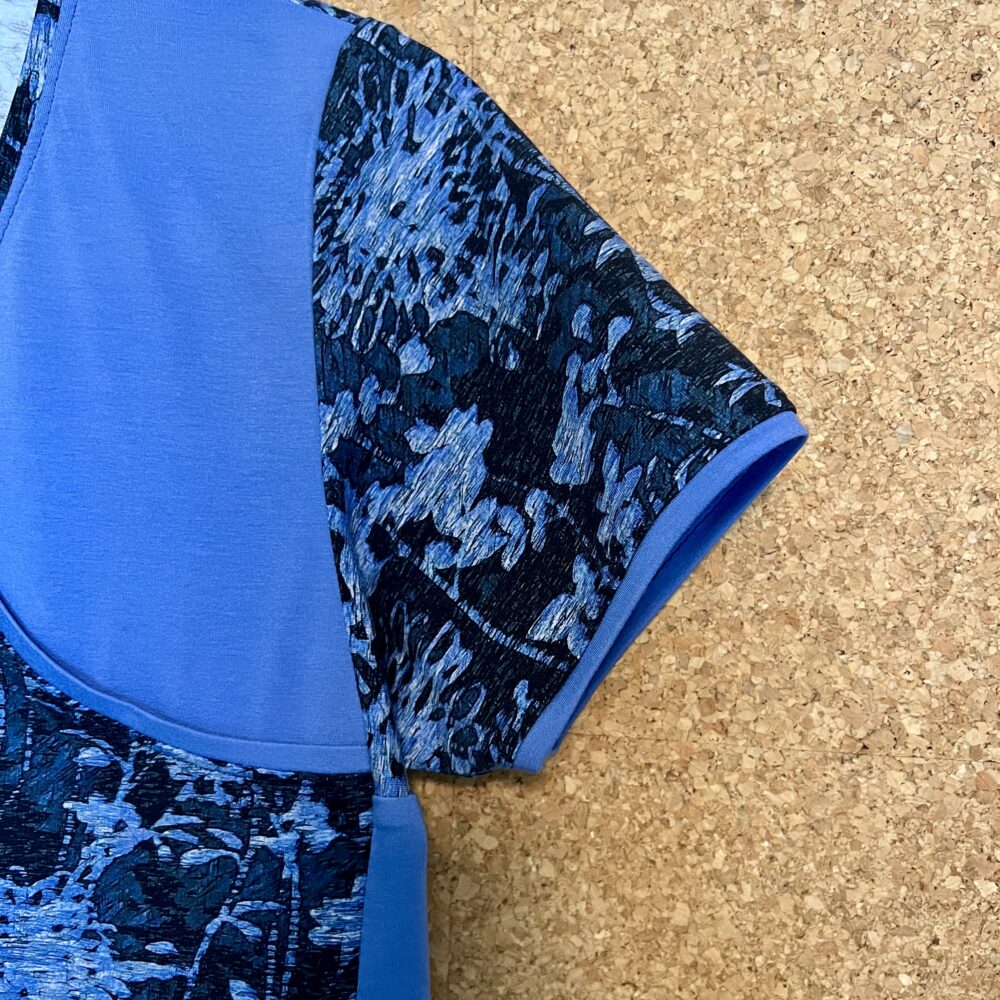
The core Knit Tee & Tunic Instruction book includes directions for finishing a knit top’s full-length sleeves with either a band or turned up hem. For a short sleeved knit top finished with a band, the method is the same. Following the original directions, Carrie measured the circumference of the short sleeve and subtracted one inch to determine how long to cut the band. Each 2” wide band was pressed in half the long way, sewed into a loop with a ½” seam allowance, and applied to the sleeve as described in the instruction book.
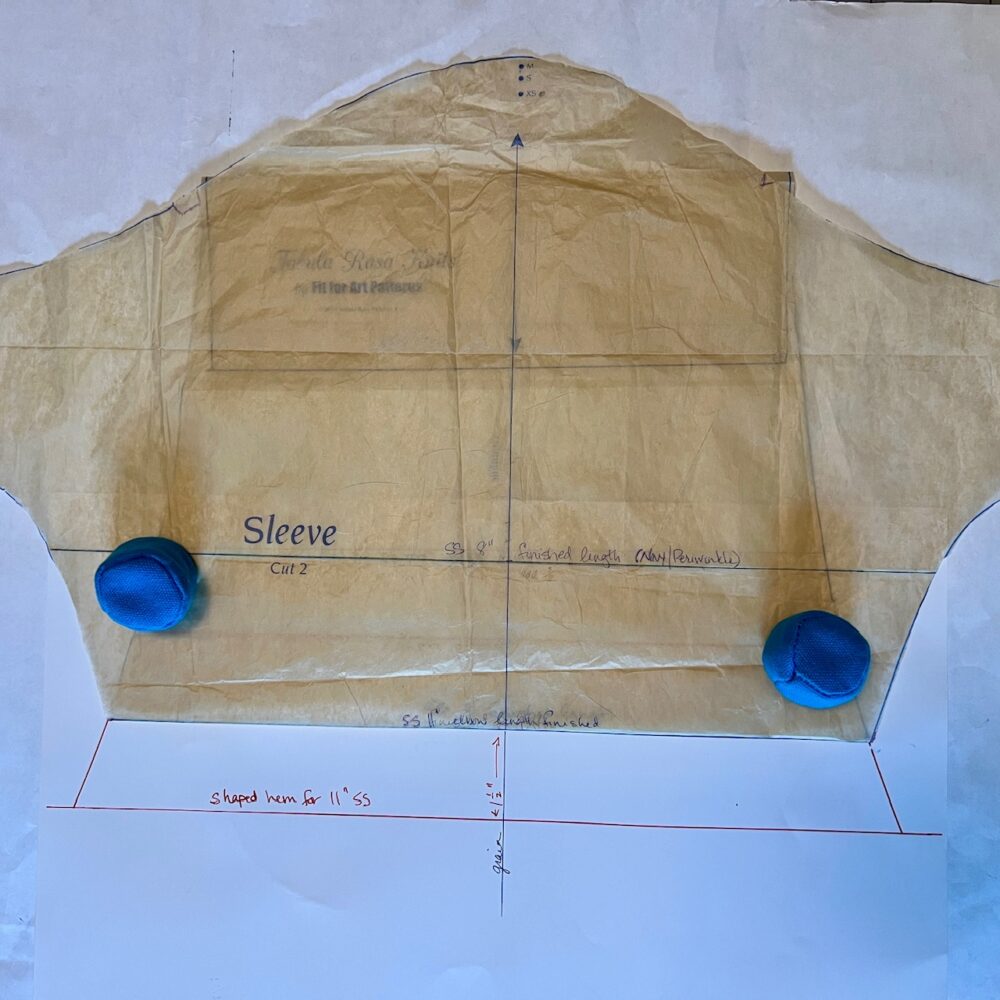
A turned-up hem on a short sleeve, however, requires a bit more advance planning because of the sharp angle of the sleeve’s side seams. The goal is to make sure that the circumference of the sleeve hem matches the circumference of the sleeve at the point where they are joined. Create a short-sleeve pattern with the additional hem length by one of the following methods. Option 2 will result in a wider/looser sleeve.
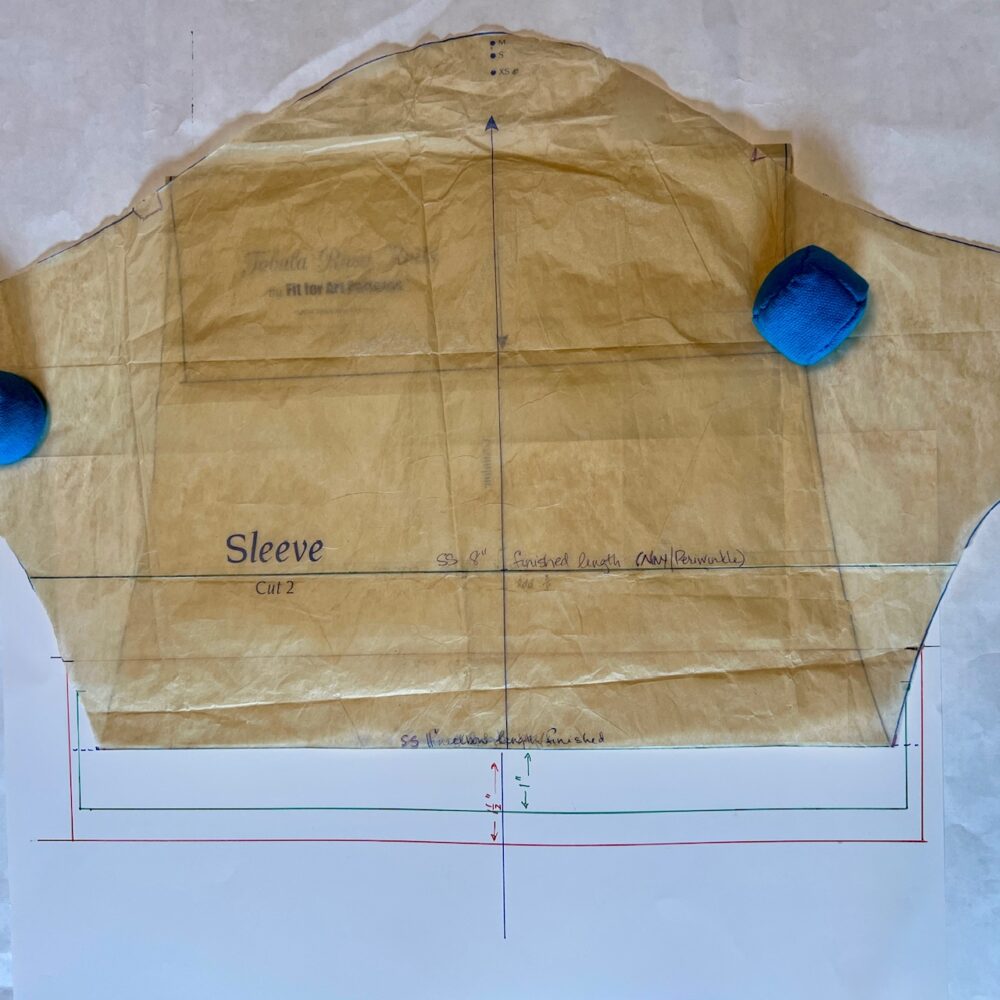
Option 1: Draft a turned-up hem that’s the mirror image of the bottom of the sleeve.
- Fold the sleeve up to the desired finished length.
- Trace the desired finished length line on a piece of tissue/pattern paper, marking the point where it intersects the sleeve’s sides.
- Draw a new cutting line below and parallel to the finished length line the desired depth of the hem.
- Lay the sleeve pattern face down on the paper along the finished length line, then trace the sleeve’s sides onto the paper from the finished length line to the new cutting line.
- Turn the sleeve right side up and pin or tape it to the paper along the finished length line. The new side cutting lines should extend below the folded-up sleeve in a mirror image to the sides above the finished length line.
- Cut away the paper outside the new hem and side cutting lines for your prepared sleeve pattern.
Option 2: Re-draft the sleeve’s side seams to fall straight (i.e. parallel to the grainline) for the distance of the turned-up hem. For example, a 1½” deep hem requires a 3” straight drop, a 1” deep hem requires a 2” straight drop.
- Fold the sleeve pattern up to the desired finished length and pin or tape tissue/pattern paper extending a few inches below and to either side of the hem area.
- Draw a new cutting line below and parallel to the finished length line at the desired hem depth.
- Lightly mark a parallel line on the sleeve pattern the same distance above the desired finished length.
- At the points where the upper parallel line intersects the sleeve’s sides, draw a perpendicular line reaching to the new cutting line.
- Cut away paper outside the new hem and side cutting lines for your prepared sleeve pattern.

Now you’re ready to proceed with cutting out and making your short-sleeved knit top, following the directions in the core Tee & Tunic Instruction book for hemmed sleeves.
Don’t forget that there are some alternate sleeves in Fit for Art’s variations and patterns! For Tabula Rasa Knits, check out the Tulip Sleeve included with Clever Crossing Variations. For wovens, we love the Cap Sleeve included with the Carpe Diem Dress & Tunic pattern. For tops based on the Tabula Rasa Jacket pattern, try the Summer Sleeve from Sleeve & Cuff Variations. It is just about the right length for creating a cuffed sleeve above the elbow, or draft your own pattern as Carrie did for the TR Camp Shirt. Check out our Pinterest page on sewing knit fabrics and Tabula Rasa Knits if you are looking for more ideas.
We hope you’ll find these tips helpful for how to design short sleeved knit top or dress of your own (or short sleeve TRJ or Carpe Diem in woven fabrics). We’d love to see photos, so please post them with #fitforartpatterns, #tabularasaknittee, or tag for whichever pattern you are adapting.
Happy Sewing! Carrie