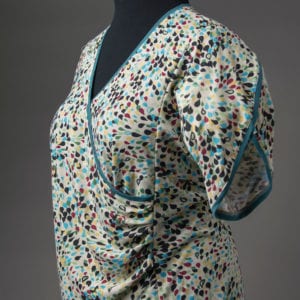
This week features my favorite variation for Tabula Rasa Knits – the Surplice from Clever Crossing Variations. Why do I love this variation? The band is so easy to put on; the surplice is great for shaping at the waist when you want a closer fit; and the overlapping front layers provide several design options for both fabric and hem styles.
Easy Neckline
First of all the neckline can be finished with a simple band or binding, the wider Shaped Band, or the cozy Cowl Neck. They are all applied right after sewing the fronts and backs together at the shoulder, so its a nice open curve – no fussy fiddling to get the band sewed into a loop just the right size for the neck opening. After sewing the band to the neckline, simply finish all the seam allowances together, press them to the inside, and topstitch 1/8″ from the seam to secure all seam allowances.

Fit the Fronts with Pleats
Second, the pleats along the front side seams can be used to adjust the fit and vary the hemline. I typically prefer to make the outer front surplice layer’s hem shorter by adding a few extra pleats. For my Confetti Surplice top, I decided to finish the hem with a band or binding, just like I used at the neckline, in order to frame the print with my solid rayon companion fabric. This option requires the right front binding to be applied to the hem before stacking the right and left fronts together.

The pleats are folded in, using the pattern as a guide; I added 2 more pleats to the right front (hard to see on this dark fabric I’m afraid) and basted them all in place.
Finally, the right and left fronts are basted together along the side seams. I think you can see in this photo that I have trimmed the waistline of my surplice pattern by taking in the side seams of the fronts (as well as the back and side panels). The method described in Adjustments for a Trimmer Fitting TRJ works just as well for Tabula Rasa Knits. However, we advise making your first surplice on the pattern, then basting out the side seams to find the fit you like. Remember, also, that there can be vast differences among knit fabrics that will affect the fit!

Finishing the Hem
After inserting the sleeve/side units, I banded the rest of the hem. When finishing a Surplice top this way, take care to set the left seam of the right front 5/8″ above the left front so you don’t catch the upper layer in the final hem binding.

True confession – I goofed on this top. Here you can see that I caught the right front’s binding in the left front’s binding; luckily it is really hard to see in this navy knit! On the right is a photo of another surplice top finished by this method correctly. It also demonstrates the effect of using a different fabric on the underneath front surplice layer.
Even when you don’t pull the right front hem up shorter than the left front, you still have options for finishing the surplice. In some cases I turn both layers up and hem them together, as in this very lightweight slubby knit. Other times I still hem the fronts separately to allow the layers more movement, as with this blue heather surplice with a shaped band.
More Clever Crossing Looks
We hope you’ll be inspired by the many surplice style Clever Crossing samples in our photo gallery, including shaped bands, such as the Spring Posies Banded Surplice, and cowl necks, such as the Cozy Mohair Sweater. When you’ve got your pattern worked out, you might even be inspired to try a faux crossing in the back as in Rae’s Black & White Surplice!
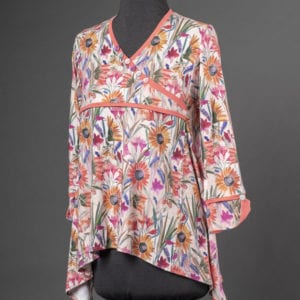
The Clever Crossing Variations pattern offers two additional styles with a crossover look, but only one layer. This is achieved with a front yoke and insert. These styles are super if you don’t want the snugger fit, you want to use a swing side, or you don’t have enough fabric for two full front layers. They are also very handy for combining several smaller pieces of coordinating knit fabrics, as in these samples: Fresh Crossover Yoke Tee and Floral Bouquet. And did I mention that Clever Crossing Variations includes a pattern for a short tulip sleeve? It’s perfect for the hot summer weather which will be here soon; check out tulip sleeve samples in the photo gallery, including this Summer Rain Surplice.


