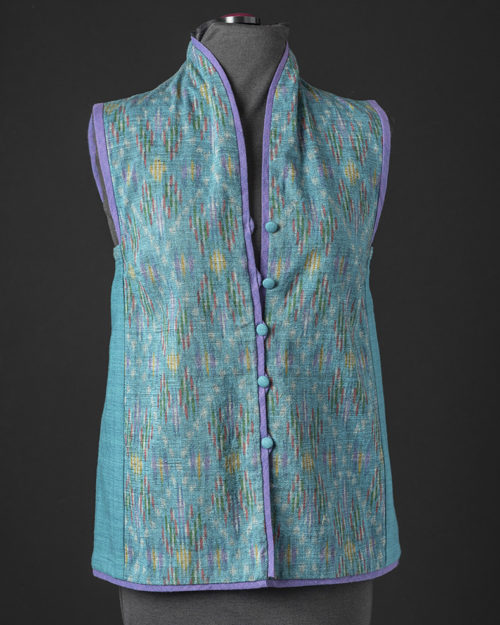
I am a big fan of easy to construct Tabula Rasa Vests! Having been asked several times to write a blog post describing the process for making a fully lined Tabula Rasa Vest, here it finally is. I am going to describe how I made this Funnel Neck Ikat Vest with a bagged lining. Detailed instructions for making a vest with your Tabula Rasa Jacket pattern are included in Swing Variations for the TRJ and also in my blog post Batik Butik Vest, so please to refer to these sources for basic vest construction. (See additional Tabula Rasa Vests in our photo gallery.)
Prepare and Assemble Layers
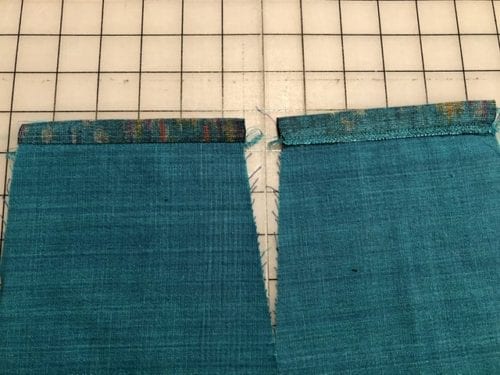
I began by assembling the outer, fashion fabric layer of the vest (in this case, cotton ikat), and the inner, lining layer of the vest (cotton batik) separately. For both layers, remember to finish the top edge of the side panel before sewing the side panels into the vest front and back. For the fashion layer, I bound the underarm with a piece of the ikat. For the lining, the raw edge of the side panel was simply turned under 5/8” and pressed.
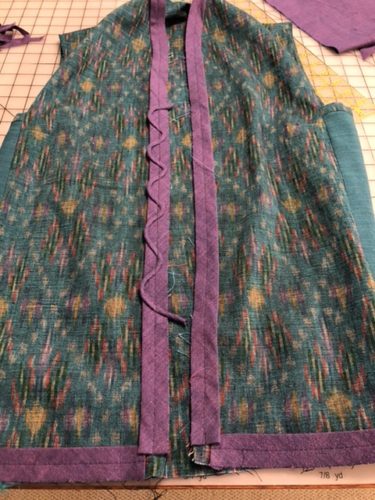
While inserting the lining is not difficult, it does require advance planning to make sure the steps for inserting and finishing the lining are executed in a logical order. For a bagged lining, any details that are to be enclosed between the layers must be finished before attaching the lining. For the Funnel Neck Ikat Vest, this meant I needed to attach the piping along the center front, neckline and hem and the button loops to the fashion fabric layer before inserting the lining.
Sew Lining into Fashion Vest
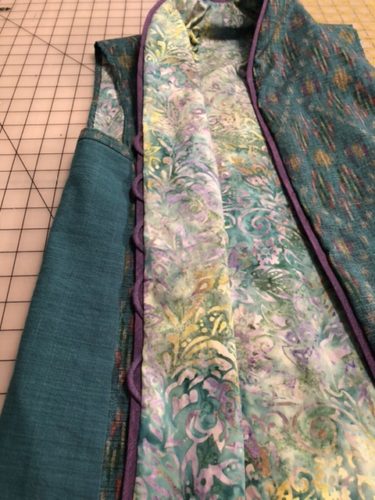
After all those details were completed, the vest lining and fashion fabric vest were pinned together all around the outer perimeter, right sides together, and then stitched. The armholes are not finished at all at this point! Turn the vest right side out, pulling it through one of the armhole openings, to check your work. If all is well, turn the vest back to the wrong side to trim and grade the perimeter seam allowances, then turn right side out again and press firmly.
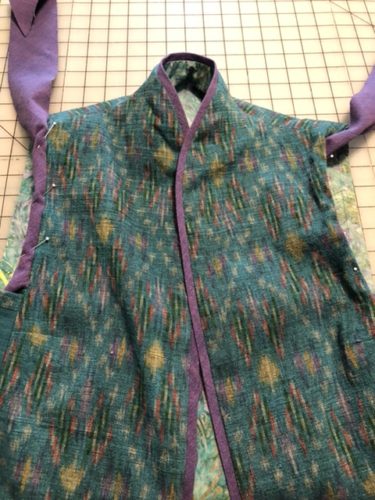
Next, I bound the armhole openings using the extended shoulder method described in Swing Variations and the Batik Butik post, capturing both the fashion fabric and lining layers inside the binding.
Finish Armhole
Finally, the ends of the binding were tucked between the outer and inner layers below the armhole opening. The vest was finished by hand sewing the top edge of the lining side panel to the top bound edge of the outer fashion side panel.


Vest with Kimono Band
The steps for inserting a lining would be slightly modified if you are putting a kimono style band on the vest rather than choosing a center front closure. After the inner and outer layers are prepared, insert the lining into the fashion fabric vest wrong sides together. Hem the layers and add the band as directed in the basic Tabula Rasa Jacket Instructions steps 9-11. Lastly, bind and finish the armholes in the same way as directed in the preceding paragraph.
Have you found another method for lining the TR vest? We would love to hear about it and to see photos of Tabula Rasa Vests you have created!
Happy Sewing, Carrie