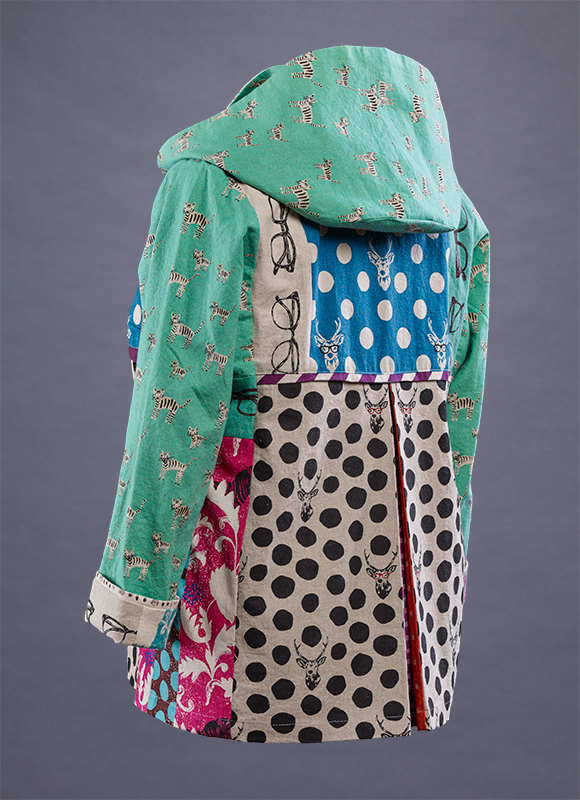
A detachable hood is the perfect accent for a spring coat like the It’s a Spectacle Jacket we have been considering for the last two weeks.

(Week one was about designing the jacket, week two took a close look at the zipper and collar details.) It’s easy to see the engineering on this hood because it is made with coordinating fabrics. The pattern pieces and basic hood directions are in Rain or Shine Variations for the Tabula Rasa Jacket. We will now take a look at some of the finer points of hood construction so your detachable hood will be as successful as this one.
If you have a directional print like both of the fabrics in this hood, you need to cut each brim in two pieces. Add a seam allowance above the fold line on top of the brim pattern piece before cutting the fabric.

Once you have cut out and stitched together each brim, fuse a strip of interfacing along the shaped edge to give the hood some support. This heavy cotton/linen blend fabric has plenty of body so I chose to interface the top of the brim only.

It is a bit tricky to connect the brim to the hood’s crown since they are competing arcs. Pin the two together first before stitching, matching the notches. As the directions recommend, be sure to leave an opening in this seam on the hood’s lining so you can turn the finished hood right side out when it has been completely finished.

Before you stitch the hood to its lining, form some loops around the neck edge of the hood so it can be hooked to buttons along the coat’s collar seam.

Consider the hoods neck edge, the length of the collar seam, the size of the buttons, and the weight of the fabric as you determine how many buttons and loops you need to anchor the hood in place.

On this coat, I used five ½” buttons and loops made from elastic cord. The cord was vintage, but it still had plenty of stretch.

Our final topic which perhaps should have been mentioned sooner is the interior finishes on the coat itself. Because I wanted to keep this jacket light and to use it as a teaching sample, I did not add a lining. I would normally line a jacket pieced in so many places, but instead, the seams have all been finished with a 3 thread overlock on the serger and pressed to one side.

The facings and hems are also finished with a simple overlock stitch except for the back facing which has a selvage edge attached for a fanciful finish. I anchored the seam allowance of each inseam pocket into the front facing to keep them from flopping around.

There are so many options for finishing the inside of a jacket and many of them are outlined in Seam Finishes, which you can also reach through our website page Helpful Hints for Jackets. If you are planning on attending the Atlanta OSQE, I am teaching a seam finishes sampler class and there are still a few spaces left. This class is a great way to learn about the hows and whys of a number of great seam finishes which will all work in your Tabula Rasa Jackets. Hope to see you there!
Happy Sewing, RAE


