I hope that you have been thinking about, and perhaps even playing with some fabrics, for your own pieced jacket as I suggested in last week’s post. This is the second week of conversation about the pieced blue scarf jacket that received so many compliments during our fall appearances. Read last week’s post if you haven’t already before you dive into these instructions for putting a scarf band onto an unlined Tabula Rasa Jacket (TRJ).

These instructions assume that you are using the serger rolled edge exterior seam construction which we discuss in detail in Swing Variations for the Tabula Rasa Jacket. As I mentioned last week, if you don’t have a serger, use French seams on the inside of the top and baby hems for the finishes. Read about French seams on the Seam Finishes page located in our Helpful Hints. Step by step instructions for a baby hem can be found on page 6 of the Swing Variations pattern. When you have completed the top’s construction, proceed as follows.

Put on the top to determine the location of the hemline and the point where you want the scarf to tie on your body. The scarf will be attached to the TRJ above this point and will hang freely below this point. Just below your bust line is a good choice. Mark the hemline and the scarf attachment point with pins and take off the top. (If you are having a hard time deciding where to end the scarf, skip to the next step and stitch the center back seam of the scarf so you can drape it around your neck while you have the unfinished TRJ on your body to play with the scarf tie’s placement.)
Prepare the hem by trimming away all but ½” below the marked hemline. Clip ½” into the center front seam allowance at the scarf attachment point. Finish the hem and each center front from the hem to the clip using the rolled edge setting.
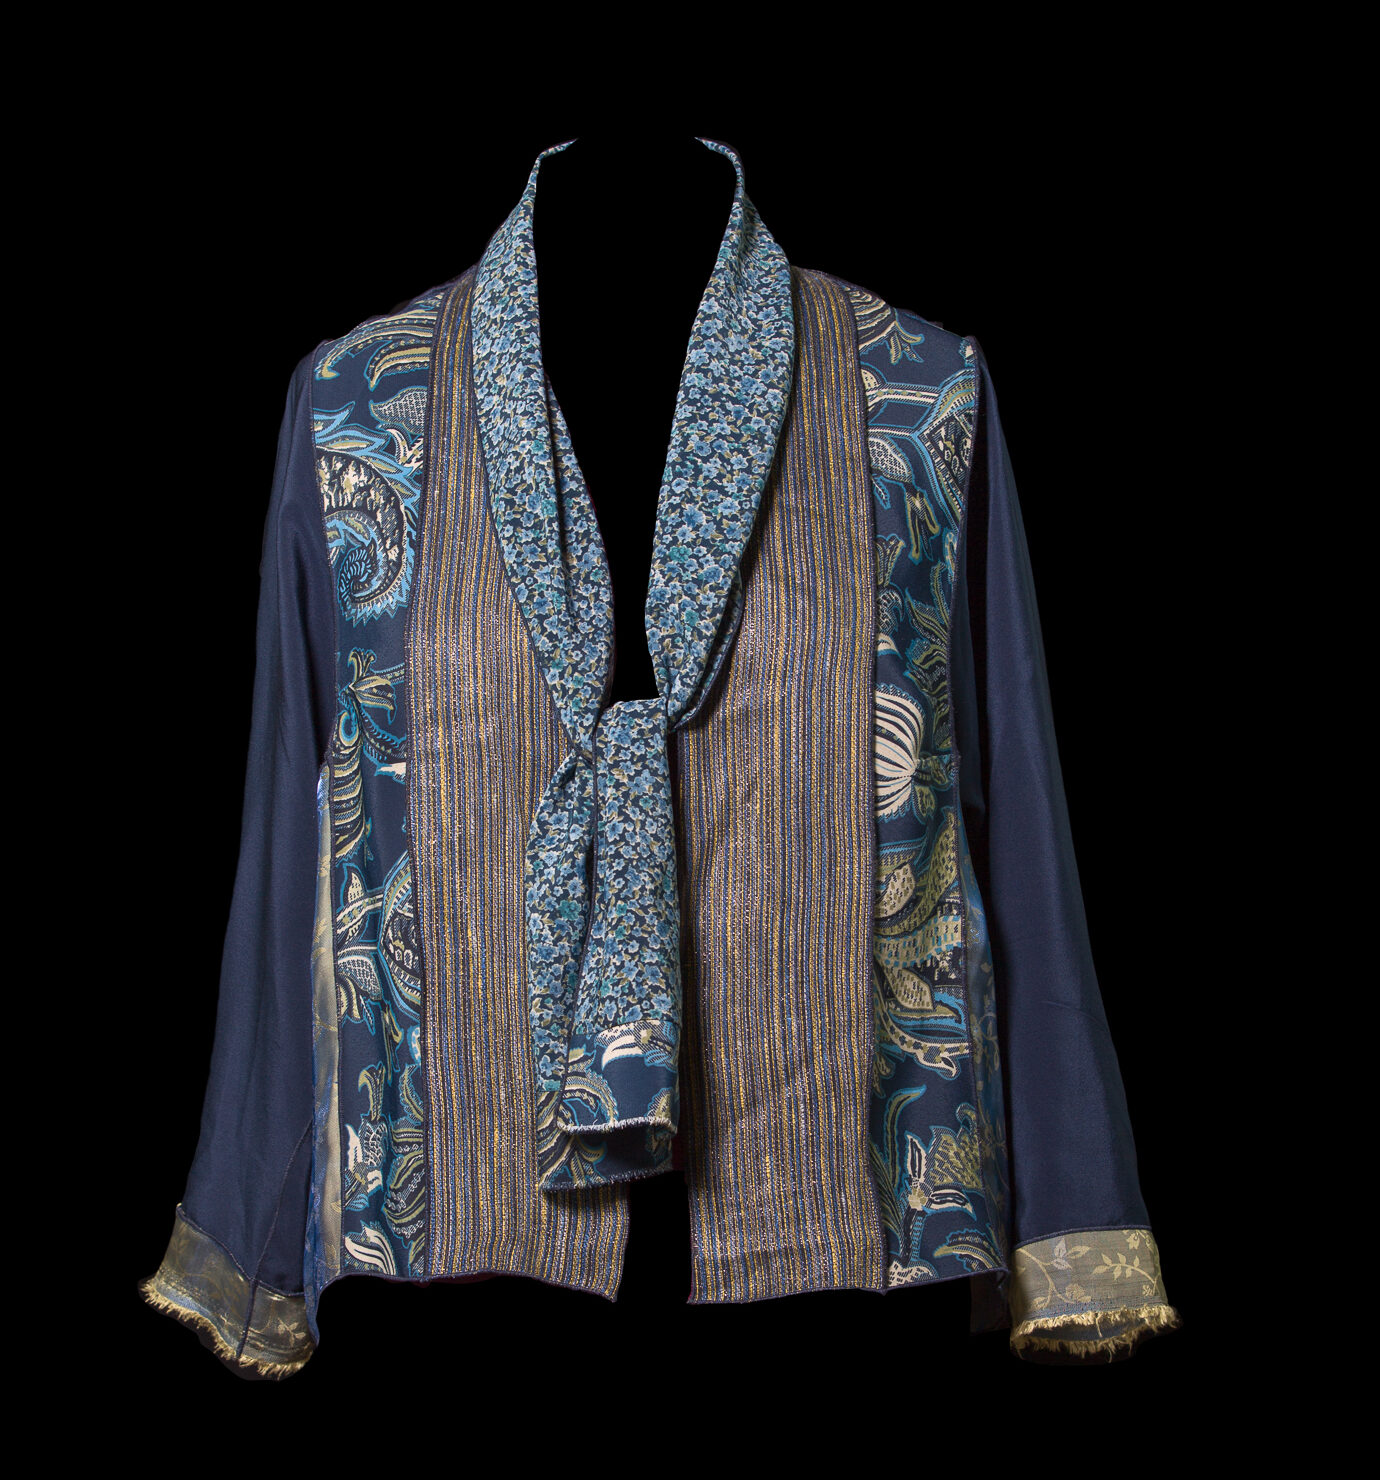
Prepare the scarf by stitching it together at the center back with a rolled edge finish or a French seam. Choose a hem finish or rolled edge to finish each end of the scarf. On the blue top, I chose to add a piece of paisley print selvage to each end of this band (repeating the exterior seam with the serger rolled edge technique). It extended the sleeve length and allowed the large print to be repeated in one more place.

To attach the scarf to your TRJ, match the center back of the scarf to the center back neck of the top with the wrong sides together. Pin the scarf to the top starting from the center back, around the neck, and ending at the clip on each side of the center front. Using a 5/8” seam allowance, stitch the scarf to the top between the clips. Finish this seam at the same time that you finish the loose edges of the scarf. Here’s how: begin at one hem, carefully rolling the inner loose edge of the scarf; continue around the seamed edge of the neckline and then roll the remaining scarf extension to the other hem. The last step is to finish the outer edge of the scarf with a rolled edge.
If you are using French seams on the inside and baby hem finishes, the process is a bit different. Attach the scarf to the TRJ using a French seam. It will be easier if you clip into the seam allowance of the scarf on each side where it joins the top. Use a baby hem to hem the scarf ends and the outer edge of the scarf.
Try the top on and admire your handiwork. Make sure you are happy with the width and length of the scarf, the hem length and the rest of the fit. Make adjustments if necessary.
Your top will need a drop of liquid fabric sealant on each serged rolled edge tail. Make a test sample of the sealant on your fabric to make sure it does not discolor after it is dry. Carefully apply a small drop on the jacket where each rolled edge thread tail originates. Let it dry completely before you trim off the tails. If you like, add a couple beads at each end of the scarf for both weight and drama. We will talk about making these beaded accents in a future blog post, so stay tuned.
Post your fabric groupings on our Facebook page so that everyone in the Fit for Art community can see what fun jackets you are planning!
Happy sewing! RAE


Rae-
Years ago I learned about a “neat” trick for a”dab of seam sealant” from Cynthia Guffey that could be useful for your readers: take an old discarded machine needle and “dip” or roll the eye into a pool of sealant. Use the needle loaded with sealant to place the “dab” where needed. The elongated eye of a machine needle picks up enough sealant to be useful and gravity –plus the graduated shape of the needle point–allows the tiny blob to land where it’s intended. Try it.
Thanks Marijo, That is an excellent suggestion, thanks for sharing Cynthia’s excellent tip. I will certainly use that method next time I am sealing my thread tails.