Welcome to Sew! Let’s Get Dressed, a weekly blog that encourages you to sew successfully.
When I have a special motif or a fabric treasure I want to feature I often use the sashing technique. It has been used successfully in several silk Tabula Rasa Jackets (TRJ), one of which was featured in Threads Magazine last year.
As I taught my Stash Busting Fashion Piecing class this year, I have encouraged folks to try this piecing technique in cotton first. Trouble was that I did not have a sample in cotton to show my classes. When I discuss this technique at Sewing Expos this fall, I will be prepared.
I am happy to share with you the process I followed to make this cute sample using this easy technique.
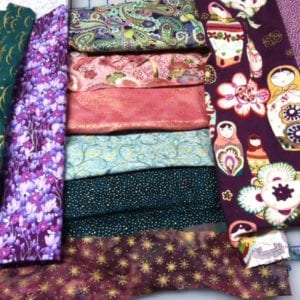
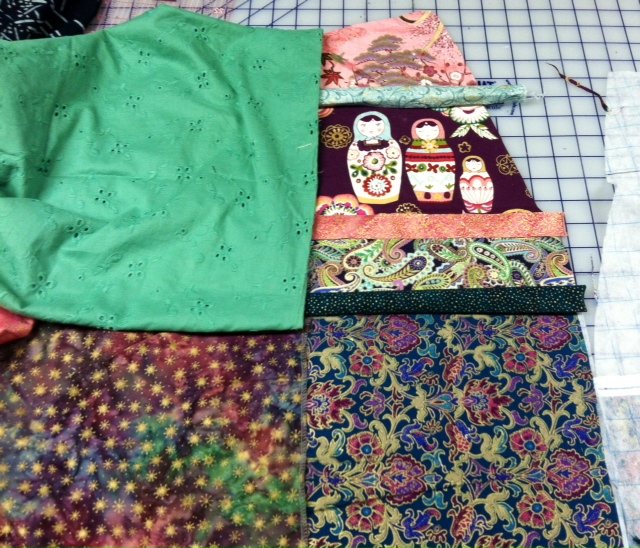
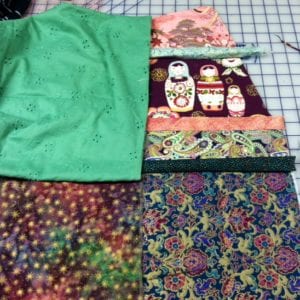
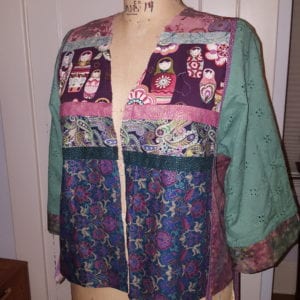
To build a sashed cotton TRJ, I collect a group of coordinating fabrics, some with bold motifs and some with small overall designs or textured solids.
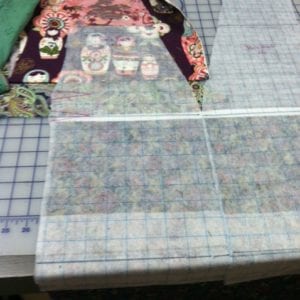
Using my gridded Pellon pattern pieces, I cut the large motif fabrics into pieces that just butt up against each other to fill the pattern. No seam allowances are needed. The sashing strips will connect the pieces.
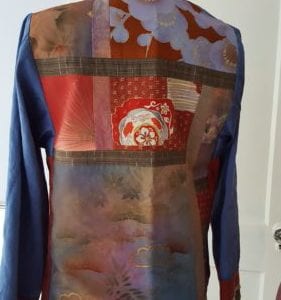
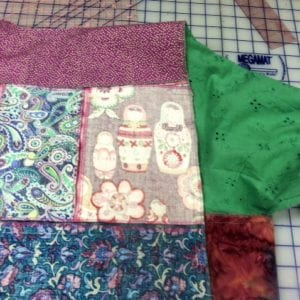
In an effort to keep it simple, I used a symmetrical design of horizontal pieces. In the back, I divided the two top horizontal pieces into vertical sections for added interest.
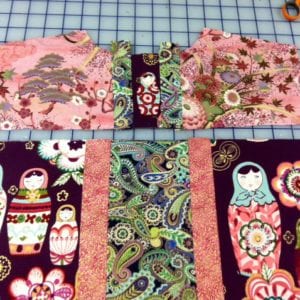
When each gridded Pellon piece was covered with fabric, I cut the sashes. Each sash was cut on the straight of grain 2” wide by the length needed to connect the pieces. I checked the composition by laying the sashes in place on the fronts and back. The sashes are cut from small prints or solids and give definition to the decorative pieces. I think it makes a very pleasing composition.
Have you noticed that the design is softly colored at the shoulders and gets progressively darker as it moves down to the hemline? I hope this will be slimming.
Each vertically pieced back section was sashed first, then the horizontal sections were sashed together. One-half inch (1/2″) seams are used to connect the sections so you end up with a one inch sash dividing each fabric piece.

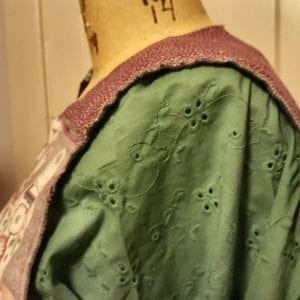
Once the two fronts and the back were completely sashed, I laid the pattern on top and trimmed away any extra fabric before inserting the flat piping and constructing the jacket.
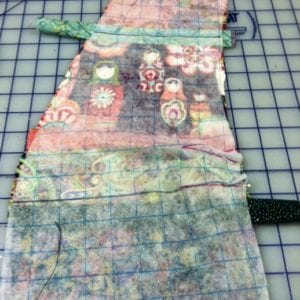
A peek inside shows you the process. Note that the sashing seams are serged in pink and the construction seams are serged in green.
I hope to get the jacket hemmed and the band completed this week during the retreat. Keep an eye on Facebook and Instagram for an update.
If you are attending one of our fall expos, be sure to sign up for the Stash Busting Fashion Piecing class so you can get a close look at the sashing process. We are looking forward to meeting up with old friends and making new friends in Cincinnati, Fredericksburg, and Novi at the Original Sewing and Quilt Expo. Plan to join us!
Happy Sewing, RAE
PS, We know most of you cannot be at our retreat this week so we invite you to visit Facebook to see a video that captures the insertion of the interior shoulder facing into this jacket before construction.
Enjoy receiving our blog? Sharing is caring, so forward this post to a friend by clicking on the Forward link at the upper right corner of your e-mail notification. Remember that the beauty of the Fit for Art System is you can sew successfully with endless variations. Take a moment to review our variation patterns offered by clicking here. Also, are you following us on social media? Take a moment to check us out on Facebook and Instagram and follow the hashtag #fitforartpatterns and #sewsuccessfully.


Lovely Rae! Thanks for the great tips. BTW, thank you as well for connecting me to Cherrywood. I had a great conversation with Linda today and hope to tour this amazing dye house in Brainerd, MN next year.
Cherrywood has great stuff and they are very fun women rocking the world. We have two students at Retreat this week who are working on the Cherrywood Vines and Leaves Jacket. It is so lovely! RAE