A couple of years ago, Rae made a tee with a twist at the front hem and one at each sleeve hem. She did lots of searching online to try and figure out how to adjust a pattern to accommodate a twist, but once she made the navy tee, she really liked it. Trouble is, it requires fabric that looks the same on both sides, so the twist looks right all around. Rae is not one to make a solid color shirt, so fast forward to this summer in her French studio where she took a damaged remnant from a recently discovered fabric store, and whipped up another twist front top with plenty of photos. Here she tells you how easy it is to sew a twisted tee.

Because I had left my beloved navy twisted tee in Baltimore due to overstuffed suitcases, I was wishing for it as the weather turned a bit cooler. The red remnant recently added to the fabric shelf seemed like a good candidate as it was a little beefier than the rayon/lycra fabric used in my previously twisted tee and it was the same color on the inside and outside of the fabric. It would also pair well with my very mended jeans which have some red accents.
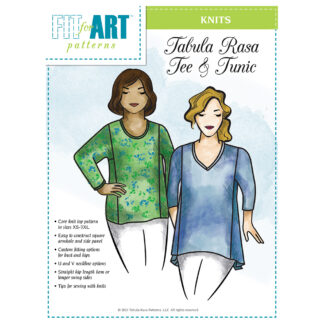
First I adjusted my Tabula Rasa Tee shirt pattern for the twists and used the V neckline template which works nicely with the center front seam created by the twisting. I decided this tee would be a bit longer and have longer ¾ length sleeves than the one in my drawer at home, which is a bit short in the front.

Using the front Tru-Grid Pellon pattern made from my Tabula Rasa Knit Tee and Tunic pattern, I began by shifting the center front (shown with a dashed black line) so a seam allowance was added. I also tipped it out a bit so there would be extra fabric to accommodate the twist in the fabric at the center front hemline.

Once this pattern piece was cut on the fold, the darts were marked as well as the 3” twist at the center front. Remove the pattern piece and while still folded, cut along the center front from the neckline to the top of the twist, which in this top was marked 3” up from the lower edge.

Finish the front hem that will be incorporated into the twist. This top’s hem was clean finished on the serger and then turned under ¼” and stitched down. The center front seams and top edge of the twist were also finished with the serger, then just the curve was turned under and stitched down.


Now fold one side of the shirt down and then back up and around to create the complete twist. Pin and then sew the center front seam, starting at the neckline and moving down to within ½” of the bulk of the twist. Press the seam open.

Check to make sure everything is aligned then, working from the front, machine or hand-tack the fabric edges between the seam and the twist.

Stitch the darts in place and now sew the front to the back at the shoulder seams, remembering to put a bit of light weight interfacing along one side of each shoulder.
Making the sleeve pattern is a bit more complicated because the sleeve has different shape to the front and back. On the pattern paper I drew the front with the center line marked, then shifted the pattern and drew the back with the centerfold marked 1¼” away from the front’s fold line. Each sleeve is constructed in the same method as the front. Check out social media this week to watch the sleeves come together.

You can see from the photo, I added a good bit of extra width where the hemline would twist. It turned out that this extra fabric was not needed on either the front or the sleeves. Fortunately, I could just sew a deeper seam in the underarm of each sleeve and in the sides to front seams, to remove the excess. A twisted garment with stretch needs to fit pretty closely or it will look odd.
Now construct the top as you would normally. To finish the hems, I used a small hem all around each sleeve and then went back and turned it under again so the ivory serging would not show.

On the body of the tee, I eased the hem to ¾” around the sides and back, allowing the twist to hang a bit longer in the front.


After everything was finished, it seemed prudent to set the twist with a little tack at the hemline to keep things tidy which is always my preference.

Use your personalized tee pattern to make one for yourself.
It is the perfect little detail on a solid color shirt, adding a bit of weight and style to an easy to wear Tabula Rasa Knit Tee. If you want a more pronounced twist, make the amount of fabric to be twisted deeper. I used 3” here but you could use a 4” or 5” twist for a much more dramatic detail, especially at the hemline.
Have fun playing with knits! RAE


