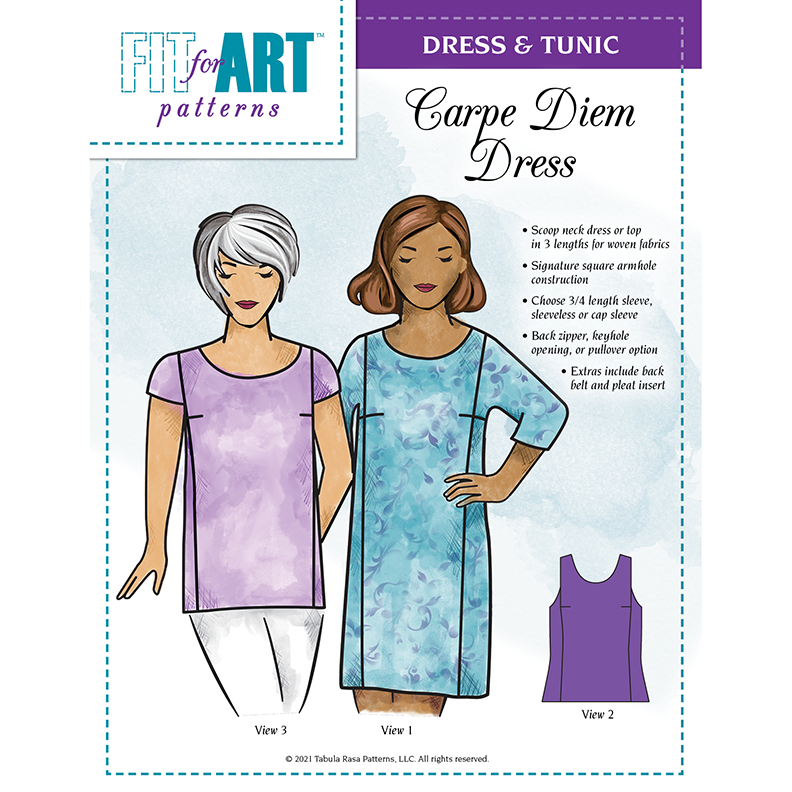
We hope you caught last week’s release of our new core pattern – the Carpe Diem Dress & Tunic. In today’s post we share many of the great details of the Carpe Diem Dress & Tunic pattern to start you dreaming and planning your dress and tunic wardrobe.
This pattern includes 3 views, 3 lengths, 3 ways to finish the back neckline, and 2 optional details. No wonder it took us so long to bring it to market! Let’s take a closer look.
3/4 Length Sleeve 
Cap Sleeve 
Sleeveless
Three Views
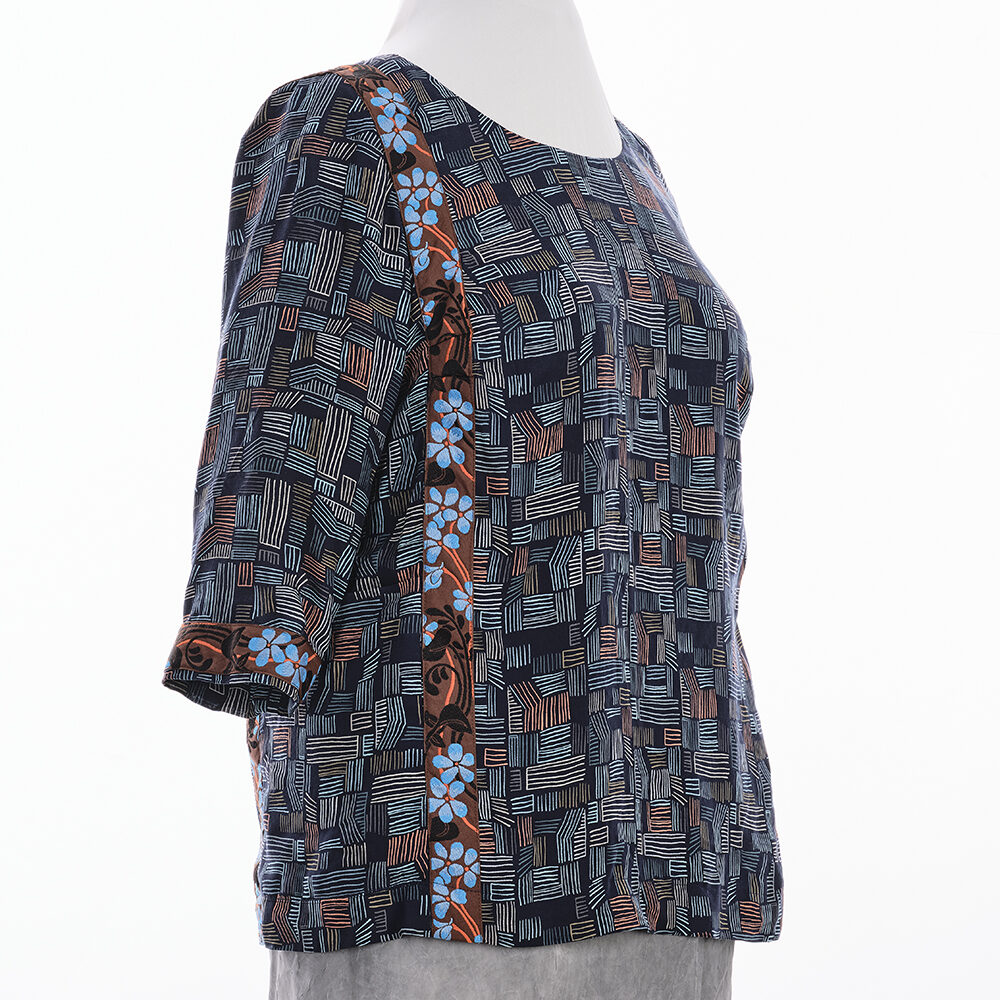
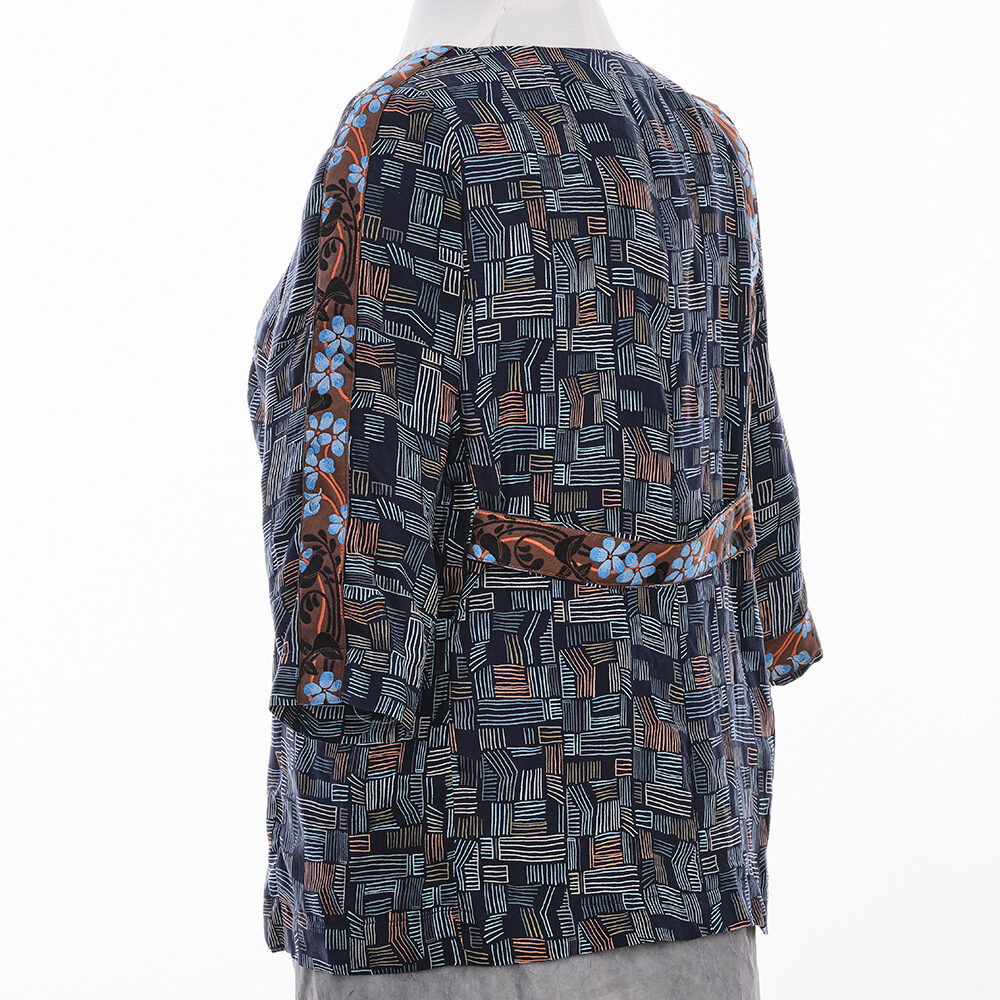
View 1, with a ¾ length sleeve, follows the same square armhole construction as the Tabula Rasa Jacket and the Knit Tee & Tunic with which many of you are already familiar. This sleeve is a little more tailored and has a bit higher sleeve cap than the jacket, but is still easy to insert. Of course, we can never play it straight for more than one garment, so here are a couple of sleeve riffs to inspire you.
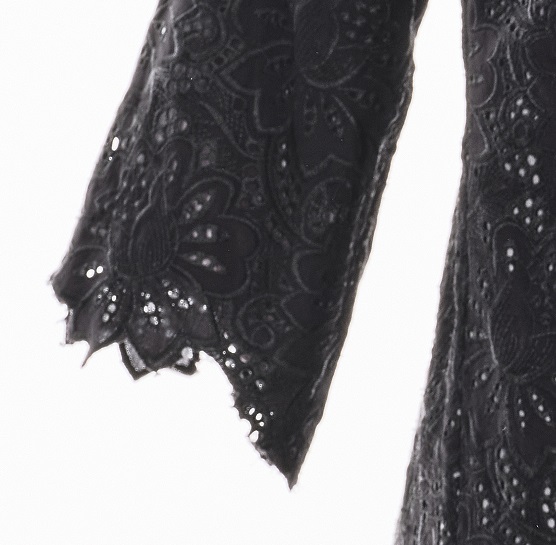
Black lace dress
sleeve detail
Collaged and Painted Tunic sleeve detail 
Sizzling Crop Top
sleeve detail
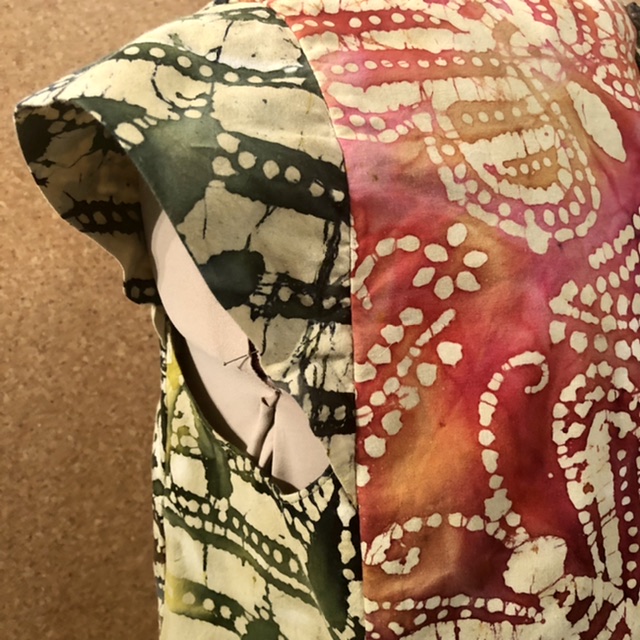
View 2 is sleeveless, so there is a higher and more shaped side panel to fill the square armhole area. View 3 adds a cute cap sleeve to the sleeveless side. For both views, the top edge of the side panel is finished with a facing before inserting it into the dress, simplifying the process of facing the front and back. The cap sleeve is cut on the bias and inserted into the shoulder before adding the sleeveless side which results in a charming finish with the sleeve and side crossing each other.
Cap sleeve on
Butterfly Batik Tunic
Cap sleeve on Nightgown 
Cap Sleeve with pintucks
The order of construction is different for all 3 views. Take the time to read the instruction book through for the view you are working on before launching into your project. We have several blog posts planned to walk you step-by-step through some of the construction differences, so look for those over the next few months. Check out the many samples in our Carpe Diem photo gallery.
Three Back Finishing Methods
All views of the Carpe Diem are finished at the neckline with facings. Many sewists will opt to slide the modestly scoop necked Carpe Diem tunic over the head. The scoop neckline can also be made lower and wider by following the seamline but moving it out by a few eighths of an inch. Sew up a test sample to make sure you haven’t gone too far! When you transfer the new neckline to your pattern, adjust the shoulder seams as needed to match.
For a longer dress or more fitted garment, or if pulling a top on is uncomfortable, we provide options to make it easier. The center back seam allows installation of an invisible zipper for easy on and off. Alternatively, leave a keyhole opening in the center back and finish it with a button and small thread or fabric loop. Illustrated directions for both options are included in the instruction book.
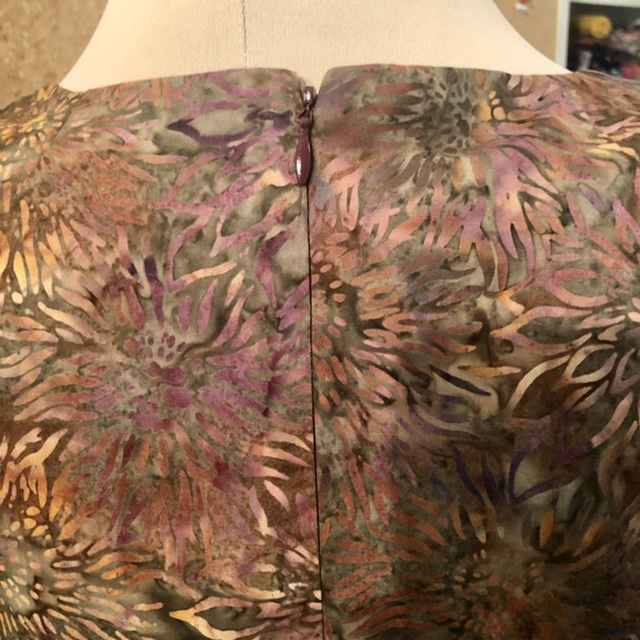
Close up of zipper closure 
Close-up of Keyhole opening and button 
Inside view of Sleeveless Facings
Three Lengths
The pattern is designed with 3 cutting lengths for a tunic (great with Eureka Pants), an above-the-knee dress (or consider it an extra long tunic to wear with leggings), and a below-the-knee dress. As always, we encourage you to test the pattern in a mock-up and tailor it to your own preferences. All 3 cutting lines provide an easy place to lengthen or shorten your dress or tunic, as do the Horizontal Balance Lines (HBLs). In the photo gallery, you’ll even find samples where we have used the pattern for short cropped tops and tank tops; the lowest HBL can be a good guide for creating a cropped Carpe Diem pattern.

Dress Length 
Tunic Length 
Cropped Top
Two Optional Details
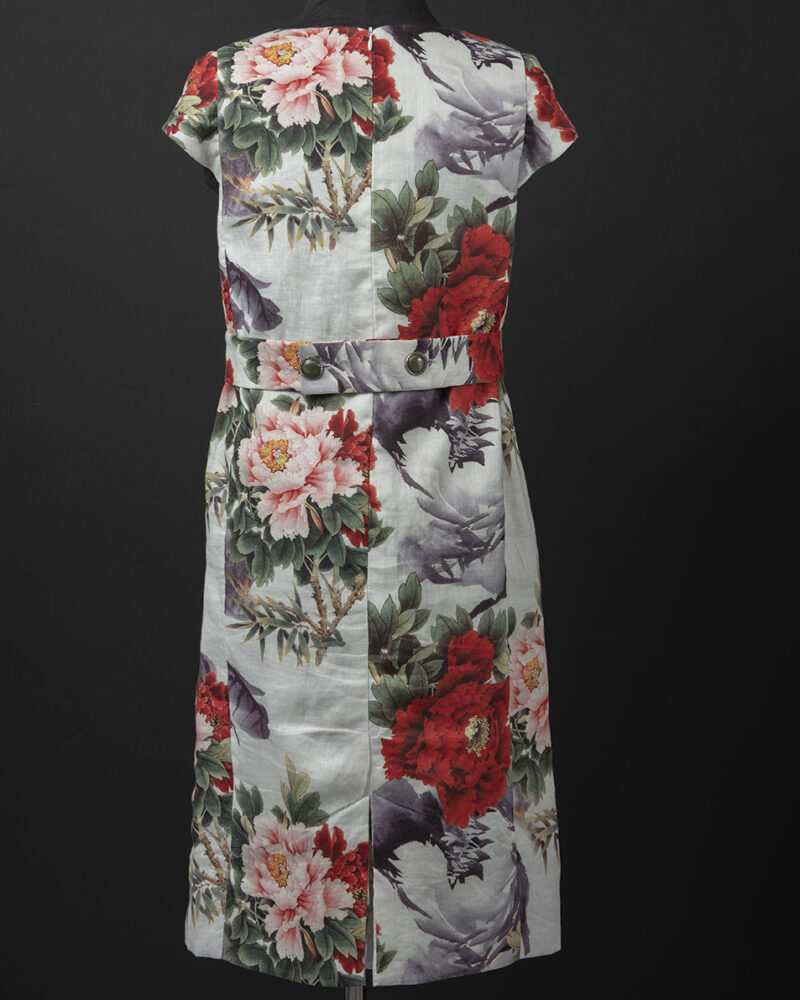
Because the dress drops straight down below the hips, we’ve added an optional center back pleat to provide ease in motion in a longer dress. In this sample, the pleat is in the same fabric as the dress, but I can’t wait to try one with a contrasting fabric peeking out the back!
A second optional detail for shaping the Carpe Diem in the torso area is a simple back belt. Follow our instructions for inserting the belt into the front/side seams and crossing at the small of the back. This is a great place to add interest with contrasting fabric, trim, buttons or a buckle!
We can’t wait to see what you create with the Carpe Diem Dress & Tunic! Please share your dresses and tunics on Instagram or Facebook with the hashtag #carpediemdress and #fitforartpatterns so we will all be inspired! If you don’t use social media, please send us your photos at info@fitforartpatterns.com.
Thanksgiving Gratitude
As Thanksgiving approaches, we hope you will indulge us a minute to highlight a few of the things that Rae and Carrie are so grateful for in our lives and work:
- All of you kind and generous sewers who inspire us to keep creating.
- Our families who support us and don’t complain about the many hours we work, especially our spouses who welcome us home with delicious meals.
- Returning to a world in which we can meet and teach you in person.
- Having finally launched the Carpe Diem Dress & Tunic pattern, and your enthusiastic response.
- The supporting players who helped us create the Carpe Diem: digital pattern expert Madeline Stage of Goheen Designs, graphic designer Alison Cooper of Alison Cooper Designs for the instruction book, envelope and much more, photographers Chris Armstrong and Teresa Castracane, SublimeGrafx for printing the pattern tissues, and our media and web guru – Amanda Wozniak, who helped us launch last week.
We wish you and your loved ones a festive and delicious Thanksgiving!
Carrie and Rae


I am excited for you and hope this pattern is a great success. I need thought before ordering as this neckline causes me to look wider and emphasize my heavier chin and shorter neck. I try to make and wear only a vee neck at this point and would need to remake the neckline.
You could easily shape this neckline smaller if you like, although you wouldn’t be able to pull it over your head. We have other necklines in mind for the Carpe Diem, including a v-neck. It will take some time, but look for carpe diem variations in future!
how about my favorite…the boat-line3 neckline
Taken under consideration Pat!
Wondering about making the carpe diem dress in a mid calf length?
Absolutely Susan! The Peony Garden Dress is close to mid calf. YOu’ll proabaly want to make use of the center back pleat to ensure it’s comfortable for walking and moving. Carrie