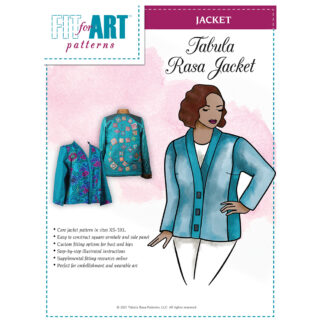
The Tabula Rasa Jacket that I started on Labor Day is designed and appliqued. Now the front and back crepe de chine foundations are ready to be stitched and flipped to create the pieced front and back.

We will look look closely at the soft drapey construction of the back to explain the process I used. The full back had already been cut from the blue base. The component pieces to cover the foundation had also been cut and each one included seam allowances to allow for the stitch and flip process.
The appliqued upper back was pinned and then hand basted to the foundation.

Next, a strip of silk batik was to be added. I placed the strip along the raw edge of the upper back with the geisha appliques, right sides together. It was heavily pinned so it was smoothly anchored to the foundation with the appliqued upper back.

Using a very slow machine stitch, I sewed through all the layers, being careful not to stretch the fabric.
Then I flipped the batik strip to the right side and pressed it against the foundation so it’s raw edge could be pinned and basted to the foundation in the next step.

The batik strip flipped and pressed.

This process was repeated with the next piece, a strip of silk ikat, matching up its raw edge with the batik then pinning, stitching and flipping, pressing and basting it into place on the foundation.

The large blue shooting star appliqued section was applied next. I placed it right side down so its upper edge aligned with the raw edge of the basted ikat piece. After testing its placement with pins, I adjusted slightly to get a smooth seam line that would allow this larger piece to line up with the foundation once it was stitched and flipped. Again, a slow machine stitch was used to stitch the raw edges to the foundation.

Carefully the shooting stars were pressed to cover the blue foundation. The 3 outer edges were pinned then basted to the foundation to keep the layers smooth.

Finally the striped ikat sections were placed onto the back inside each side seam, right sides together. They were positioned so that once they were stitched and flipped, all the raw edges of the previously attached pieces would be covered. After pinning them in place, they were also carefully stitched down by machine, flipped toward the sides, pressed and then basted into place.

When you are working with cottons, it is easier to stitch and flip. Often, you do not have to baste the raw edges in advance of attaching the next piece. But with these drapey fabrics, slow, careful stitching and basting keeps the foundation from buckling or bunching under each attached section.
Once the fronts were completed using the same process, the shoulder seams were stitched, being careful to line up the striped ikat sections of the front and back.

I stitched a hong kong finish to each side of each shoulder seam since this foundation pieced jacket will be unlined. Then I completed the construction of the jacket using bindings to cleanly finish the interior seams.
Next month I will tell you about the double band I fashioned to finish off the jacket. It is a real show stopper if I do say so myself.

What techniques do you like to use when piecing drapey fabrics to keep them soft? Do share them here so I can test them out myself.
Happy Sewing, RAE


I hope you will sell in future also downloadable patterns. The costs for shipping the paper-patterns to Europe are very expensive. For the amount just of the shipping I can buy more than 7 patterns at burdastyle.de or knipmode.nl.
Hi Ursula, Thanks for your note. We are happy to work with you to find the best method of shipping if you e-mail us directly at info@fitforartpatterns.com . We are a very small company and do not operate on the level of burdastyle. Maybe someday we can offer downloadable patterns that include our extensive illustrated directions in the booklet form we like best. RAE