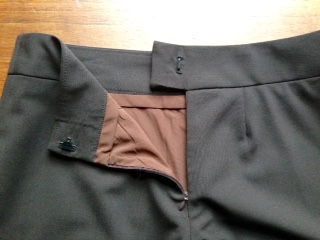
I love the clean lines of the back zipper Eureka! Pants with a faced waist, but I have struggled to get them to stay put on me, especially since I like to wear them a little below my waist. Finally I’ve settled on a waistband that satisfies my style and fitting preferences – a shaped waistband. A shaped waistband follows your contours so it hugs without squeezing or drooping. We use a shaped waistband for Sporty Details pants, so here I am going to apply the same method to pants with a back zipper rather than a fly front.
You too can alter your basic Eureka pattern to accommodate a shaped waistband by following the pattern work outlined here. Since this is a bit technical, I will also refer you to the original Eureka! Pants and Sporty Details Instruction books for more detailed information and illustrations. Because you will be making changes to your front and back pant patterns, we recommend that you trace off a copy of your Eureka Front and Back and label the copies “Front for Shaped Waistband” and “Back for Shaped Waistband”. Use these copies for the following steps. These directions will result in a 1½” wide shaped waistband; if you’d like it wider or narrower, adjust the measurements accordingly.
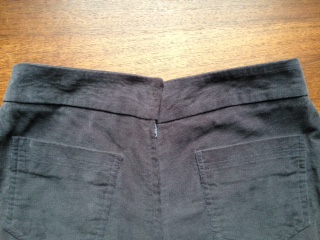
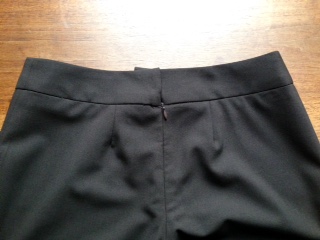
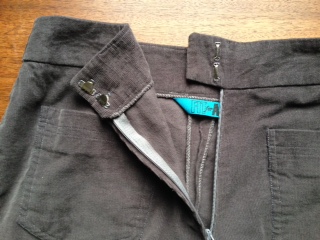
Here you can see two pairs I’ve made recently with the shaped waistband; one is corduroy with back pockets and the other is a dressier lined wool pair.
Establish Waistline
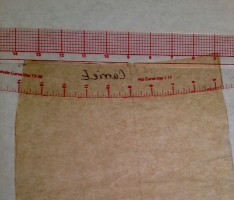
Begin by considering where you want the top of the pants to fall on your body. If you are content with where your Eurekas are sitting, you can go on to step 2. If you’d like to move the waistline, put on your Eureka mock-up and mark the desired location for the top of the waistband at several points. Transfer these marks to your Front and Back for Shaped Waistband patterns. Use a curved ruler draw a line connecting the marks and label it “seam line”; draw a parallel line 5/8” above the seam line and label it “cutting line for waist”. Cut away excess paper above the new cutting line for waist. (Refer to page 2 of Sporty Details.)
Create Shaped Waistband Pattern
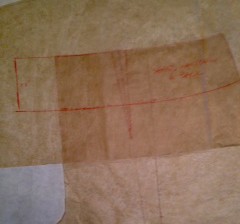
Lay a piece of pattern or tissue paper over the top of your Front for Shaped Waistband and trace off the upper portion, including the cutting line for waist and side seams, darts, and grainline. At several points, measure and mark 2¾” below the cutting line for waist. Use your curved ruler to draw a line connecting the points; this becomes the lower cutting line for the Front Shaped Waistband pattern. Repeat process with Back for Shaped Waistband to create Back Shaped Waistband pattern. (Refer to page 5 of Sporty Details.) Before cutting out the waistband patterns:
- Extend the center back seam by 2” so you will be able to create tab behind the back zipper.
- Take 5/8” off the center front seam and label that new line “Cut on Fold” so you will be able to create a front waistband without a center seam.
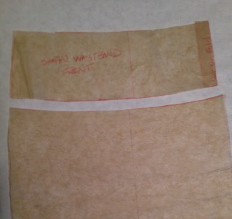
After you’ve cut out the waistband patterns, fold out darts and tape closed. See page 15 of the original Eureka! Instructions for more on removing the darts.
Alter Pant Front and Back for Shaped Waistband
Return to your Front and Back for Shaped Waistband pants patterns. Measure and mark 1½” below the cutting line for the waist. Use your curved ruler to draw a new cutting line for the Front and Back, then cut away excess paper above the new cutting line. If in the process of moving the waistline you have eliminated most of a dart, redistribute this small amount of dart intake to the closest existing dart or side seam. (Refer to sidebar on page 6 of Sporty Details.)
Make your Pants
When you are ready to make your pants with a shaped waistband, you’ll need to cut out:
- 2 Front and 2 Back pant pieces,
- 1 Front Waistband and 2 Back Waistbands,
- 1 Front Waistband facing and 2 Back Waistband facings,
- 2 Front Waistbands and 4 Back Waistbands out of fusible interfacing. Fuse them to the corresponding waistband pieces and facings.
Constructing Eurekas with a shaped waistband is similar to attaching and finishing the waistband in Sporty Details (refer to pages 13-14) except that you leave the opening in the back center seam. To make it easier to take in or let out the side seams later, if needed, I work in the following order:
- Attach the Front Waistband to the pants fronts after they have been sewn together at the center seam but before sewing the side seams.
- Sew the Back Waistbands to each pant Back at the same time.
- Sew the side seams all the way from waist to hem, making sure to match the waistband seams.
- Sew the waistband facings together at the side seams, leaving the center back seam open.
- After installing a zipper, attach the facing to the waistband and finish the waistband with a tab as described in the waistband directions for the original Eurekas (refer to page 22 of the Eureka! Instructions).
- Add a hook and eye or button and buttonhole for the waistband closure.

No doubt you don’t have time to try this around the holidays, but we’d love to hear about the results when you do! And if you’ve found a waistband style that works better for you, please share it with our Fit for Art community here or on our Facebook page.
Happy Sewing, Carrie


Thanks, Carrie for your encouragement to apply the Sporty Details techniques to my regular pants pattern. The thing that I like the *most* about the Sporty Details adaptation is the waist treatment…they are, by far, the most comfortable pants that I have. I know I will like them.
And yes, it won’t happen this week…
Let us know how it goes, Lugene, when you get the time to try it!