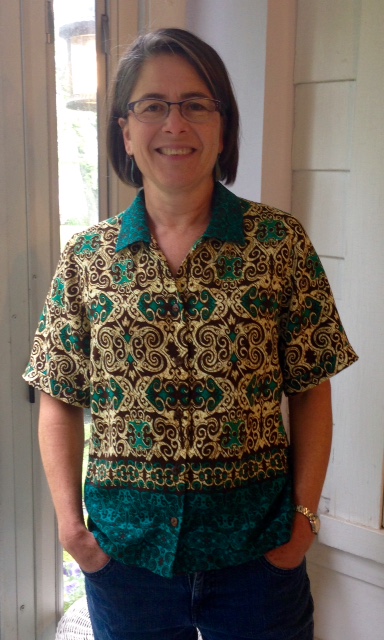
A few weeks ago we had a brief spurt of warm weather which got me to thinking about my summer tops. I really like to wear a “camp shirt” in warm weather, which I think of as having short sleeves and collar on a relaxed fitting shirt that falls open at the neck. It occurred to me that the PJ top I made in December with Shirt Variations for the Tabula Rasa Jacket is just like a camp shirt, so off I went to search my stash. My favorite camp shirts are rayon, so I pulled out a rayon “sarong” that I purchased last summer on our trip to Malaysia. I bought this piece in Sarawak on the island of Borneo; it has a very busy “native” print with a pronounced teal border. I’m loving the end result!

My pattern work had already been done for the PJ top, but here I want to show you how I altered the Tabula Rasa Jacket sleeve pattern to make a short loose fitting sleeve. The main thing to remember after you’ve determined your preferred length is to redraw the side seams; they need to drop straight down for the last 3-5 inches so the sleeve will have an open fit and so the width will be correct for hemming. (If the side seams angle in all the way to the cutting line, you’ll have a problem when you turn up the hem!) If you have the Sleeve and Cuff Variations pattern, you can use the Summer Sleeve. Just check to make sure the length is right to include the 2 ” hem required for the cuff.

I chose to make my sleeve long enough to be able to turn up a cuff to give it a little weight and better hang. You can read more about how I finished the cuffed sleeve in our blog post “Fit for Art Pajamas and Robe.” In brief, I simply:
- clean finished raw edge of the hem with a serger;
- folded the hem up 2” to the inside and pressed firmly; and then
- folded the sleeve up again 1” to the outside, pressed and topstitched cuff in place.
After taking a look at several of my RTW camp shirts, I decided to make one additional pattern change. I made the collar pattern 1¼” shorter than usual so I would end up with a notched collar, rather than having it extend all the way to the center front.
Our local chapter of the ASDP recently had a program that featured techniques for making a better collar which I just had to try. Many of you may already know these tricks but for those who, don’t read on.
- The first technique is designed to keep the under collar from showing on the upper collar. Cut 1/8” off the neckline seam allowance of the under collar (the side with dots) easing out to 0 at the corners. After you stitch the other 3 sides of the collar and turn it right side out, match the unstitched edges and press, rolling the outer edge of the upper collar to the underside.
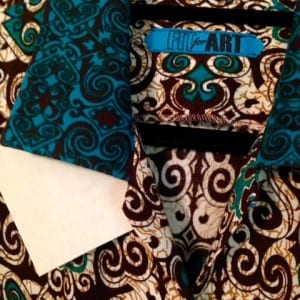
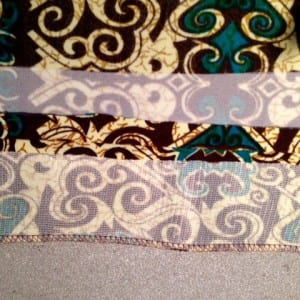
- The second technique, for sharp collar points, is well described and illustrated in Pamela Erny’s shirtmaking blog, so I won’t repeat it here. I found it to be simple and effective, so I include a few photos of my collar in process. (Just be careful not to cut off the loop when you clip the corners of the collar points! I speak from experience.)
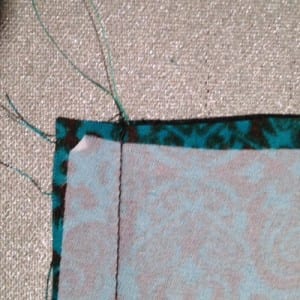
Loop for collar point 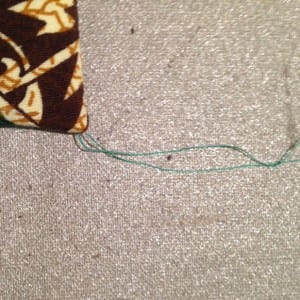
Pulled collar point
After rearranging the pattern pieces several times to study my options, I decided to feature the border print around the bottom of the shirt and to repeat the teal border in the collar to tie it all together. Here’s a glimpse of my layout of the main pattern pieces; for the rest of the pieces I worked around what was left of the fabric.
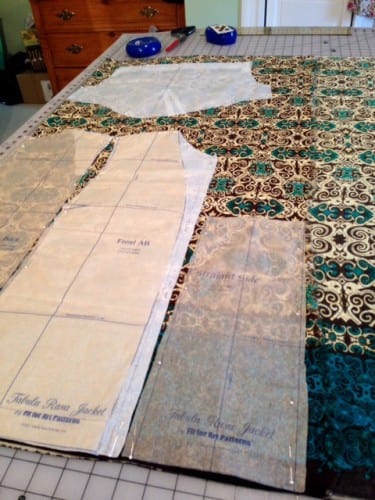
As I worked with laying out and cutting the fabric, I found that this rayon was pretty “wiggly”, so I knew I would need fusible interfacing to stabilize the facings, collar and hem. I made several interfacing samples with fabric scraps and eventually decided to use French Fuse to firm up the front and back facings and Silk Envy to stabilize the hem (1” wide strip) and shirt fronts (2” wide strip) where I would be putting the buttonholes and buttons.
I used French Fuse on the under collar to help it stand up and Silk Envy on the upper collar to keep it soft to the touch. Because I was planning to cuff the sleeve, I decided that interfacing wasn’t needed at the sleeve hem.
As with most Tabula Rasa Jackets, it was the planning and prep that required the most time. After I got the pieces cut out and interfacing fused, my camp shirt came together very speedily! My next challenge is to figure out how to make a sleeveless TR shirt for the hottest days of summer. Have you tried to make a sleeveless TRJ? We’d love to hear what you tried and how it worked!
Happy Sewing, Carrie


Carrie, Did anyone respond on how to make a Sleeveless TRJ. I just finished making the shirt TRJ with rolled sleeves and was wondering how to make one sleeveless. I was thinking of drafting the side panel higher up and adding some binding to the armhole area.
I made one last year and it still needs some refinement, but you are on the right track. I extended the side panel up by a few inches and rounded it to more of an open U than a straight line. Then I bound the whole opening with a narrow bias binding. I found it laid better by hand finishing the binding to the inside. Let me know how it goes! Carrie