Every time I approach a group of fabrics destined to be a Tabula Rasa Jacket (TRJ), I consider both the design and the engineering. It is easy to dream up a pieced front and back for a jacket, but it is quite another thing to stitch it together into a successful jacket.
And so as we return to my “Inspired by Ruth” jacket, we will consider the piecing technique of stitching and flipping fabric onto a foundation. It is an excellent construction option for an unlined cotton jacket, especially if you want to include diagonal piecing.
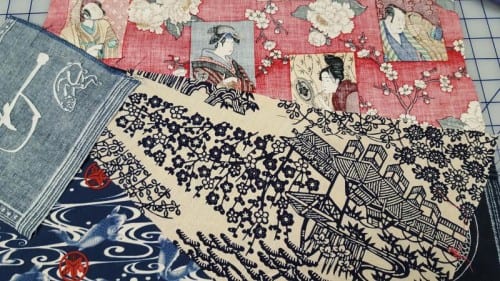
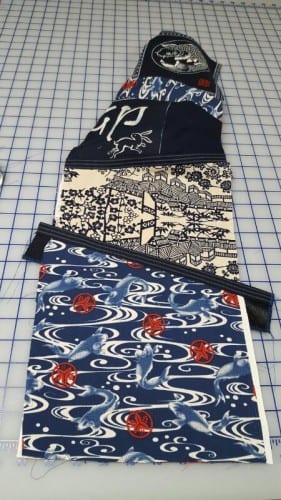
As I mentioned last week, I was drawn to the triangular printed motifs in the vintage Japanese fabric. I had hoped that the fabric was wide enough that each section would fit alternately across the back. Sadly, the fabric was about 3 inches short of fitting on my back pattern. I tried alternating them in an overlapping pattern but the triangular nature got lost in the piecing and I did not like the results.
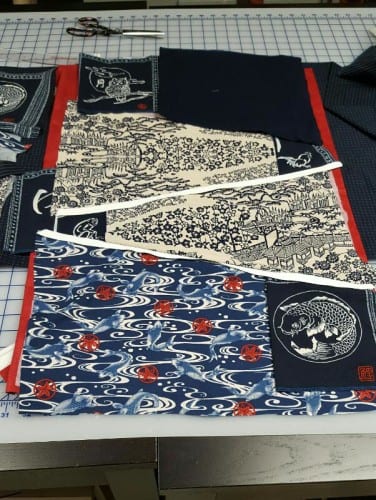
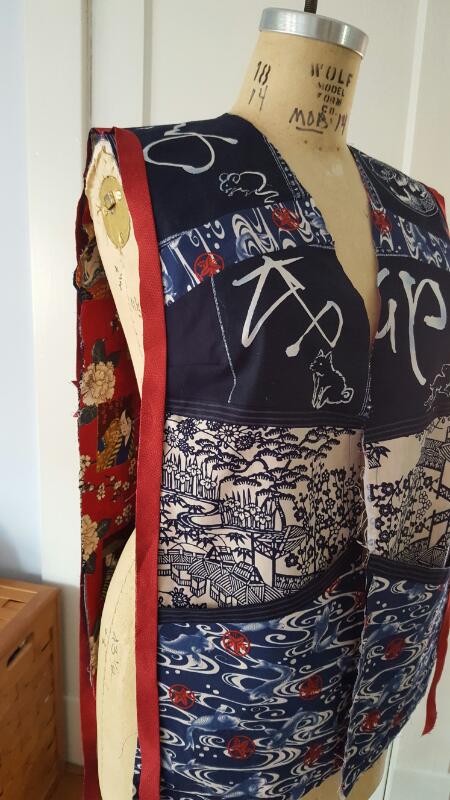
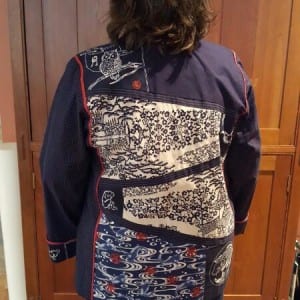
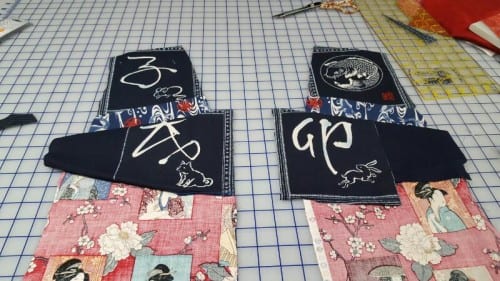
So, I revisited all my fabrics and found I liked the addition of the block printed animals on alternate sides of the sections I was creating for the back. Some animals were used in their entirety including the lettering on each block. Others were cut to the necessary size and simply captured the animal. Of course I chose my favorites, but intentionally put the fish with the water and fish printed fabric at the hemline and the owl with the solid navy at the shoulder area, giving me a sense of the sky at night.
Once the sections were designed, I decided to separate them with strips of blue striped fabric. The effects were striking, but then I wondered how best to stitch it together? I feared that a classic 5/8” seam construction would result in wavy and unruly seams because some of the fabrics would be cut off grain. Before I even tried making samples, I looked in the stash for an appropriate foundation cotton that I could build this jacket on. I was delighted to find a red cotton with Japanese designs in an overall pattern and colors that were a nice compliment to the blue and ivory fabrics for the outside of the jacket. Happily, there was enough to cut two fronts and one back.
Once I cut out the foundation pieces and marked the darts on the right side, I cut a lightweight interfacing to support the shoulder area and neck edge and fused it to the wrong side of each foundation piece.
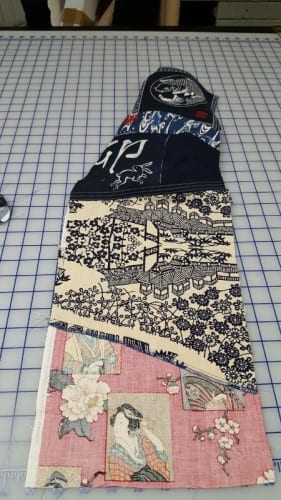
I started piecing the back from the hem up, building the design on the foundation by tacking the first piece in place and then pinning, stitching, flipping and pressing each section and striped fabric strip in place. The photos show the progression and as you can see, I occasionally had to do a bit of adjusting and trimming to get each piece to fit on the foundation.


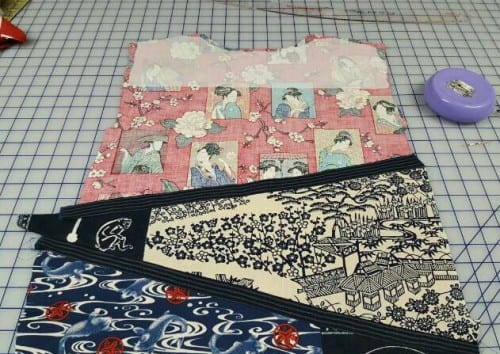


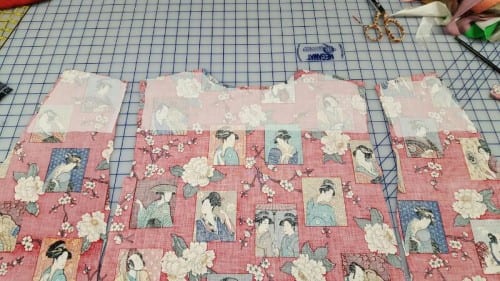
On the front, I began with the shoulder area and worked my way down through the Japanese landscape section, carefully adding each layer so the two sides lined up at the center front.
I also serged and securely topstitched the raw edge of the landscape section to the foundation as it would become the inside of each pocket.
Then I created the pocket that would form the lowest section of each front. Once each pocket edge was finished with an interfaced striped fabric strip, I laid the pockets in place and topstitched them around the outside edges, trimming away the extra fabric.
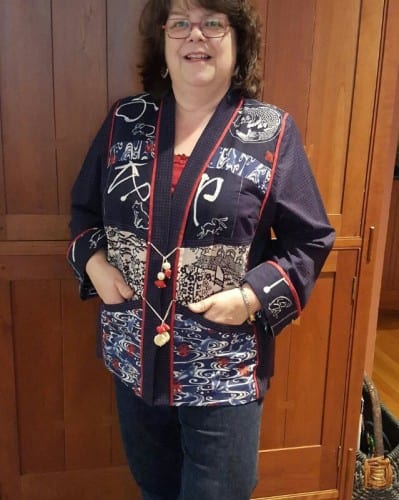
After the fronts and backs were complete, I stitched in the darts through all layers and stitched them together at the shoulder seams. I made some red flat piping to insert between the body and the side/sleeve sections and the front band. I put the jacket body on the dress form to test the red accents.

This method is pretty easy when you use cotton. The last time I wrote about this stitch and flip method was in the construction of the Blue Geisha jacket. It is made of silk, so each flipped section had to be basted to the foundation along the remaining raw edges after it was stitched and flipped to keep the slippery layers from shifting.
The other Tabula Rasa Jackets in our Photo Gallery sewn with this stitch and flip method are the yellow and green On the Diagonal cotton jacket with a narrow band, and the Kimono splendor burgundy and blue silk jacket with the summer sleeve.
Have you constructed a jacket using this piecing technique, or used it on a handbag, bed quilt or wall hanging? We would love to see a photo. Here is a photo of my finished jacket. It is perfect for the weather in Baltimore this time of year.
If you are interested in a basic one day TRJ class, there are still a few spots in my class this Saturday, May 21 in Easton MD, at Lilies of the Field. Contact Reggie if you are interested in participating.
Happy Sewing, RAE


Love the closures, Rae!
Ray,
Thank you for your tutorial on making a blocked flip and stitch Tabula Rosa jacket. I really like the way it turned out. The front is very nice and matched!
Glad you all like it. It is such an easy method of construction in cotton. RAE
Rae—what a great jacket! It looks fabulous on you and I love the explanation on the stitch and flip method. I used that method for some vests years and years ago so I really appreciated the reminder! Thanks for all your great inspiration!
Hi Rae,
Last October when I was in Fredericksburg, Va. for the sewing expo, you put me in a size for the Tabula Rasa Jacket along with some suggested fitting changes. I made the changes and sewed the jacket up in muslin but am unsure if it needs further changes. Do you know when you will be offering another fitting class for the jacket or do you offer personal appointments?
Many thanks.
Hi Marianne, There is a class in Easton MD on Saturday that has a couple openings, otherwise, nothing scheduled in the area. If you are near Baltimore, you could make an appointment and come by for me to look at your jacket, or send me a photo of front and back, or areas of concern and I can check your lines to see if they are running parallel and perpendicular to the floor. Mail photos to me at rae@fitforartpatterns.com
I’m having a hard time visualizing how you did this. Is there a video?
There is no video yet, sorry. Maybe try to make a small sample going step by step. Don’t let the process get away from you. RAE