Use your Eureka! Pants pattern to stitch up a “slip” to wear with your pants. It is an easy way to add a layer of warmth and drape to your fall and winter pants without lining each pair. Plus, if you choose a fabric that can be pre-washed, you will save on dry cleaning costs too.
I have three pants slips, each made with a different fabric. While each was made to accompany a specific pair of pants, they are routinely worn in the colder months with other pants. Each fabric was pre-washed before the slip was cut and constructed.
The most useful is a black pant slip made to go with black boot cut wool pants. The slip fabric is silk crepe de chine with a bit of stretch. It is the perfect weight for a pant slip and the little bit of stretch allows the slip to be fit on the snug side.

My spring/fall pant slip is light blue china silk. It was made to accompany a pair of grey/blue pants made from silk suiting. I chose a very light fabric so the slip would be comfortable as the seasons change, while keeping the silk fabric from clinging to my hose. In the summer I wear the pants with sandals so I don’t need the slip.
The last of my slips is made with navy blue Ambiance lining. It was made to be worn with a pair of itchy wool tweed pants that I rarely wear. I love the feel of the rayon Ambiance lining, but it does not hold up well when it is stressed. My first pant slip, made many years ago, was made from black Ambiance. Over time it shredded in the seat and was patched several times until it finally had to be retired.
If you do not mind the warmth that comes with wearing polyester lining, a polyester lining like Hang Loose will make a very nice pants slip that is non- static.
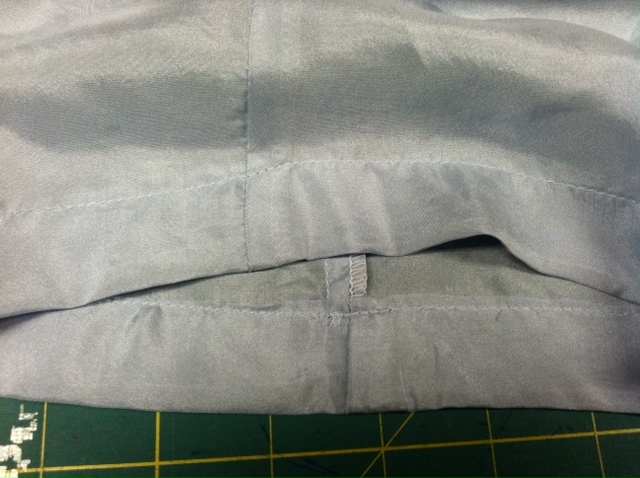
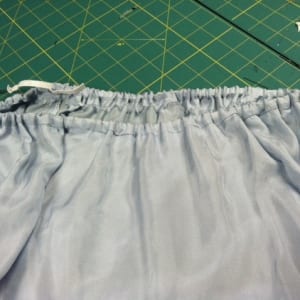
To make a pant slip, follow the directions for constructing elastic waist pants on page 22 of the Eureka! Pants direction book. Before you cut the front and back of your Eureka Pants pattern out from your pre-washed fabric, add one inch in length to each pattern piece. Follow the directions to calculate the length of the waistband. It needs to be long enough to fit around the pants without darts and it should be only 2” wide. That gives you a band the right width for the 1/4” elastic you will feed into the waistband casing.
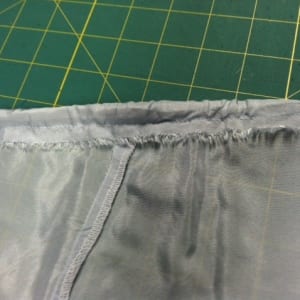
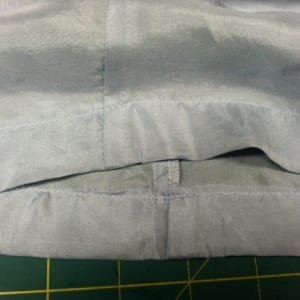
Finish your seams cleanly, trimming them to 1/4”.
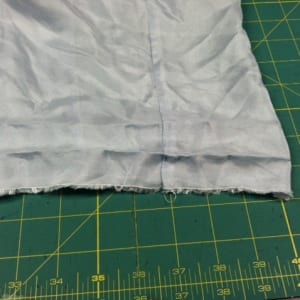
Plan for a double turned machine stitched hem. You want your pant slip to be a little bit shorter than your pants. With the extra length you added before you cut, you should have at least 1 1/4” to double turn at the hemline.
This is just another way you can use your well fitting Eureka! Pants that Fit pattern to extend your wardrobe. Pants with optional slips can be worn in more than one season. Have you made a pants slip before? What fabric did you use?
Happy Sewing, RAE


Great idea! A removable lining….perfect for wool pants.
Hope you’ll give it a try! Let us know how it goes.
I would like to send you a more extensive e-mail. Could you tell me how I might do that? I love your website/blog and missed your class at the Mannings.
Mary, e-mail me at rae@fitforartpatterns.com
Hi Rae, thanks so much for the workshop last Friday- it was wonderful. I want you to know that I finished my mock up jacket and considering that is my first ever piece of clothing I find in a mini miracle. Thanks so much for making it possible.
Lily, I am so delighted. Looking forward to a photo of your first jacket! Rae
I have one piece of black stretch silk charmeuse and three pieces of black stretch wool pants that need lining. Making a liner will certainly save time and money.
Are the pants slips pull on, no opening or zipper, wide enough at the waist to go over the hips? I do not understand the instructions regarding the waistband and ” It needs to be long enough to fit around the pants without darts and it should be only 2” wide. That gives you a band the right width for the 1/4” elastic you will feed into the waistband casing.”
The pants are indeed a pull on version of the Eureka! Pants that Fit. Because most people fit the Eureka! pants with darts and a zipper, this is the elastic waist directions ( which are in the direction book on the last 2 pages). We apply a waistband onto our elastic pants because most women have a curved waistline and it is much smoother than adding a double fold casing at the top. When you are converting the waistband for a darted, zippered pant into a elastic waist pant, you have to add more length because you are not forming the darts in the pants.
For the pants slip, though, I did not make a wide waistband for the elastic casing, but a very narrow waistband for the elastic casing. The reason to make a narrow waistband and use narrow elastic is to minimize the bulk at the waist when you have on both the slip and a pair of pants over it.
Hope this helps to clarify your question. Happy sewing, RAE
Thank you !