
We are in the depths of winter in the northern hemisphere and the Olympics will come to a close soon, so time to find another diversion. Here is Rae’s Stitching Slowly – Ideas and Updates to inspire you. The more she plays with slow stitching, the more she loves it as a stress free way to settle down with very little financial investment and as much time as one wishes to invest. Perhaps you are tired of the slow stitching conversation, but there must be a reason why everyone is talking about it.
Next week starts the beginning of the 100 day project, a self motivating creative endeavor that lasts 100 days. Check out my jean jacket project from last year. I am planning to work on a new snippet roll, part of my preparation for this summer’s Spark Creativity workshop at La Cascade. It will be deliberately slow and satisfying using only materials on hand, accompanied by my needle book and box of threads. I will begin in France and then move back to the States where there is a whole new pile of materials to play with.
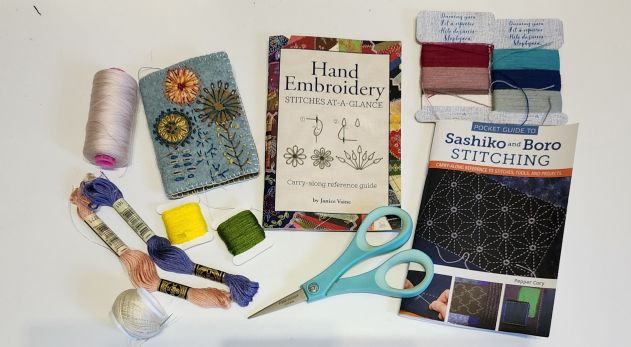
Let’s take a look at the two projects I made to put under the Christmas Tree for my girls. If you follow us on social media, you might have seen some glimpses of these during the fall. It was nice to work entirely with my hands and basic tools like scissors and needles to complete these projects. A little pocket book of embroidery stitches is helpful too.
Make a Needle Book
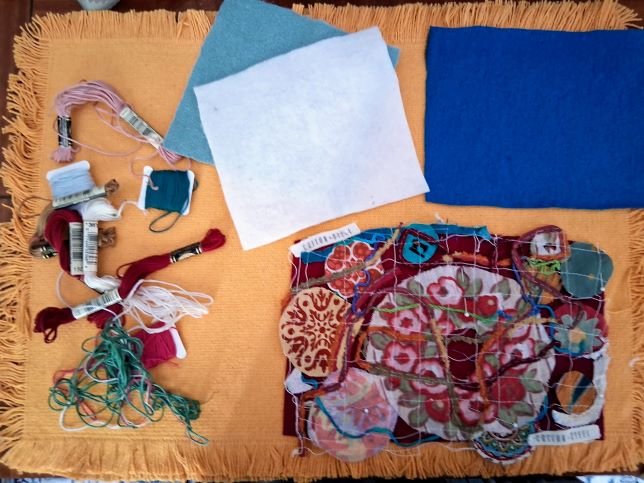
For my cross stitch obsessed daughter Sarah, a needle book started with a piece of scrap lace I made at La Cascade last summer. I loved the composition of this scrap lace. While this daughter has a pretty traditional style, this colorful beginning seemed just right to stretch her color palette. From our pile of recycled and washed wool pieces in the La Cascade studio, bright blue, aqua, white and dark red felt were chosen and cut into rectangles that would be finished with a blanket stitch and joined in the center. Basic bookmaking techniques were used to create a tool for keeping track of needles.
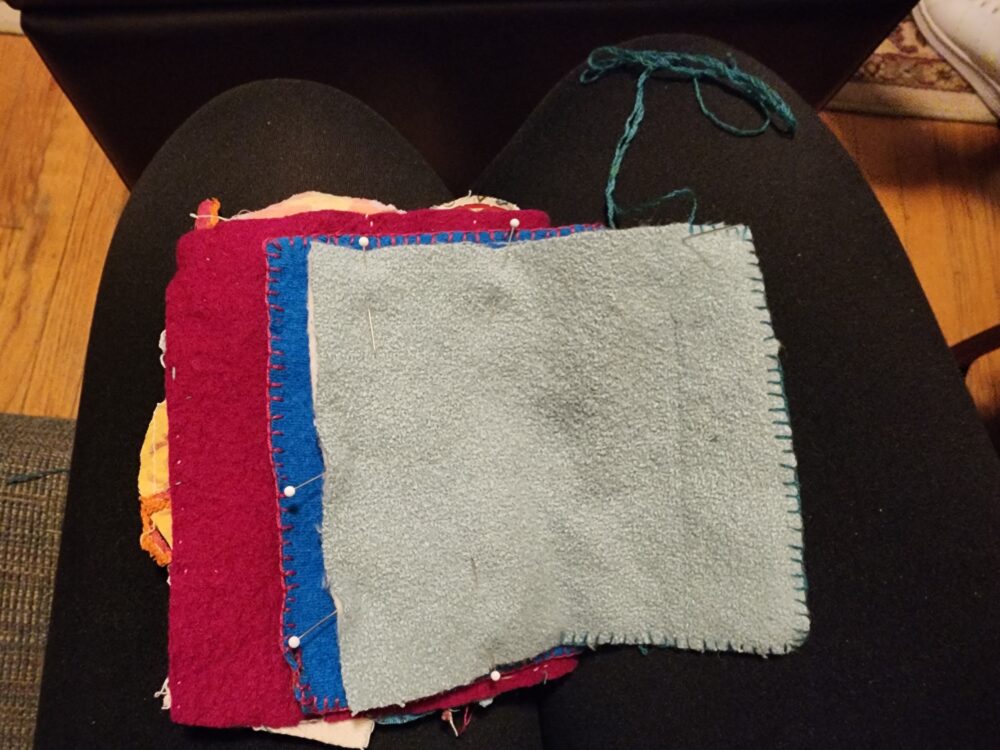
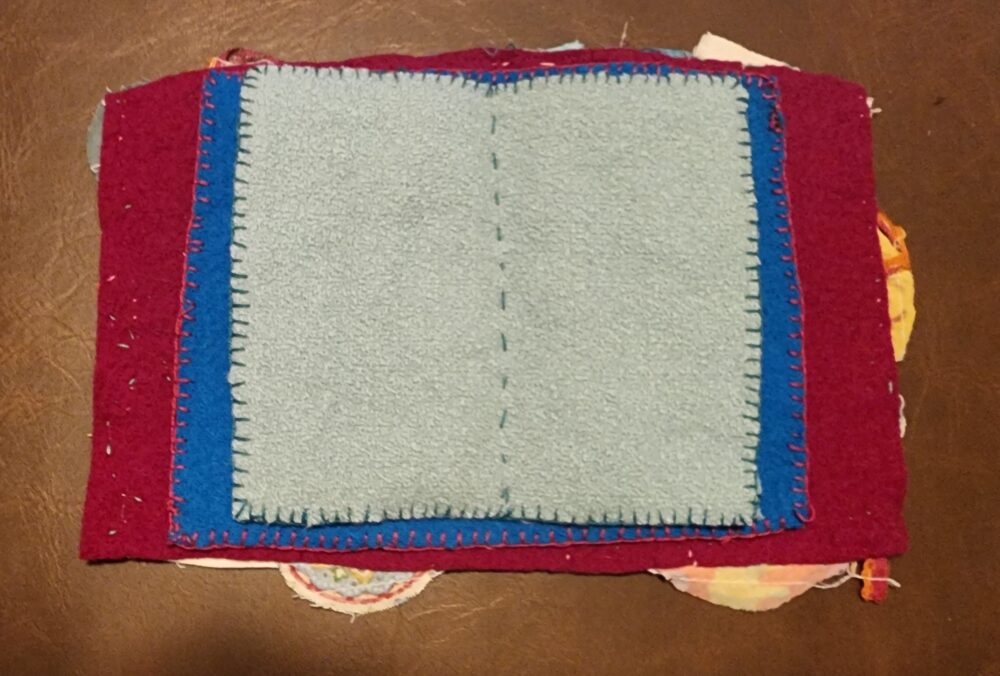
The lace was cut to size and hand stitched discreetly to the dark red washed wool. No additional decoration was needed here. Then the pages were stacked, some single layer and others double layered, and joined by hand with a back stitch down the spine.
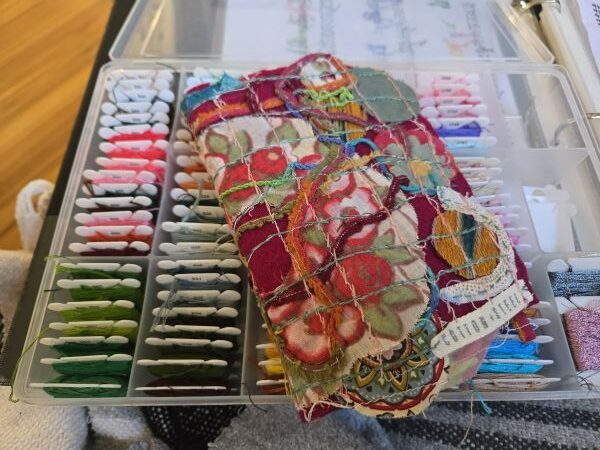
If more decoration had been desired, there are plenty of ways to do that. My own little needle book (pictured above in the second photo) was made using a kit purchased at Handcraft Happy Hour in Baltimore with basic purchased felt and decorated with embroidery designs. I decided if Sarah ever needed to test a stitch or idea, she could further decorate the interior pages of her book.
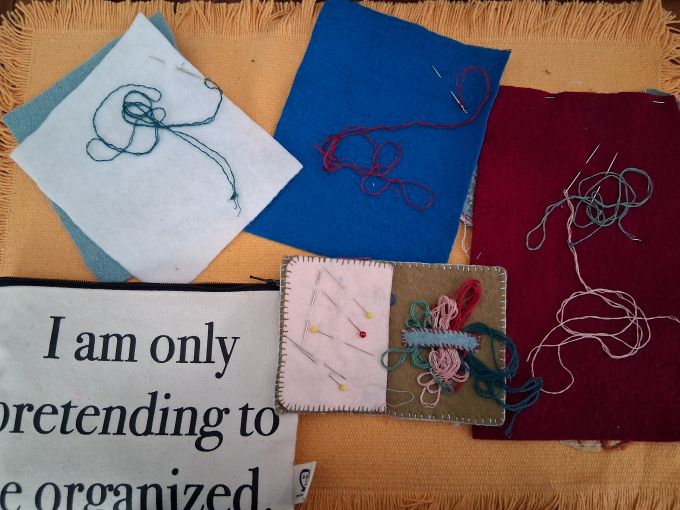
This project came home with me in the fall and was prepped for my long day of travel by creating a series of pre-threaded and knotted needles to use on the project. They were simply folded into the sections and placed in my little travel sewing bag.
Repair a Damaged Garment
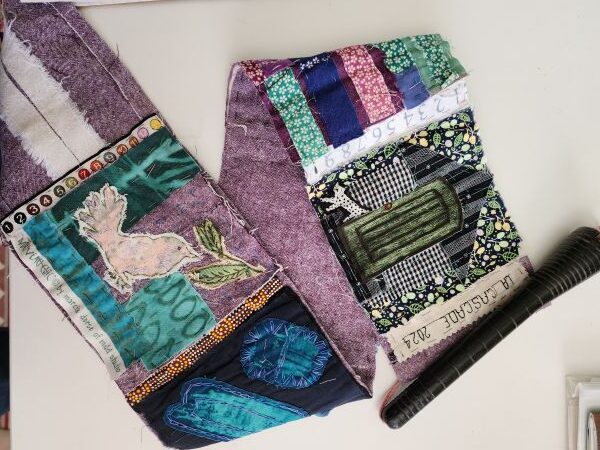
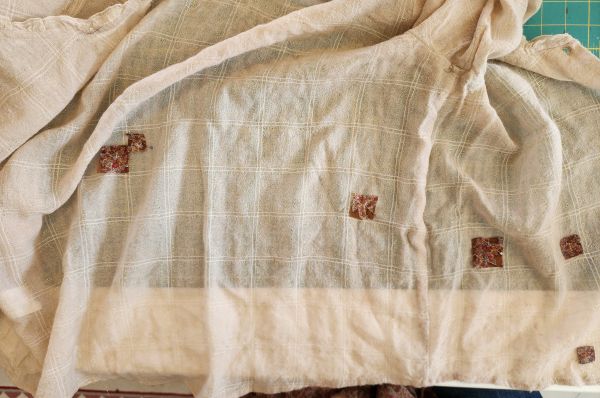
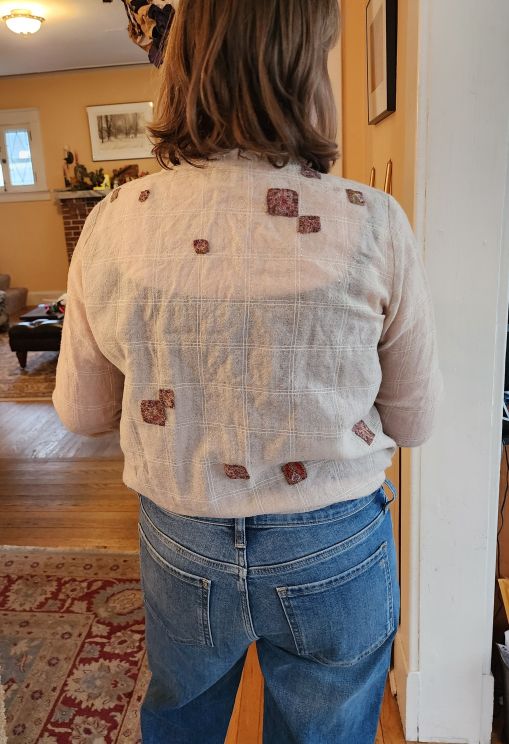
The project for my daughter Anna was a very lovely wool gauze shirt that we found when unpacking some boxes that had gotten set aside after her last move right before her little one was born. When we pulled it out of the box it was musty and had a number of moth holes. She sighed “that was one of my favorite shirts but now it is lost.” I decided otherwise. First I washed it and ran it through the dryer, then began saving ideas on how to cover the holes on my Pinterest Inspo: Slow Stitching Page.
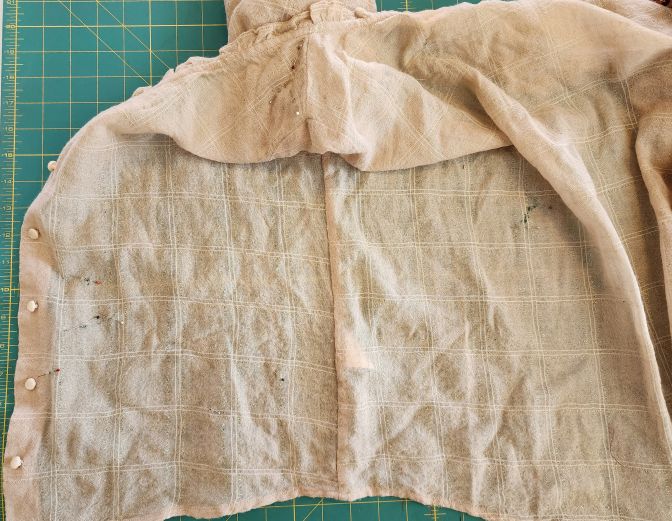
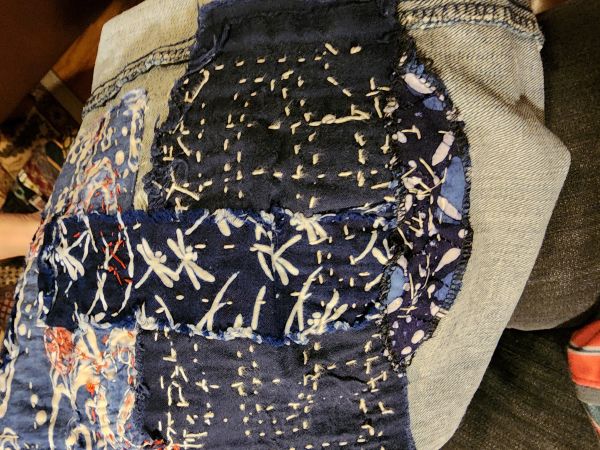
I also picked up a very moth-eaten scarf at the La Cascade fabric table last summer that had lots of colors she liked. I diddled around with some wool darning thread and floral embroidery, then with paisley shapes cut from the scarf, but with little satisfaction. Next I thought about square patches, similar to the ones my friend Ann Williamson puts on her Kimono silk garments to enhance the design. The square weave of the fabric seemed quite suited to this and so it became the direction I followed.
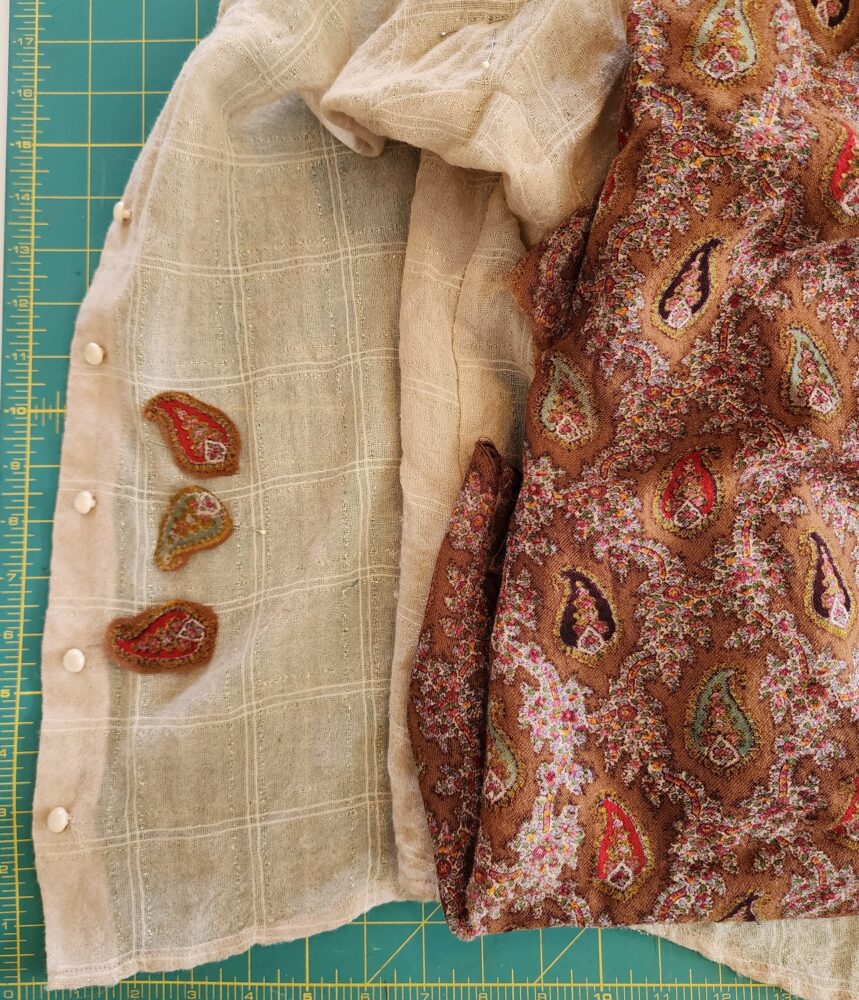

First, all the damaged areas were identified with a pin. Squares that reflected the size of each hole were pinned over the damage. After all the damaged areas were repaired, additional squares were added to create a more random design overall. Each square was left raw edged and attached with the wool darning thread using a blanket stitch.
After the package was opened and we had time to reflect, I offered to add more stitching, but Anna decided for now it was just right. There is always time to add more.
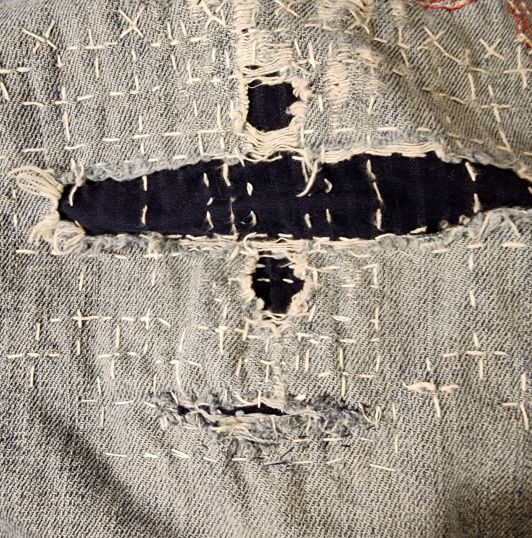
Repairing damaged garments is a great way to embark on a slow stitching or a 100 day project. Check out the jeans that began their mending journey in 2017 with just a few patches at the knee and recently were repaired again for a new fabric split just below one of the original holes. There are so many ways to enhance and repair favorite old garments!
Painting, Quilting, Stitching Too
Other fun ways to creatively play with clothes include painting, attaching painted and embroidered patches, and more. Check out some of our previous projects in our blog archive within the categories Slow Stitching and Surface Design. One of these would make a terrific 100 day project. Read more about the international sensation that is the 100 day project and start something that stirs your heart and calms your soul as we move into the next season with an uplifted spirit.
Gather Materials and Get to It
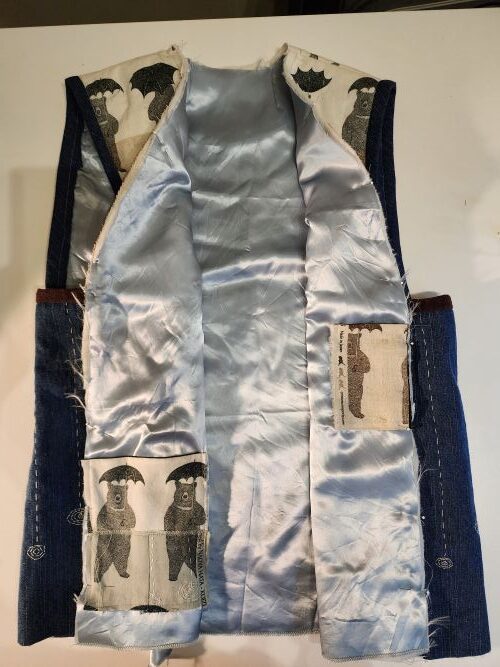
Hopefully you have been inspired by Stitching Slowly – Ideas and Updates. Here is one last update about last week’s post. Rae has finished the first round of slow stitched hand quilting and finished the construction, hem, interior seams and pockets of her Bears with Umbrellas vest. She has decided to wait until she gets back to the states and her plastic sewing clips box, to add the suede band, button and loop. Then she will get Carrie’s opinion about whether the vest needs a few more raindrops!
Don’t forget there are still spaces in the Vest of Many Colors class at Artistic Artifacts and the Spring Sew Successfully Retreat. It would do you good to get a change of scenery and meet new sewing friends. What a great way to start something new!


Rae
Thank you for reminding us of the 100 day project. It got me thinking of what I could do. Looking through your Etsy inspiration page and especially Anna’s shirt gave me the idea. Remember the photo of all those boring solid blue shirts? I believe some creative embellishment could give them all a new life.
(PS-it was an honor to see my Eiffel Tower piece on your Etsy page)
Linda
Linda, just love your idea! As you are considering projects with existing garments be sure to try then on and make any alterations or adjustments while you are embellishing. Good luck and send photos.