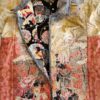
Today we take a closer look at the Sumbermouse patchwork jacket created for project #9, the Kids Patchwork Opus jacket, another installment in our series of posts about the jackets in Sewing Quilted Patchwork Jackets. Our publisher’s editors consolidated some of the steps to creating the patchwork fabric in order to fit everything into the book, so here we share some more detailed step-by-steps.
Gather Fabrics and Make a Plan
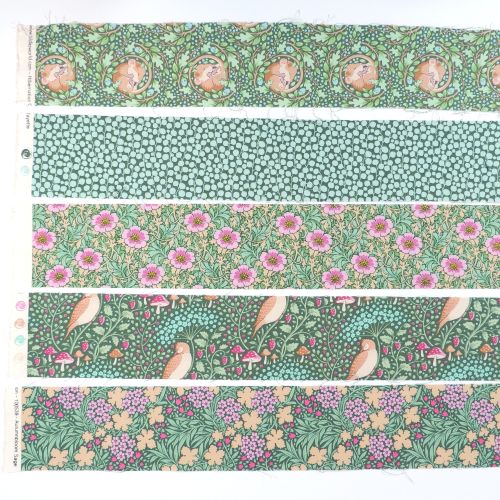
Fit for Art planned to create a coordinating adult and kid quilted jacket from 5 bolts of fabrics we had purchased from the Tilda Hibernation series. We’ve already written about the wholecloth adult Tilda jacket in First Quilted Jacket? Keep it Simple, which features three of the Tilda Hibernation prints. This method can be used for any collection of fabrics, whether a manufacturer’s coordinating prints or gathered from the maker’s stash, or anything in between!


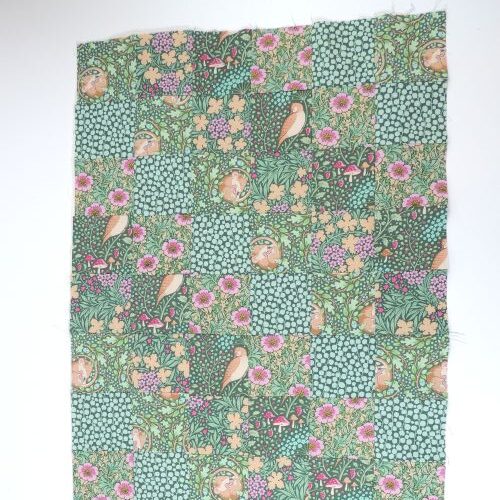
When it came time for the kids jacket, Carrie wanted to use a traditional patchwork piecing technique to inspire our seasoned quilting audience. Because this would be a smallish (size 6) kids jacket, we decided on smaller 3″ squares, which when sewn would end up 2.5″ squares. (Compare the Assorted Patchwork Jacket, book project #3, which used 5″ squares). With 5 coordinating prints on hand, she spent some time contemplating how to arrange the blocks of fabric so as to avoid duplicates side-by-side, and decided on a diagonal patchwork layout. Others might choose a more random arrangement of prints.
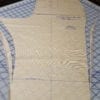
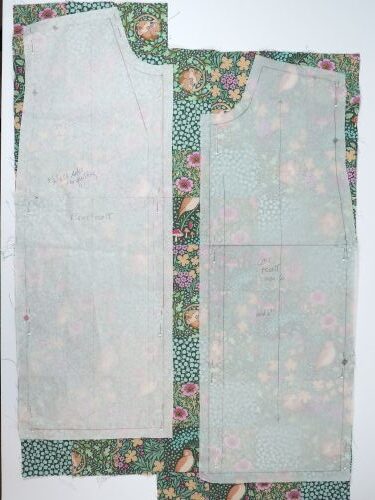
Finally, Carrie cut out a paper pattern for the jacket’s full back, left and right front, and left and right sleeve. These are used to guide what size grid of 2.5″ squares would be needed for each patchwork jacket section and approximate how much fabric is required.
Sew the Patchwork Grid
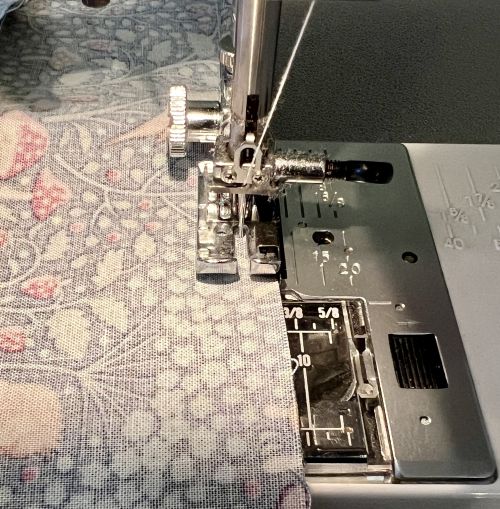
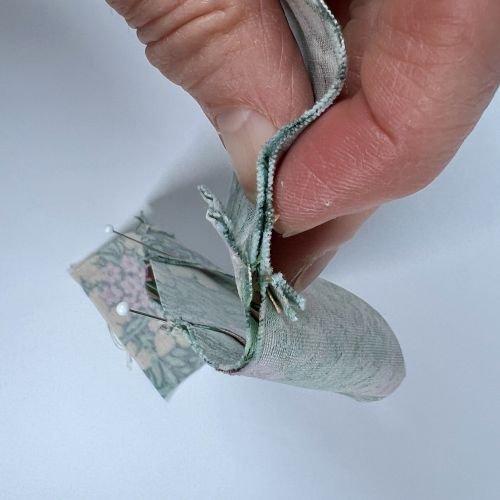
Carrie used a rotary cutter and ruler to cut the fabric and 1/4″ seams to construct the patchwork grid. (The 1/4″ foot that came with her Janome sewing machine makes sewing these seams so much easier!) For garment sewers with little quilting experience, we’ve provided some basic tips for accurate patchwork on page 117 of the book. There are many books on the market with extensive information about piecing and quilting for those interested in learning more.
This description of Carrie’s steps for creating the patchwork fabric is an example for the order of construction. Many variables may alter the dimensions and numbers for your own patchwork jacket, such as choosing different size squares, working with more or fewer prints, making a jacket in a larger size, or making a vest rather than a jacket.
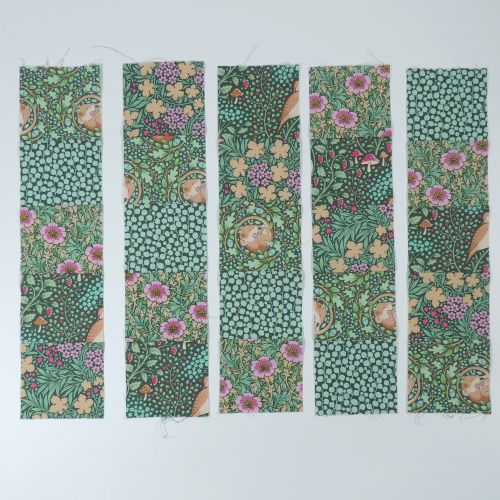
- Cut several 3″ wide strips of each of the 5 fabrics.
- Join one strip of each fabric to create sets of 5, joining each set of 5 in a different order to create the diagonal effect. So the 5 sets were arranged 1 2 3 4 5 (set A), 2 3 4 5 1 (set B), 3 4 5 1 2 (set C), 4 5 1 2 3 (set D), and 5 1 2 3 4 (set E).
- Press seam allowances within each set all to one side, alternating between sets to reduce bulk when sets are joined. So, for example, the seam allowances for sets A, C and E would be pressed up, while B and D sets would be pressed down.
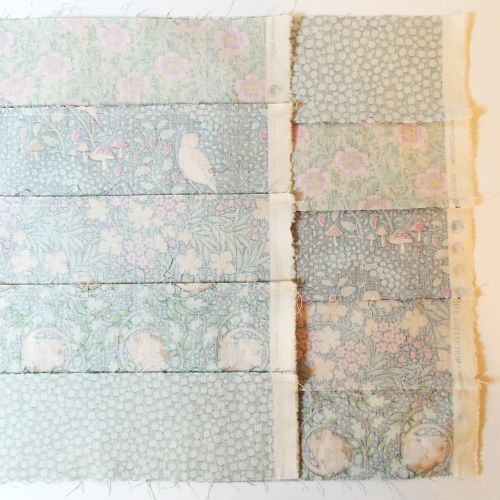
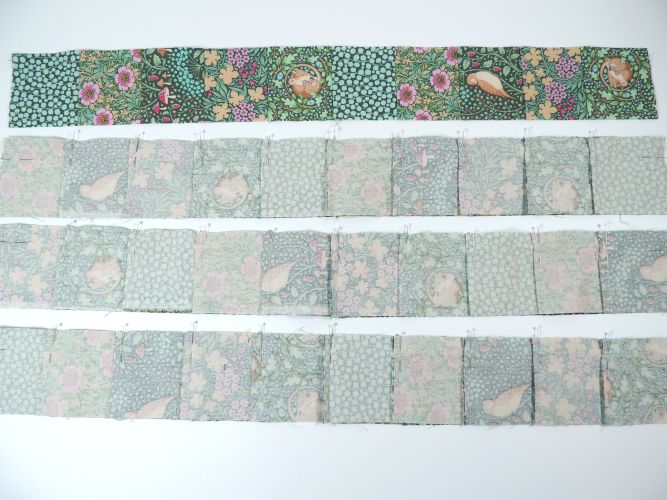
- Cross cut each pressed set into 3″ wide strips and lay out the sets of cross-cut strips into the desired arrangement.
- If needed, sew 2 or more cross-cut sets together at the short ends to create a longer or wider grid.
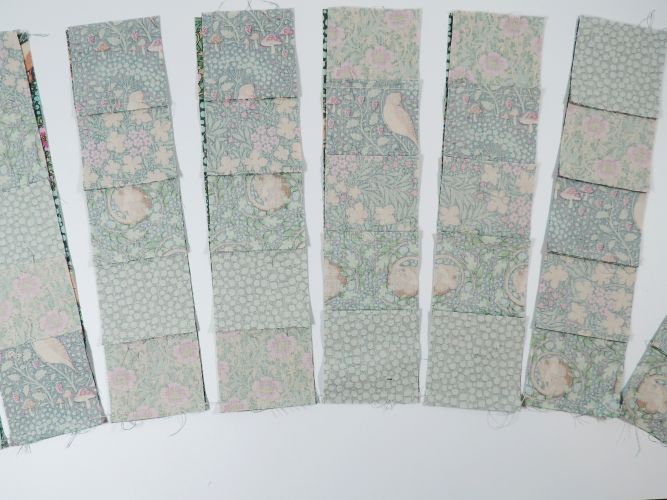
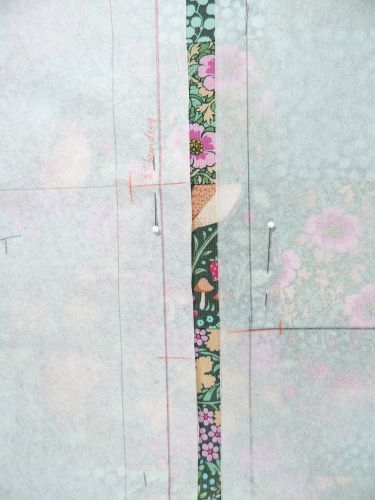
- Sew the strips together to create the patchwork grid. Before sewing, pin adjoining sets at each intersecting corner to hold them in the right place and make sure that seam allowances are pressed in opposite directions. Make corrections if needed before sewing these long seams together! Sew carefully to avoid pushing the seam allowances in the wrong direction as they are fed under the presser foot.
- Continue joining groups of strips to reach the grid size needed for each jacket section.
Cut and Quilt each Jacket Section
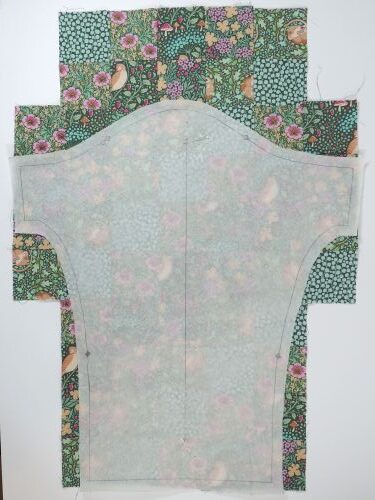
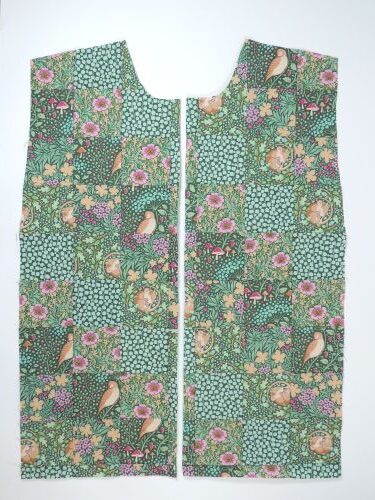
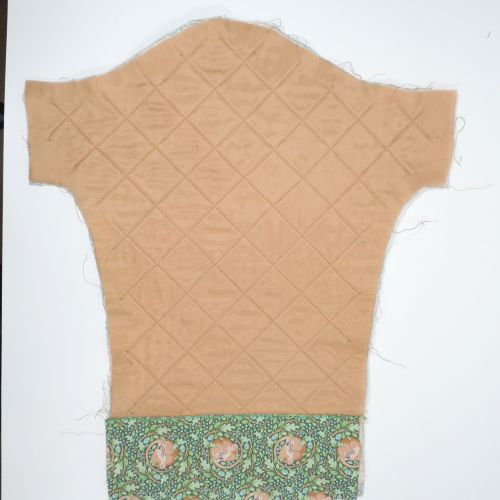
This jacket required a grid of 7 by 10 squares for the full back, 7 by 10 squares for both fronts, and 5 by 8 squares for each sleeve with an extra row of 4 squares added to the right and left side of the upper grid to accommodate the sleeve extensions.
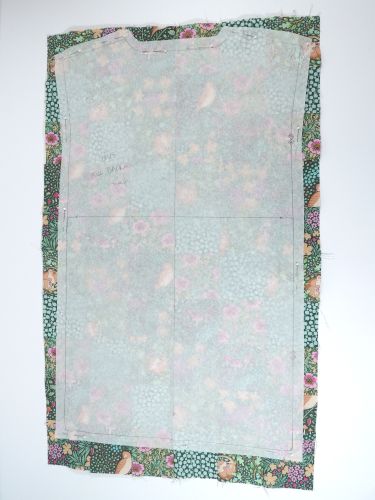
Cutting the fronts to align the diagonal pattern from the right to left front required careful attention to detail. Carrie had to offset the grid by one row and mark a few points along the center front of each pattern to assist with matching.
After the three layers (outer, batting and lining) for each section were assembled, they were quilted on a diagonal to emphasize the diagonal patchwork motif. The first couple of diagonal lines in each direction were marked and sewn through the corners of the squares.
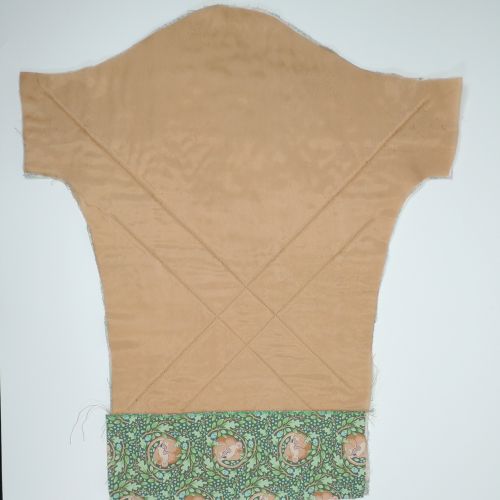
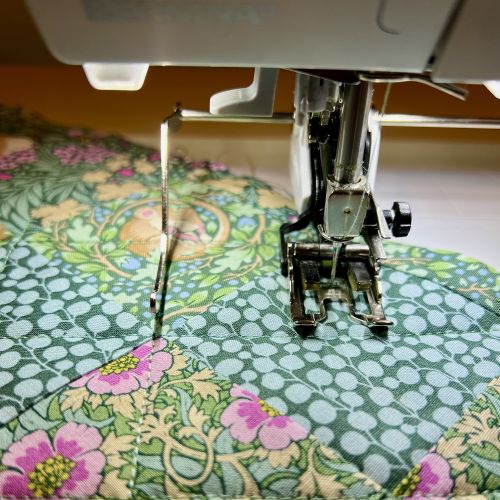
Once the central diagonal lines were established, Carrie used a seam guide bar to stitch evenly spaced parallel lines across the rest of each jacket section. In order to prevent any bunching, use a walking foot and work from the center out, alternating the direction of stitching from left to right, then right to left. Don’t forget to stop stitching at least 1″ from each edge of a section that will later be sewn into a seam, such as at the shoulder and side seams, sleeve head and underarm seams. At edges that will be finished with binding, such as the center front and hems, it is okay to stitch all the way to the section’s edge.

We hope this peek into the process of creating patchwork for the Kids Patchwork Opus jacket provides some insight and inspiration for other quilted jackets. Every stitcher will be making many choices about materials, piecing and quilting styles to create a unique and personal quilted jacket, and we can’t wait to see what you create! Please send us photos, or post them to social media with #sewingquiltedpatchworkjackets and #fitforartpatterns so our community can admire your finished garments!