Do you love to sew for your family members? I am especially happy to sew for my two daughters. Like their mother, each of my daughters has a unique style, and it is best to keep that in mind when planning to sew personalized gifts for them.
Sew Personalized Gifts by Hand
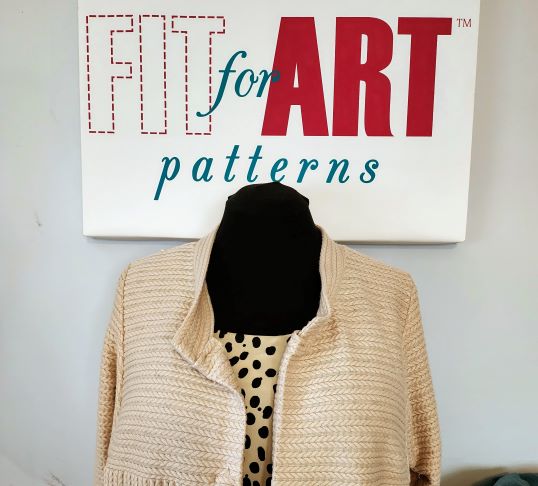
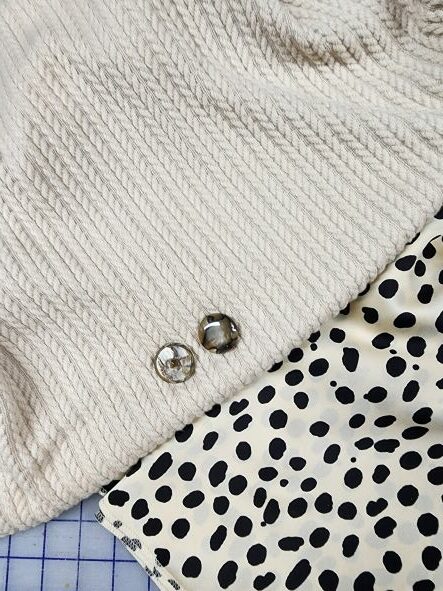
My January daughter Sarah has a very classical style of dressing: she shies away from prints, her outfits look best with pearls, and the fit should be tailored, not too loose. On a late fall visit to JoAnn fabrics, I spotted a fun sweater knit in a lovely creamy beige color and a coordinating easy care blouse fabric in ivory with black “Dalmatian dots.” I could not resist the purchase of these fabrics on deep discount. I hoped they would make a great outfit to top Sarah’s black pants and leggings.
This coming weekend we are celebrating all the January birthdays, so now is the time to get the cutting and sewing done in short order.
10 Steps for a Quick Turn-Around Garment Sewing Project
- Acquire fabric and be sure the patterns have been tested and altered for a good fit and possibly for design changes.
- Pre-wash the fabric for easy care in the future.
- Decide on the design and incorporate any last-minute changes to the pattern.
- Lay out the patterns on the fabric, pin in place and cut using your favorite method.
- Before removing the pattern pieces, mark any dots, squares, darts and other notations to make the stitching smoother. Pin in the darts and possibly the first seams to be sewn.
- Make an interfacing sample using a scrap to choose the best interfacing. Cut out the chosen interfacing needed for the project and fuse it to the wrong side of the fabric section.
- Set up the sewing machine with the correct needle and thread. Use your interfacing samples to sew a test seam or two to assure sewing success.
- Construct the garment, pressing after each step and testing the fit, if possible, as you go.
- Plan for the garment finishes and prepare to complete the finishes.
- Give the garment a final pressing.
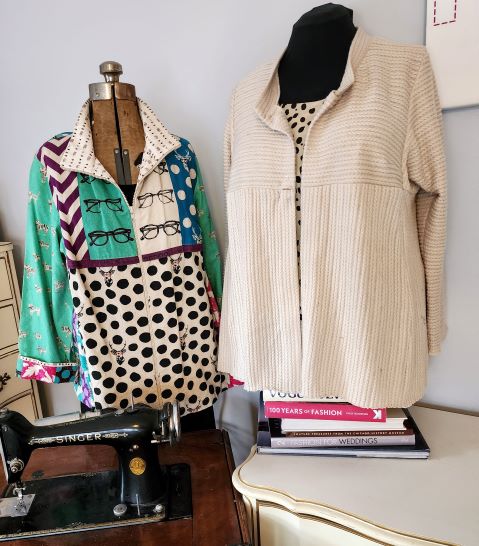
Twin Set Project, an In-Depth Look
For this project, I had two garments, one in a knit fabric and one in a silky fabric, with similar steps of construction. Follow my timeline below, then remember to make your own when you get started on your next project.
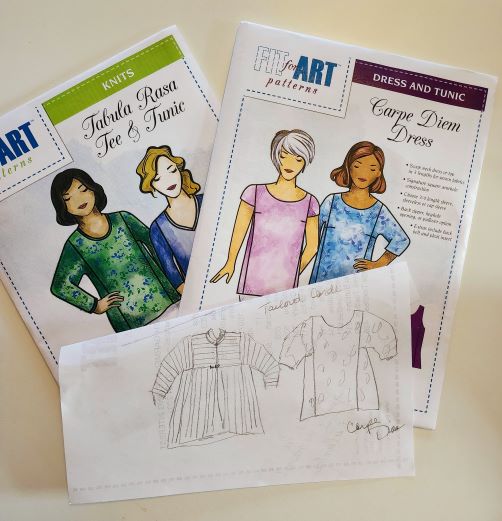
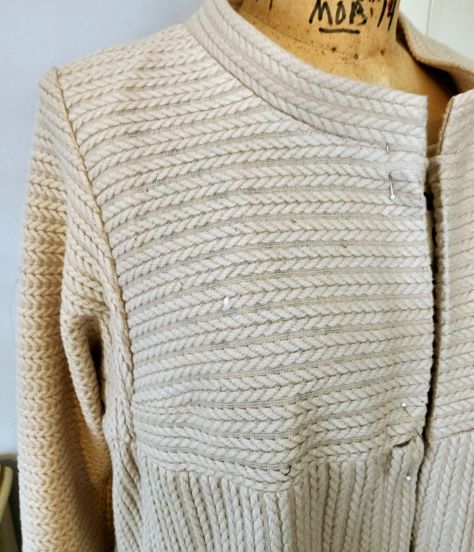
In November I purchased the fabric; last week I pre-washed it and revisited it to make a final design plan. I was sorry upon revisiting the fabric that the stretchiest direction of the fabric had horizontal stripes. For that reason, I decided to make the bodice and sleeves with these stripes running the correct direction, so Sarah would have the benefit of an ease through the bust, arms and shoulders. The lower section of the sweater has the cable stitch stripes running vertically. Here is the sketch I made to test my ideas. A bit of pattern work was required to divide the tailored cardigan variation for this design change.
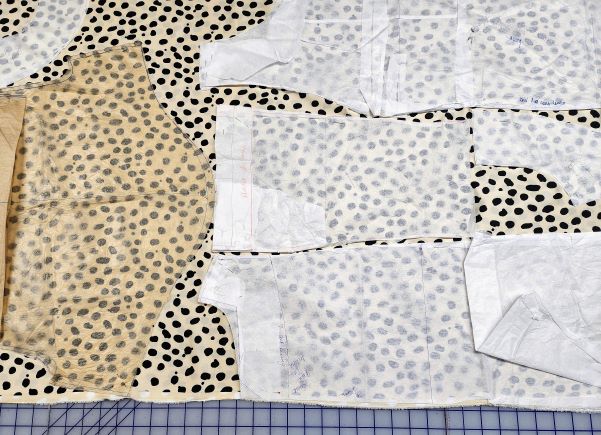
On Saturday afternoon I cut out the Carpe Diem top and the tailored cardigan from Twin Set Variations for Tabula Rasa Knits, tested the interfacing, choosing Envy Silk for both garments, cut out the interfacing, fused it, marked the darts and pinned them in place. I also got all four sleeves pinned and ready to stitch together.

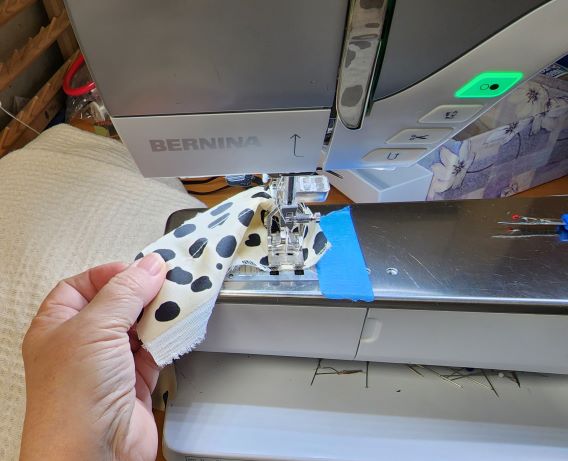
Monday morning, I went right to the studio after coffee and the paper, set up the machine and began stitching. I decided after testing fabric scraps, to use the same needle for both garments, a microtex #70 since the silky fabric was rather finnicky and the knit was chunky and easy to sew. That way I could sew both garments at the same time. I just had to remember to change the stitch from straight to a long narrow zig zag when moving from the silky fabric to the knit fabric. Construction of both of these garments is second nature to me, so by lunch I had them stitched together, pressed the seams and serge finished my work.
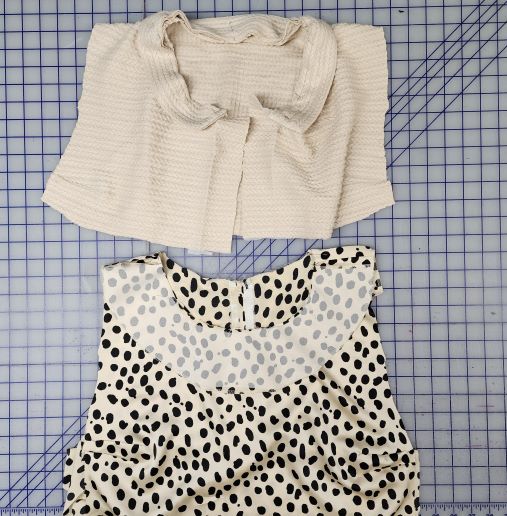
Monday afternoon I took a few photos and began deciding what sorts of hem finishes to use on the sweater and the silky top as I wrote this post.
Tuesday morning, I am still deciding about the finishes while I drop photos and links into the blog post.
Sometime later in the week I will make the final finishes and wrap this up for the birthday party on Saturday evening. Check out Facebook to see how it all got finished off.
Plan Your Projects When You Sew Personalized Gifts
Hopefully you are not usually working on such a short deadline when you sew personalized gifts. If you are new to sewing these garments, it would be better if you made one at a time, keeping the direction book close at hand. Don’t sew for too long at each session. You will make fewer mistakes that way and can appreciate each step in the process. Finally, if you are in a hurry, leave behind your cell phones, audio books and other distractions while you sew personalized gifts.
Isn’t it a marvel how the flat fabric transforms into a great garment? It continues to delight and amaze me with each garment I make and I hope the twin set will delight Sarah too.


Love the knit. Can’t wait to see a picture of Sarah modeling this! Happy Birthday Sarah!
keep an eye on social media for a photo!