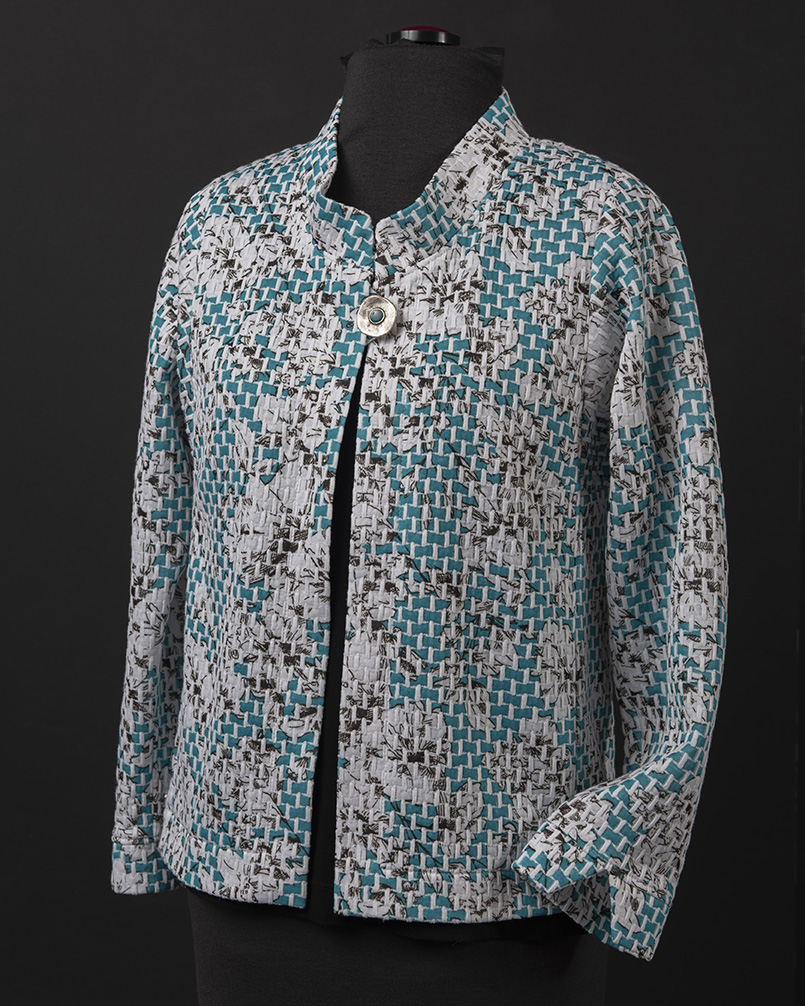
In preceding posts, we shared step-by-step illustrations for making a Waterfall Cardigan and a sleeveless Tank Top from Twin Set Variations for the Tabula Rasa Knit Tee & Tunic. Today we take a closer look at the Tailored Cardigan style from Twin Set Variations. As the name implies, this cardigan is more tailored and closer fitting than the waterfall cardigan. It features a jewel neckline and center front and can be finished with the optional angled collar and cuffs.
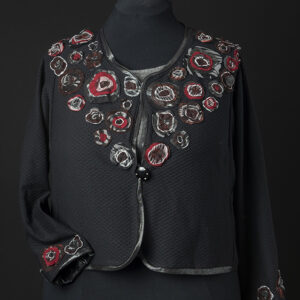
Circle Fun embellished Tailored Cardigan without a collar or cuffs shows the shape of the jewel neckline. For this sample, Rae finished the entire neckline, center front and hem with a continuous binding, and the sleeves were finished in the same way.
Prepare your Patterns
Like most of our variation patterns, the Tailored Cardigan requires you to make a few adjustments to your core Knit Tee pattern. Cut out the Templates for the Tailored Cardigan Back and Tailored Cardigan Front, in AB or CD as appropriate, in your size. Lay the template over your adjusted core pattern or a traced copy of it, lining up the shoulder line, armhole notches, center back for the back template or center front to the fold line on the front template, and pin or tape them together. As you can see below, the neckline of the Tailored Cardigan templates are narrower than the core pattern, so cut away the paper on your traced core pattern piece that sticks out from the template, or fold it down and pin it out of the way as I have in these photos.


You will also need your Knit Tee side panel and sleeve pattern pieces to complete your cardigan. Follow the directions in the side bar on page 5 of the Twin Set instruction book for adding ease to the cardigan body and sleeves, if desired. Cut out the Tailored Cardigan Cuff and Collar patterns if using and remember to shorten the sleeve pattern as directed to accommodate the cuff.
Ready the Collar and Cuffs
Basic construction of the body and sleeve/side unit are the same as the core Tabula Rasa Knit Tee. Turning to the special elements of the Tailored Cardigan, the collar is prepared in the same way as the cuff illustrated below. After interfacing the cut out pieces, fold the cuff or collar right sides together along the fold line. Sew the two short angled seams and clip the seam allowances. Turn cuff or collar out and press. It’s ready to be added to the cardigan!


Construct the Tailored Cardigan
The center front, hem and collar are all finished together, after clean finishing the raw edge of the front facing and pressing up the hem. To insert the collar, pin and baste the raw edge of the collar to the neckline starting ending at the front facing fold lines. Fold the front facings back, right sides together, along the fold line and stitch the facing down along the collar seam line catching all four layers. Trim points and clean finish the entire neckline seam. Turn the facings to the inside of the cardigan to release the standing collar. Press the collar away from the body, then topstitch the seam allowances in place about 1/8″ from the seam line. The hem is neatly finished into the front facing in the same way as the Shirt or Rain and Shine Variations with facing.


Because of the turned back facing, button loops have to be handsewn to the center front after it is finished. It can be hidden on the inside, like the sample below, or incorporated into an external embellishement. Closures that sit on the exterior of the garment, such as frogs or chinese knots, are also a great option.

Finish the Sleeves
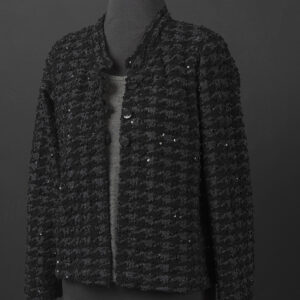
If not using the cuff for your Tailored Cardigan, you can finish the sleeve with a simple hem as I did with the Sparkly Sweater Cardigan.
Before adding the cuff, you’ll want to determine placement of the split opening. We recommend finding a point 1/2″ or more forward of the mid-point opposite the underarm seam. Baste the cuff to the sleeve and try the cardigan on to make sure you are happy with cuff location and sleeve length. When satisfied, secure cuffs with regular length stitching and clean finish the seam allowances. Press the seam allowances to the inside and topstitch them down approximately 1/8″ from the seam. Enjoy a few samples of the split cuff in these photos.


Fabrics for Tailored Cardigan
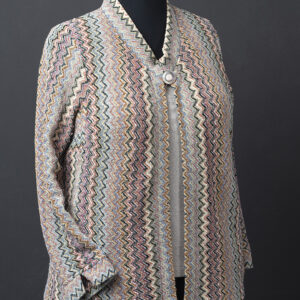
The Tailored Cardigan is best suited for relatively stable knits, in contrast to the Waterfall Cardigan which requires drapier knits. The Twin Set samples in the Photo Gallery will give you come ideas. The Flower Basket Tailored Cardigan and Circle Fun Tailored Cardigan seen above are made from stable cotton pique knits. Magic Purple Ruffles Twin Set is a cotton jersey knit from our friends at Sew Batik. Sweater knits are also a great option, such as the Wanna Be Missoni and Sparkly Tailored Cardigans. Ponté knits are also good candidates. (True confession, after making the Brushstroke Ponte Waterfall Cardigan, I realized that it would have been more suitable for a tailored cardigan.) However, if you have a softer knit that you want to make into a Tailored Cardigan, consider creative options, such as the double layer that Rae used in this Fabulous Fall Twin Set.


We hope you have a fun time creating Twin Sets. They will be great to wear this fall and winter! Please post photos of your creations with our hashtag #twinsetvariations so we can all be inspired by your choices.

Stay Well and Happy Sewing, Carrie


