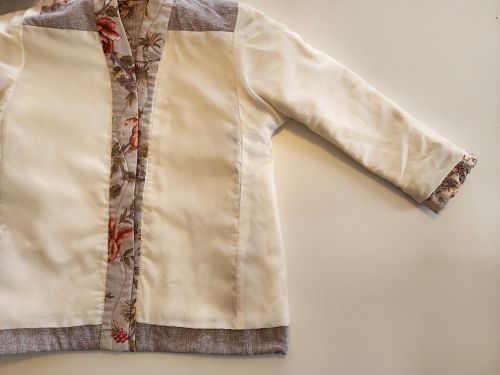
We are starting the new year with one of the last tips in our series on the quilted jackets in our book, Sewing Quilted Patchwork Jackets. Here are some notes about hemming and lining the kids Orphan Block coat, project #8. This jacket has a front band and a free hanging lining so we will look at how the finishes come together to make a tidy and integrated little coat. All of these techniques can also be used on an adult sized jacket as well. If you have decided that 2026 is the year to make a quilted jacket, be sure to have a copy of our book to use as your guide.
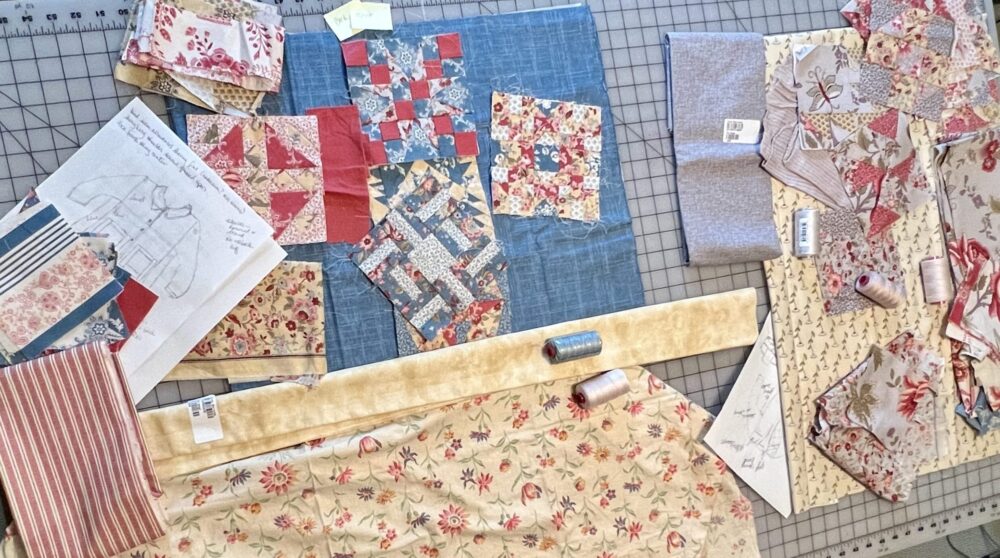
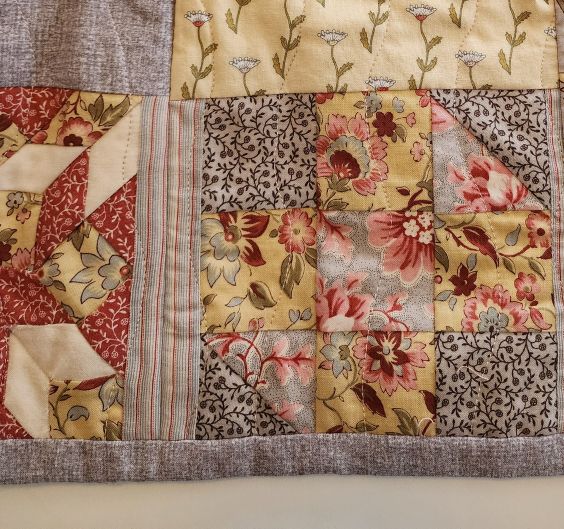
Rae designed and crafted this jacket from the yellow and grey group of orphan blocks seen on the right in the above photo, which we were gifted by our editor. The orphan blocks were combined in a manner similar to the techniques Carrie used in her Adult orphan block coat with a collar and binding finishes. Check out her post if you have questions about personalizing and combining blocks. The book has great photos of this being done for the jacket we are discussing here.
Once the jacket was pieced, quilted, trimmed and lined, it was time to finish the edges and drop in the lining. The Opus coat with the front band finish found in the book is similar to the Tabula Rasa Jacket, celebrating 15 years of happy sewing in 2026. For either pattern, create the exterior of the jacket first. The body and sleeves are then hemmed before inserting the lining; and finally the front band is added to finish the jacket. We love this construction technique because it is a very easy way to insert the lining and finish the center front without facings.
Choosing and Finishing the Hem
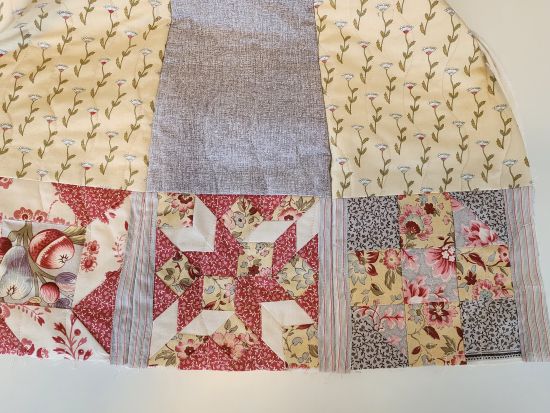
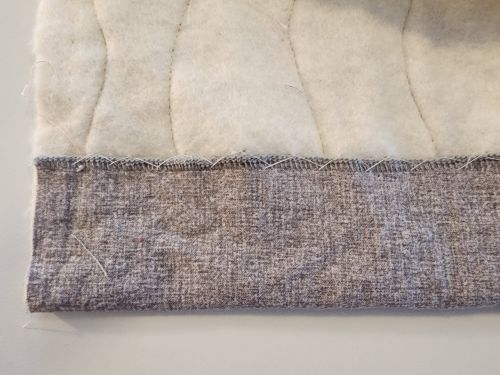
Once the jacket was finished, I decided that it should not be any shorter. The orphan block strip around the hem was such a nice edge, but it needed to be supported. Since there was plenty of grey cotton remaining, I cut a 3” wide strip to finish off the hem. This piece for binding the hem can be cut on the bias or the straight of grain. The book recommends measuring the circumference of the hem from center front to center front. If necessary this band can be pieced; the joining seams are typically placed at center back or lined up with another seam in the coat’s construction. Don’t forget to add a seam allowance on each section being joined.
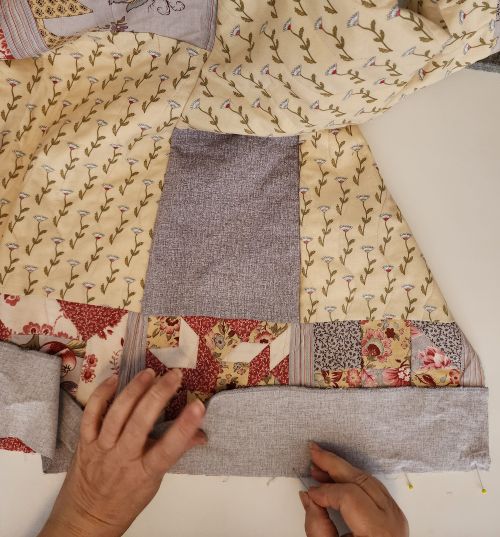
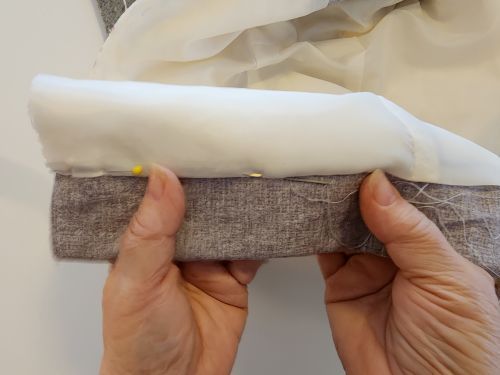
Place the hem binding right sides together with the jacket hem. Be sure to line it up as close to one-on-one as possible and pin regularly for a smooth application. If the hem and binding are stretched out, it will give the coat a wingy appearance at the hemline.
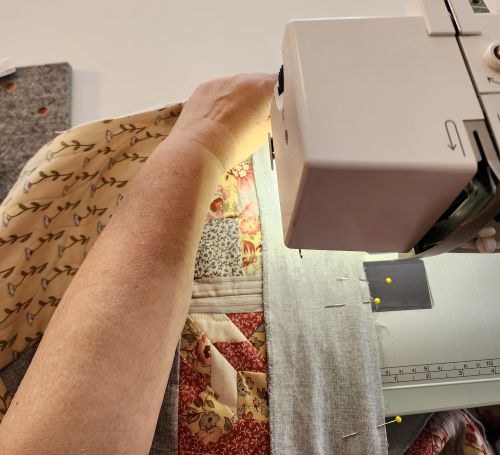
I used the hem facing to create a ½” bound edge on the front. To execute this, sew the seam at ½” then fold the band right side out and press it so the hem band lays smooth extending down from the coat. Wrap the band to the inside of the quilted coat and press smoothly against the batting. Clean finish the raw edge of the hem band binding. There should be 2” of hem on the inside of the jacket. Pin the hem in place and stitch it securely with hand stitches as shown. See a diagram of this hand hemming stitch in our Helpful Hints tab.
Create and Insert the Lining
The finished lining should extend at least ¾” below the top edge of the stitched hem. Use the pattern pieces for front, back and side to cut out the lining. Stitch them together in the same order as the jacket’s exterior.
The piece of lining I had was not long enough, so I used other scraps of fabric to form yokes in for the front and back lining. Using the yoke patterns already created for piecing this coat’s, the yokes were cut as well as the lining pieces. Be sure to have seam allowances added to the lower edge of each yoke piece and the upper edge of the lining when calculating. I also added a lining pleat into the center back, something often done in a tailored jacket. That required cutting the lining on the fold with an extra 1” extending beyond the pattern piece. The lining pleat is stitched in place at the top and bottom and at the approximate waistline to keep it neat but useful when the coat is being worn.

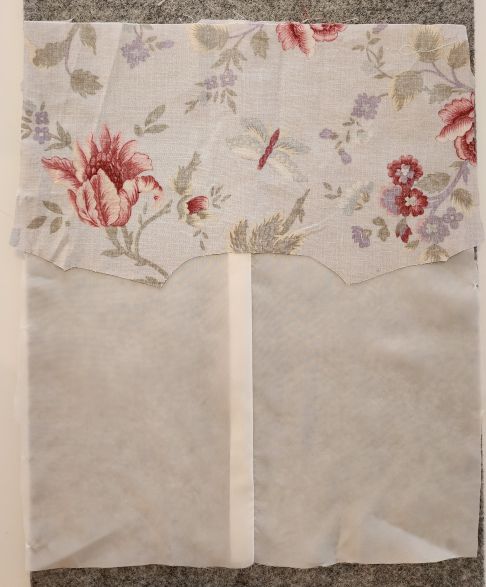
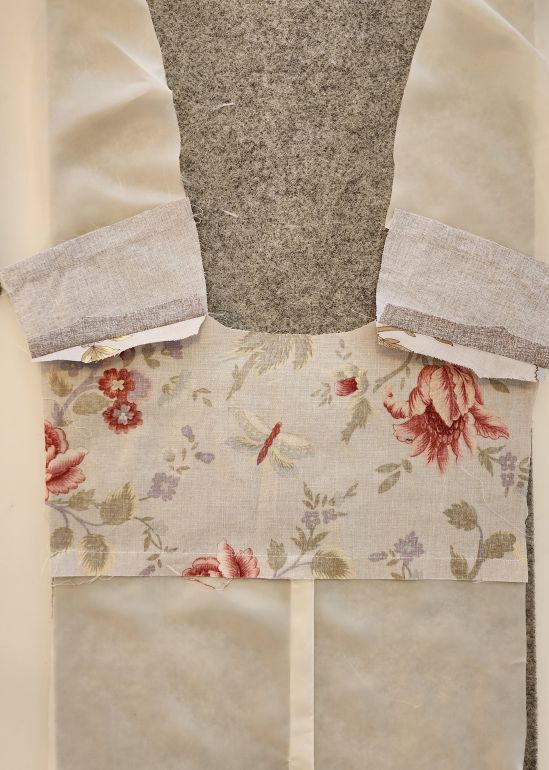
Assemble the pleated lining with the back yoke, then add the fronts, side/sleeve units and press as indicated. Before inserting the lining, it is also helpful to press up ¼” along the bottom hem edge of the assembled lining.
The lining is inserted into the quilted jacket, pinned and then stitched in place around the center front and neckline. Leave the bottom 3” of each center front unstitched in order to create the “jump” at the hemline which allows the free hanging lining to move easily on the body. Tack the lining to the jacket with thread chains in the armhole area as well for a secure finish.

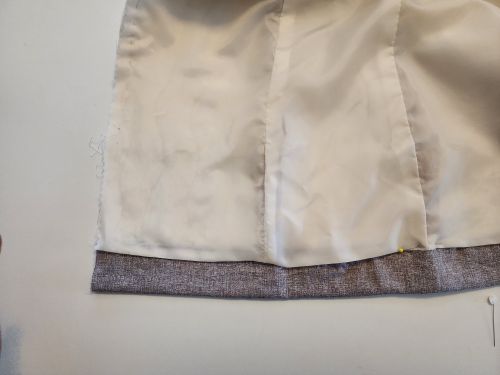
Align the folded lower edge of the lining so it just covers the clean finished edge of the jacket hem. Pin and then hand stitch the lining so it covers the hem edge. It will appear to be too long. Once the lining hem is stitched, allow the extra lining to fall gracefully over the stitched hems, pressing the extra into a pleat. (It appears that this has not been covered in a post to date, so I will get one written in the near future!)
Keep Learning New Techniques
Now add the center front band and the coat will be finished. The book has lots of great info about hemming and lining the Kids Orphan Block coat as well as other hemline options in previous projects. Just know that hems can be tricky so whichever hem you choose, follow the instructions as written for a tidy coat!
The techniques presented here are ones that can be used in many sewing projects. Lining a garment is important knowledge for stitchers, piecing a lining allows for smaller pieces to be used in a project rather than discarded, and binding a hemline with a wrap around hem like this one is a great way to add length when there is not quite enough. At Fit for Art we hope to keep your body of sewing knowledge growing along with your skill so each project can be sewn successfully.