
A colorful bundle of Echino fat quarters came to me as a gift from my daughter several years ago, and I immediately wanted to make them into a Tabula Rasa Jacket (TRJ). But, fat quarters (18” by 22 1/2 “) are challenging when designing garments, especially if you want to feature the fabric in large pieces.
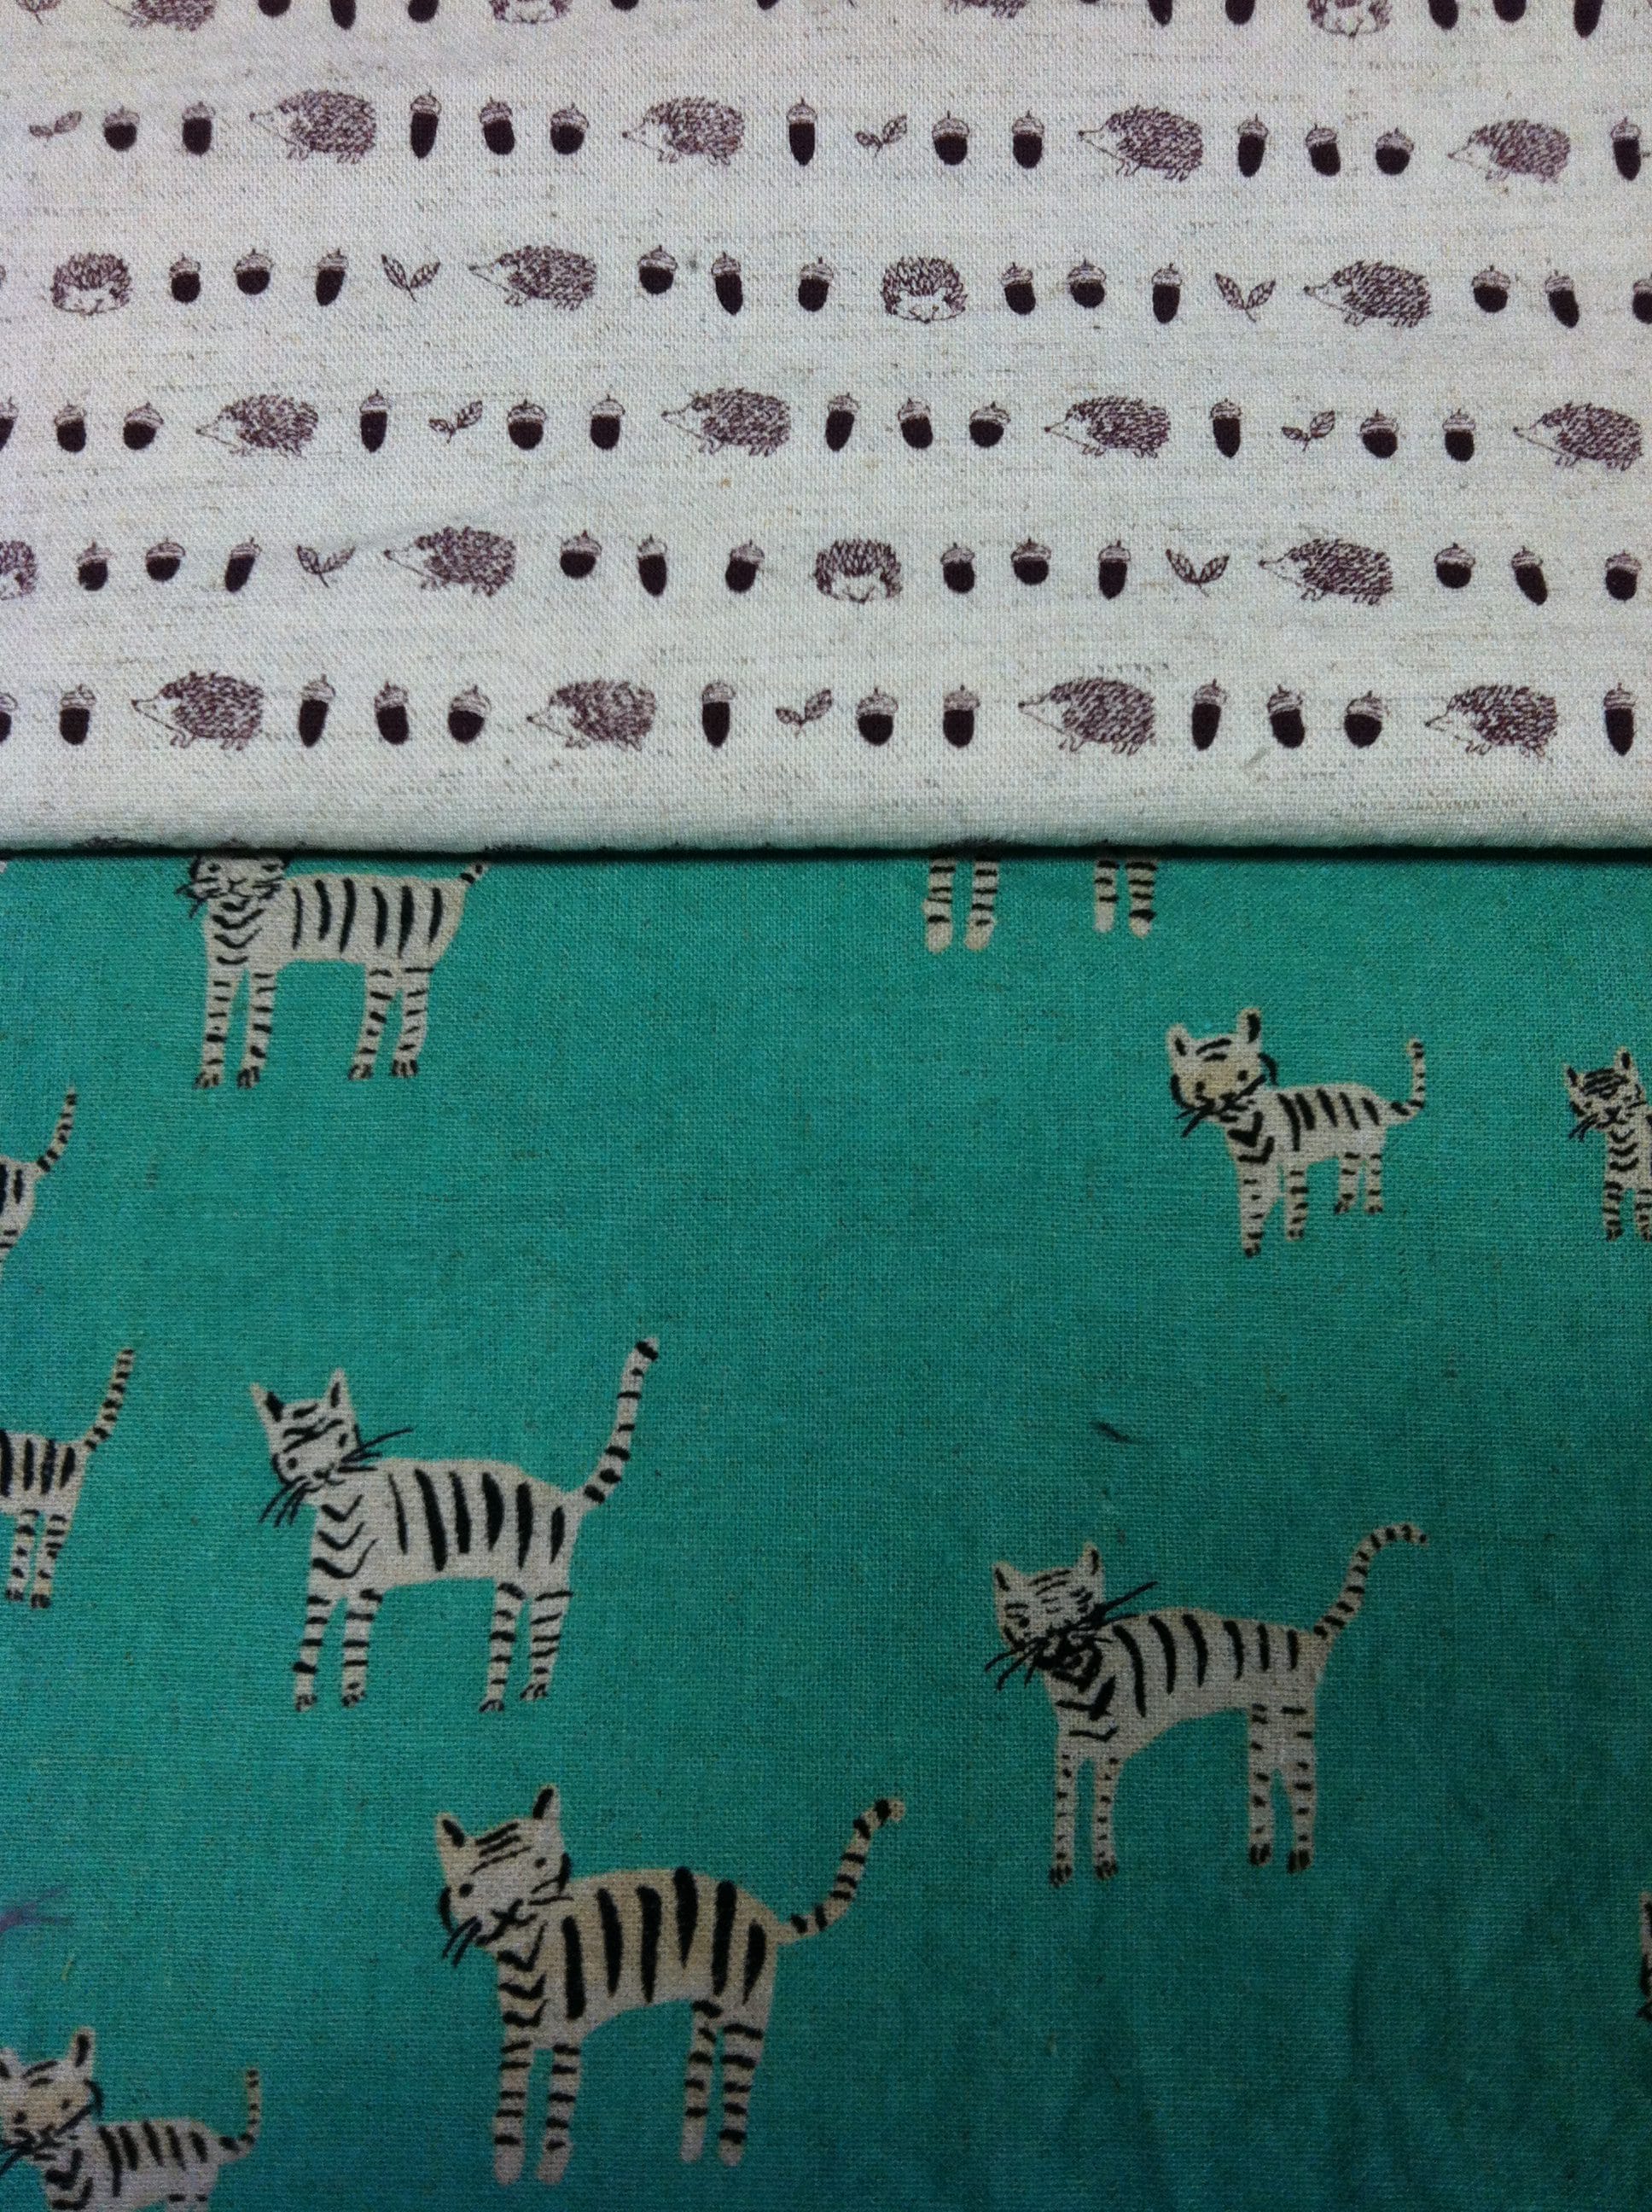
Echino fabrics are only sold at select stores so my search for a couple large pieces of coordinating fabrics was slow. I was also struggling to find a unifying theme; polka dots, glasses, bucks, or other fanciful animal prints. Because the fat quarters were so varied, I had to carry them with me, even to France for a quilt show in 2015. On that trip, I purchased 2 additional fanciful animal prints in a similar weight heavy cotton/linen, and the same wheat colored background. Then, to expand my options, I stumbled upon the wheat colored Echino bucks print and purchased a yard of it too.
I spread out all the fabrics on the cutting table for study in January 2016 as we were developing the Rain or Shine Variations (RSV)for the TRJ. In my zipper stash I had a long wheat color molded plastic separating zipper that complimented the fabrics perfectly. Here was a start.
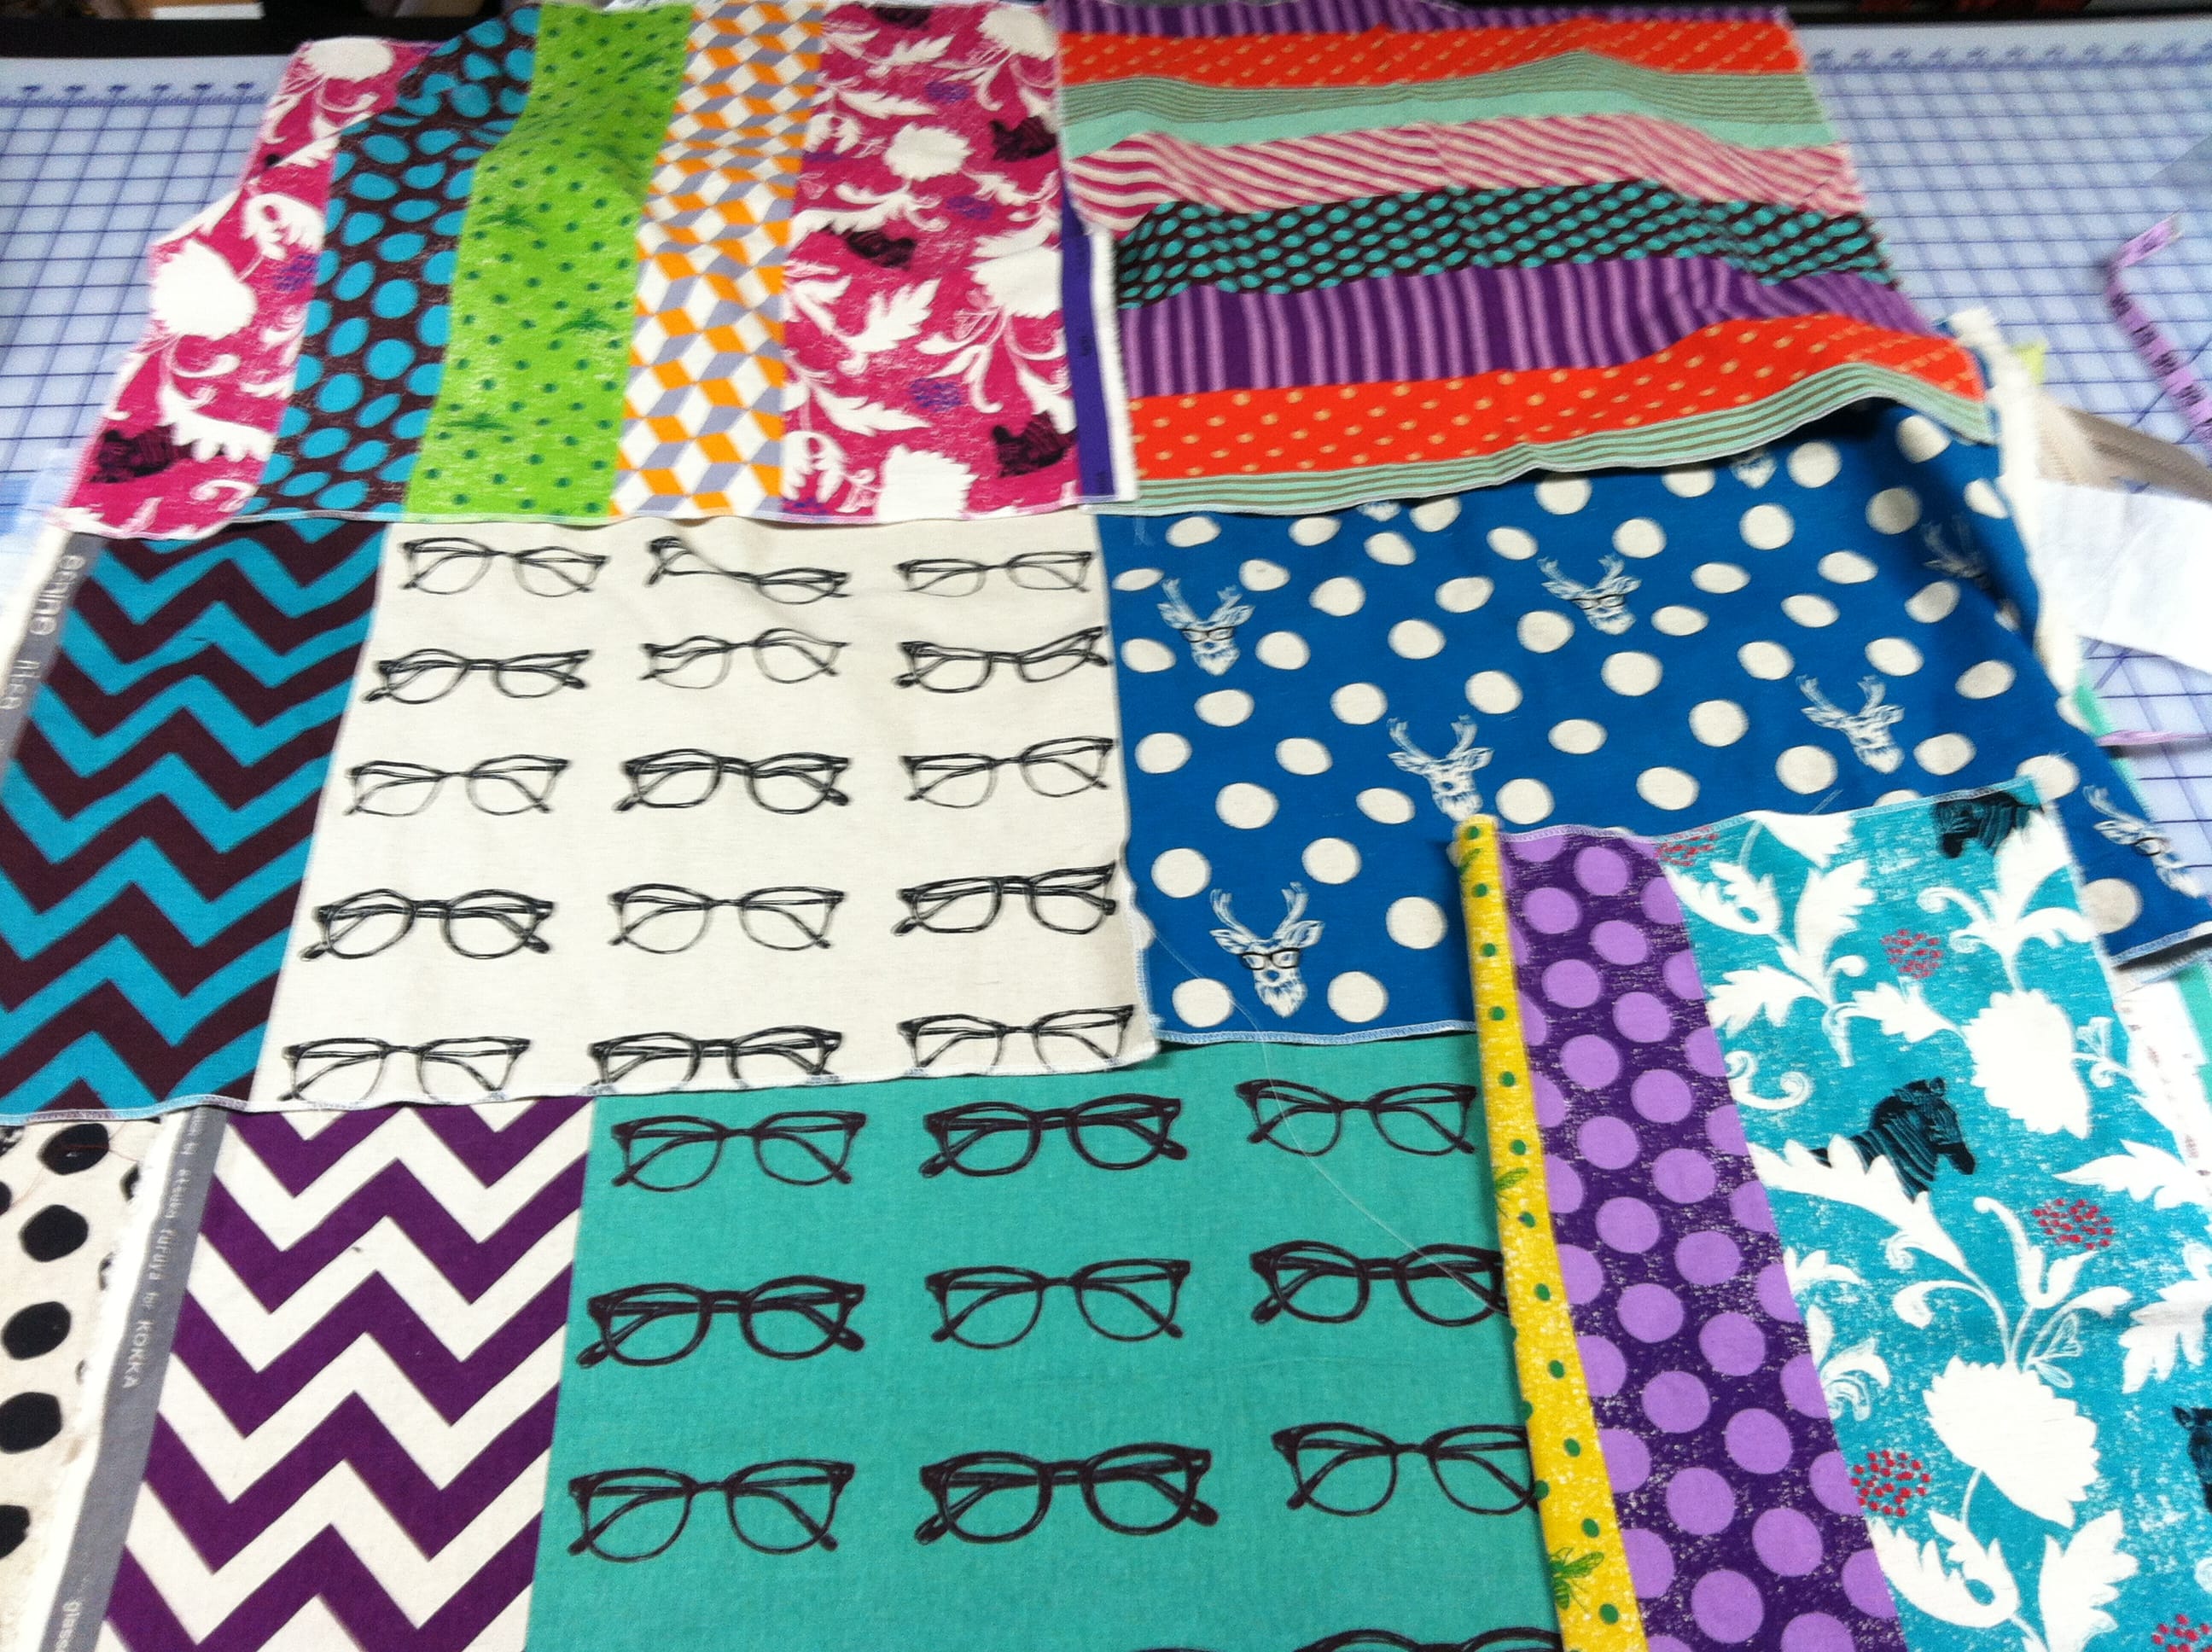
I decided to feature the glasses prominently. It was the most consistent motif, appearing large on one print and on the Bucks in several other prints. Because I have worn glasses full time since the 4th grade, it just felt right and was a unifying theme for the primary sections of the TRJ.
A plan formed in my mind to divide the front and back TRJ pattern pieces along the middle HBL (Horizontal Balance Line). I could use the fat quarters for the 14” upper body pieces and the 17” lower body sections. The pleated back feature for the RSV would be the perfect way to add ease in the back and use another fat quarter.
The pieces began to fall into place as I prioritized my favorite fabrics for the most visible sections.
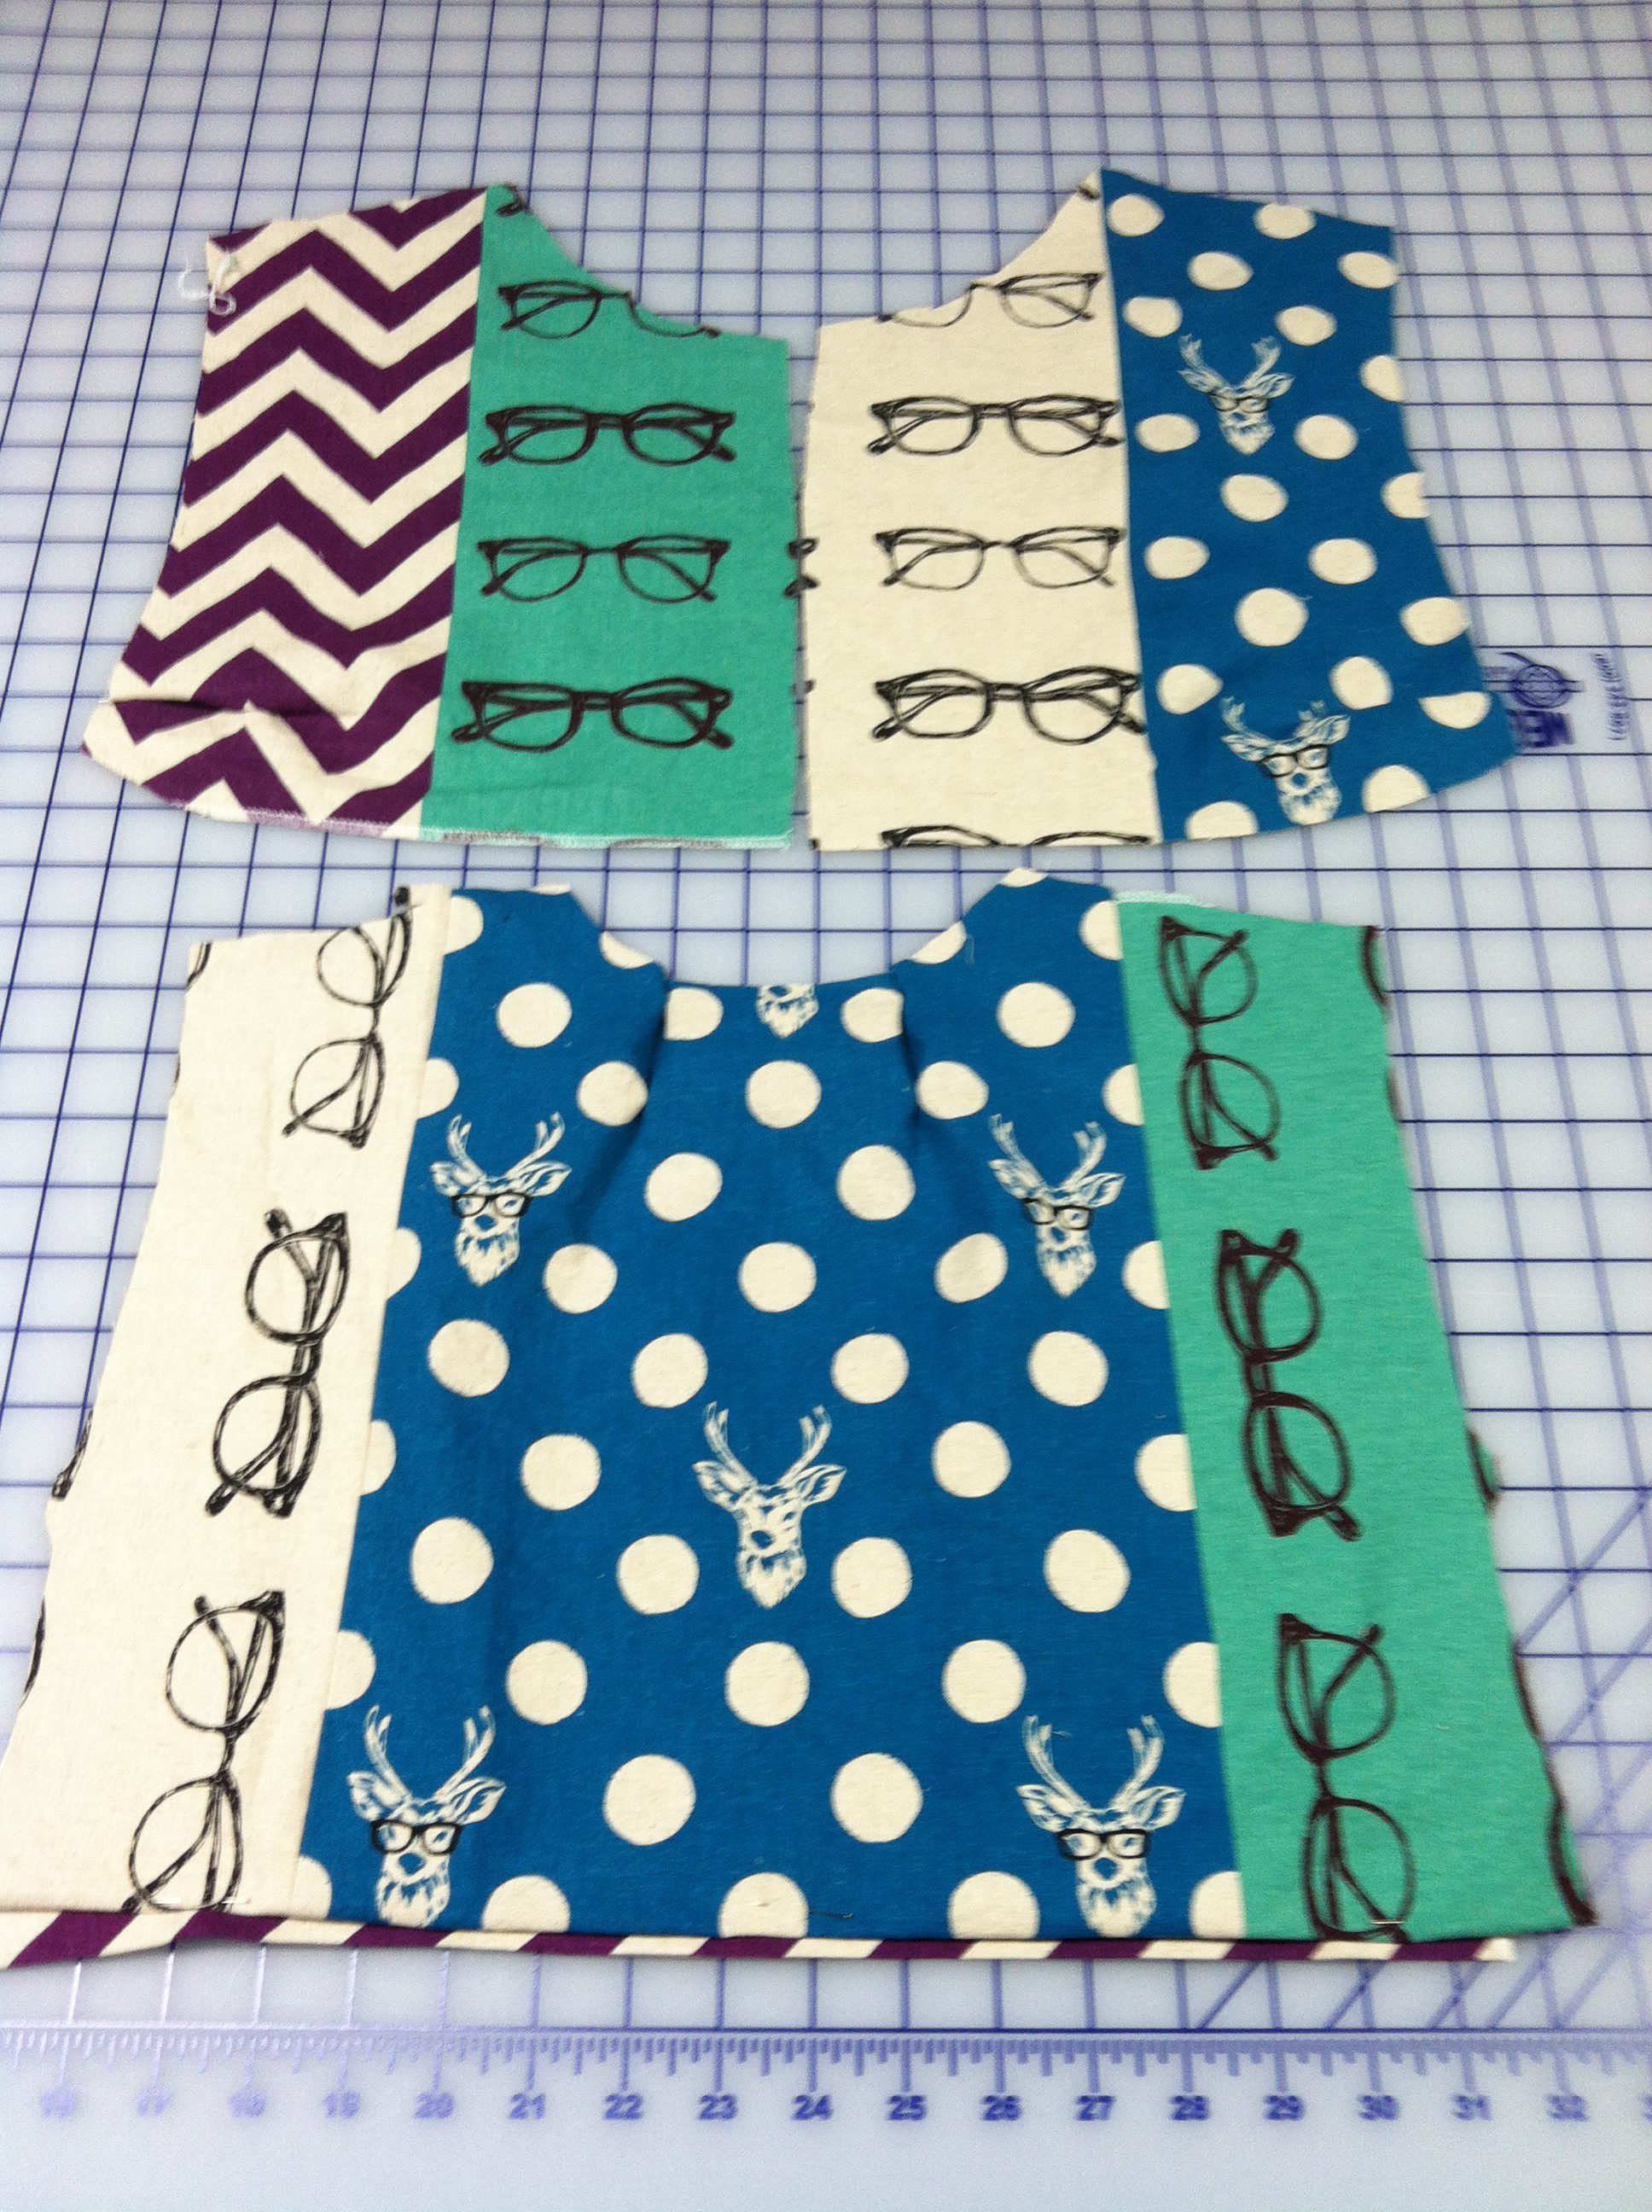
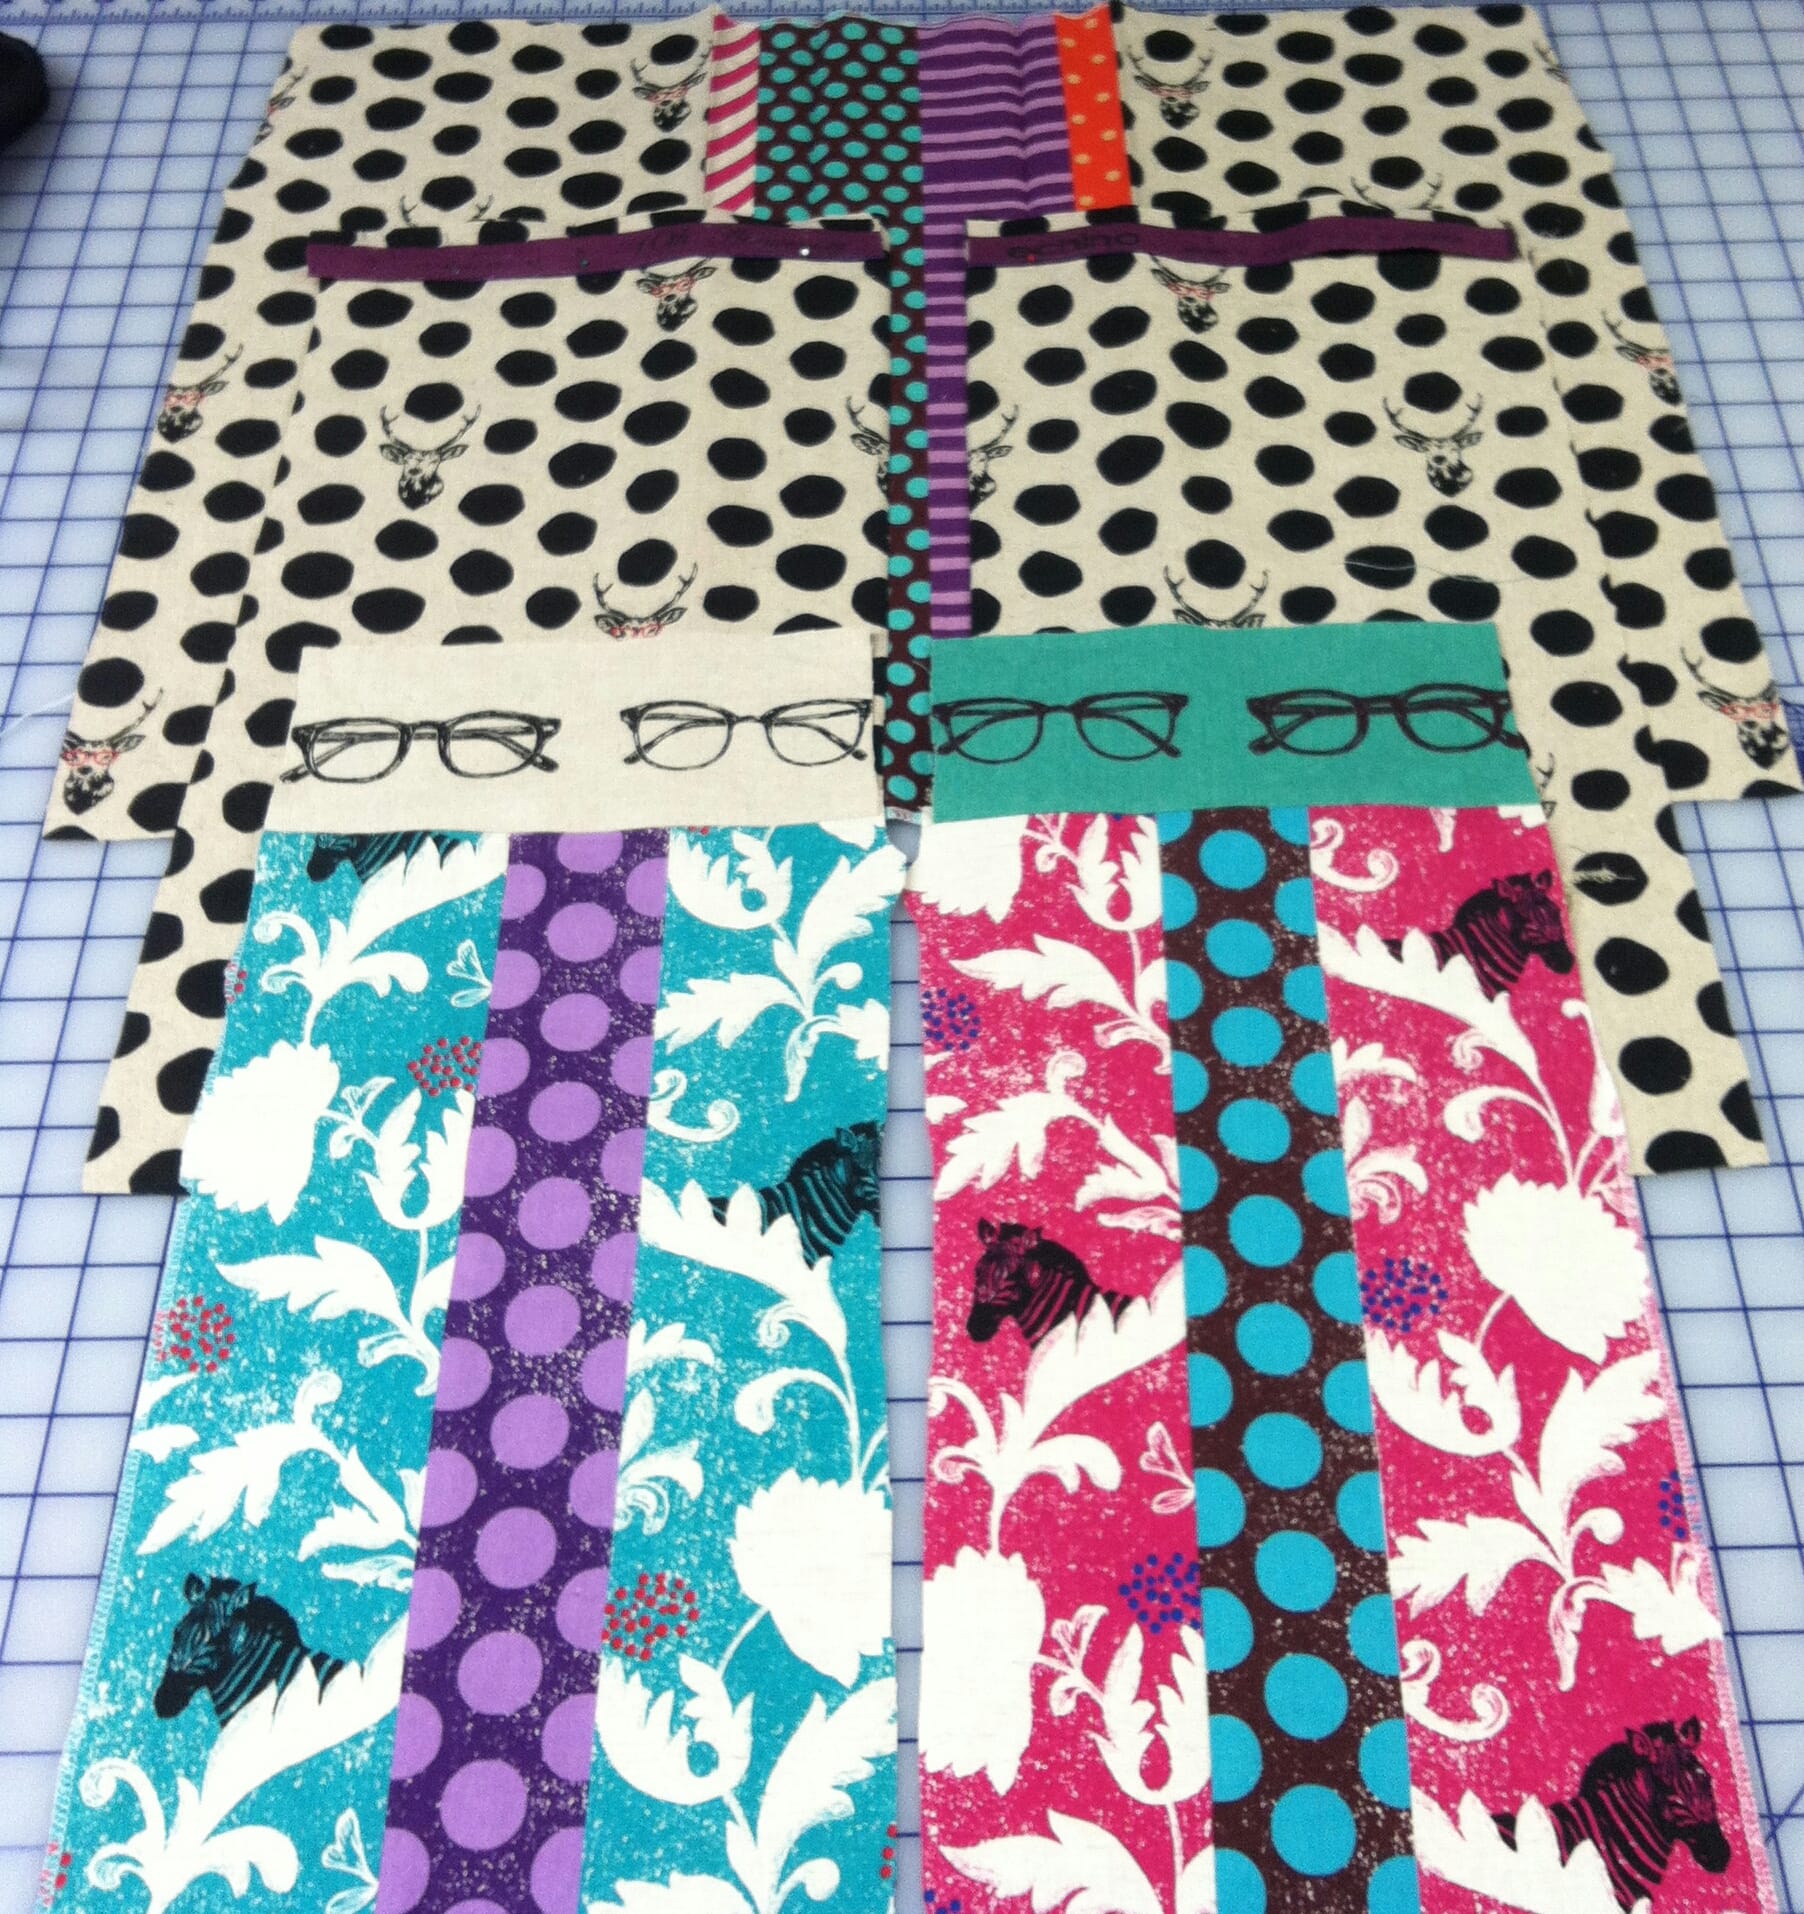
Using the selvages was another priority since the Echino fabric has such fanciful selvages. Inserting it between the bodice and skirt of the coat’s front and back would keep each section isolated, allowing the eye to observe more print combos.
Once I had planned the jacket’s front and back, the green cats seemed a natural choice for the sleeves. Next, the side panels and sleeve cuffs were designed to add symmetrical asymmetry and color balance. Each would feature the same fabric grouping in alternating color schemes. The roll back cuffs gave me more places to feature interesting fabric.
Because the fat quarters limited the jacket’s length, I would use the spread collar to finish the neck. It added just enough length for the zipper instillation. It is hard to resize molded plastic zippers so designing around the zipper’s length is best.
In my planning, I discovered that there was going to be enough sleeve fabric left for a detachable hood, another RSV feature I wanted to test on this jacket. The hood’s lining and all the facings and finishes were to be cut in the tiny hedgehog print which I hoped would tie all the chaos together.
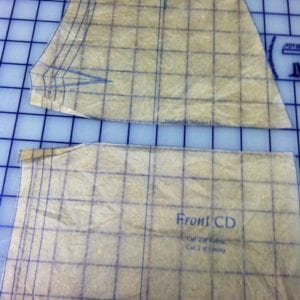
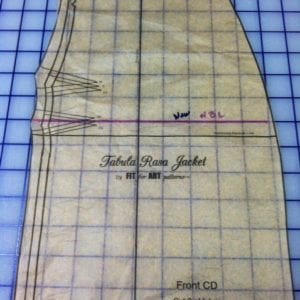
Once the planning was complete, it was time to cut everything out. First, I made the adjustments to my TRJ front for the RSV with the zipper front. In order to break the front pattern into pieces, I traced off the front and cut apart the copied pattern piece along the middle HBL which runs through the dart on the AB front and the lower dart on the CD front. Next I folded out the dart, and added 5/8” seam allowance to the upper body and lower skirt patterns, labeling them accordingly. The new seam was going to incorporate the dart so I would not have to fit it in around the decorative seam.
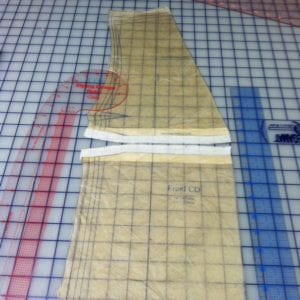
(If you have the original printing of the TRJ the HBL runs under the dart. Follow the “PS” directions after my signature to create your divided pattern)
The directions for splitting the back and adding the pleat are on page 4 of the RSV instruction booklet and I followed them, but made the insert from a coordinating fabric.
Now it is your turn. Pull out your fabric collections and begin planning a fun spring coat like this “Spectacle”. Need some reassurance, take my Wow! Wearable Art Jackets class at the Atlanta or Cleveland Original Sewing and Quilt Expo for even more tips.
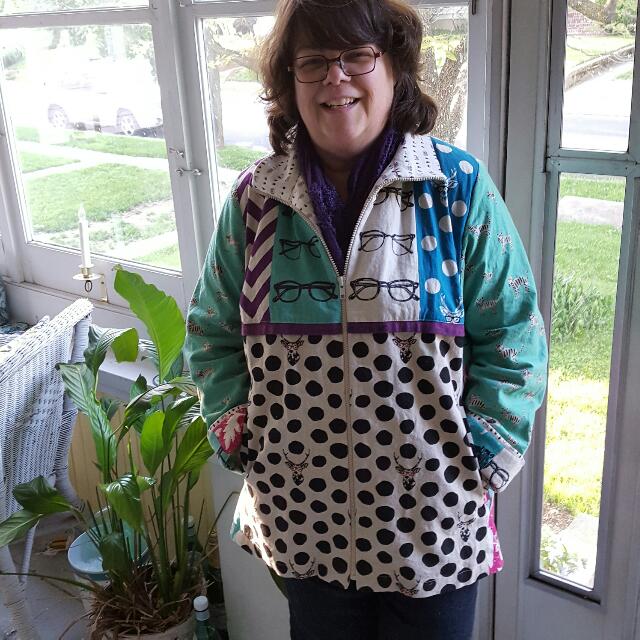
When I was working on this coat I was so afraid that it was just too much! But now that it is complete, the joyous colors and fanciful prints delight me every time I wear it. Plan to read more about this jacket in next week’s post too!
Happy Sewing, RAE
PS To adjust the front pattern from the original printing of the TRJ, move the HBL up so it intersects through the center of the lowest dart, then trace off the front pattern including this HBL and the dart lines.
Cut the pattern in half along the new HBL and fold away the dart.
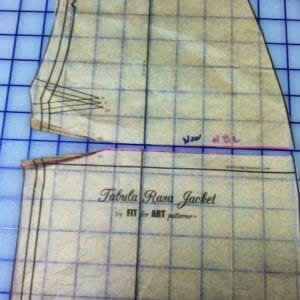
Add a 5/8” seam allowance to each pattern piece along the cut edge. Now you are ready to cut and sew.


I love this! So creative and fun – thank you so much for these posts and inspiration. I really appreciate the level of detail in the instructions too. See you in Fredericksburg later this year…
I was not so sure at first since I don’t quilt and can’t put prints together for a good look, but it looks so good it makes me want to try something with the mounds of upholstery fabric pieces I’ve been “seasoning” in my stash. Thanks for the inspiration and another great post on how to make lovely garments using the TRJ pattern.
I absolutely love your new jacket! When looking at the fabrics on your table, I agree that it did look very busy but upon seeing the jacket on you I take back all my negative thoughts. Great job as always! Hope you will have class on making the jacket.
I think you did a beautiful piece of work. It looks very attractive on. Beautiful work!
Thanks for all your good comments. Hope you are inspired to start your next jacket. RAE
Did you feel that this had enough body to be comfortably wearable without a lining? I have a stack of coordinating quilting cottons I’m bringing to the retreat to make into a rain or shine with zipper, similar to this, and I’m wondering if a lining would be necessary or helpful. I love the version you made!
This jacket doesn’t have a lining. Carrie made one with a lining (https://fitforartpatterns.com/gallery/toile-spring-jacket/), so we will bring them both to the retreat so you can judge for yourself!