Underlining is a couture technique that offers a number of benefits to careful garment sewers. When you underline, a second layer of fabric is hand basted to your fashion fabric to provide support or to change the fabric’s nature. Today we will consider underlining pants.
Why Underline
I mentioned this briefly in last month’s blog post on white pants. We have all seen white pants walking down the street in which the seams, pockets and sometimes even the underwear show through the fabric. A layer of underlining prior to construction provides the opacity needed to make white pants more appropriate and more becoming!
Other benefits of underlining include:
- strengthening a weak fabric,
- supporting a wrinkly fabric,
- providing a place to hide hand stitched finishes,
- providing a place to mark darts and connections so you don’t have to mark precious or fragile fabric.
Let’s look at two different pairs of underlined pants that I am currently working on.
Blue Eyelet Pants
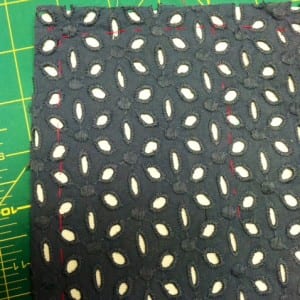
The first pair of pants is made from blue cotton eyelet. So perfect for the season, but the eyelet is a bit too revealing for pants. The eyelet is being underlined in pale yellow broadcloth. Both fabrics were on sale at my local JoAnn Fabrics.
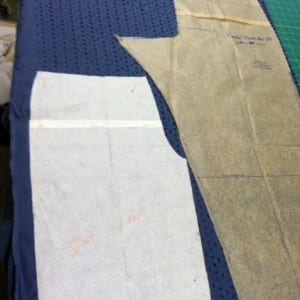
The Eureka! Pants were cut from the pre-washed and pressed eyelet and then from the pre-washed and pressed broadcloth.
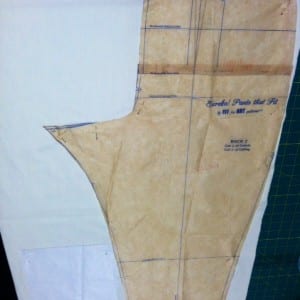
Next, each eyelet piece was stacked together with its broadcloth underlining. The two pieces were carefully pinned together, keeping both fabrics perfectly smooth on the cutting table. For your viewing pleasure, I used hot pink thread to hand baste the two layers together before moving the piece from the table.
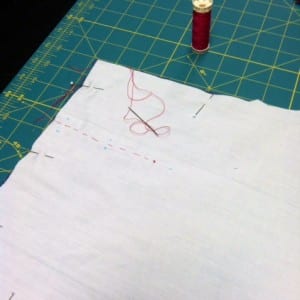
The darts were marked on the underlining and a basting thread anchored the dart through its center.
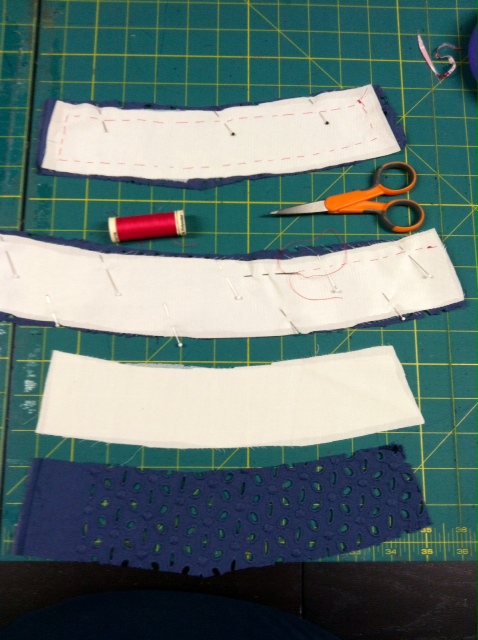
The shaped waistband pieces were also underlined to match the pants.
The basting stitches are ½” inside the cutting line and are stitched as smoothly as possible so that the resulting underlined pant piece resembles one layer of fabric.

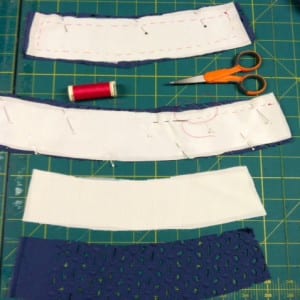
When I construct these pants, the seams, darts and zipper will be hidden under the broadcloth underlining. The seam allowance layers will all be serged together and pressed to one side. Both fabrics are lightweight enough that the pants will be cool and comfortable even with the second layer of fabric.
Silk Dupioni Pants
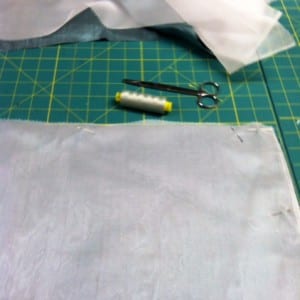
The second pair of pants is made from lightweight silk dupioni. The chosen underlining is silk organza, a classic combination for a dressy pair of pants. These fabrics were not pre-washed because the pants will be dry cleaned. Both fabrics were well pressed before the Eureka! Pants were cut from the fabrics, one at a time. I cut with pinking shears to minimize raveling edges. On this pair, you can see the sewn inseams with the seam allowances pressed open.
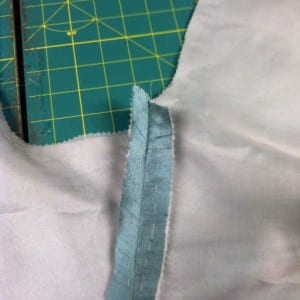
Because these pants will also be lined with china silk, no additional seam finishes are needed. The pants will be beautiful, sturdy and remarkably lightweight.
Try it yourself!
Once these pants are finished we will post photos on our Facebook page. In the meantime, consider underlining your next pair of lightweight pants. It takes some extra time during the cutting process, but I find the handwork soothing. I play some of my favorite music or a book on tape and stitch away.
Have you ever underlined pants? Were you pleased with the results? Share your experiences with the Fit for Art community. As an extra bonus, I have included a tip for stitching the corners of your underlined garments below my signature.
Happy Sewing,
RAE
Try stitching the corners of your underlined fabric with this basting technique I learned in Claire Shaeffer’s Couture Sewing: The Couture Cardigan Jacket from Taunton Press.
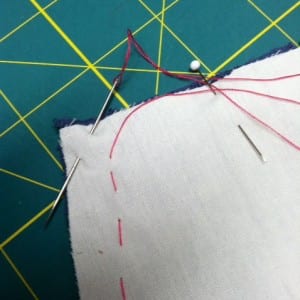
Step one: When you come to a corner, insert the needle, they stitch into the seam allowance about 3/8 inch.
Step 2: Stitch across the corner,
Step 3: then back into the corner as you head your new direction.

This allows you to snip the cross stitch if you have to release one side of your stitching, while your other stitching stays secure.


Thank you Rae for this blog, I always worry that two fabrics will be too heavy, but I would never imagine wearing light weight fabric to show my “lines”. You have given me the confidence to tackle my lighter fabric ideas now.
Hi Rae, I have a student that is going to make a pair of pants in linen and wants to reduce the wrinkling qualities of the fabric. My first thought was to underline them in silk organza. Should the organza be cut on the straight of grain or bias? If you have other underlining suggestions, please share. Thanks!
Alania, I have underlined linen pants with silk organza cut on the straight of grain. I am afraid that bias organza would get lumpy under the straight of grain pants over time. You can wash the organza first, so the pants can be washed, but it all wrinkles a little then, maybe not quite as much. Seems to me you just have to embrace a few wrinkles as part of the charm of wearing linen. Let me know how it goes. RAE
So, if she were going to dry clean her finished pants, would you launder the linen first?
If you are really trying to minimize wrinkles, I would not launder anything, linen or organza. RAE
I made a pair of summer pants out of a quilting cotton and lined them with cotton batiste. The pants were still cool to wear in the summer heat and did not wrinkle as much. I have some linen that will get this treatment, though I know my pants will still look somewhat wrinkly–oh well!
Underlining always makes me too nervous: I worry that I won’t be able to keep the layers flat, even with basting. You do make it look easy!