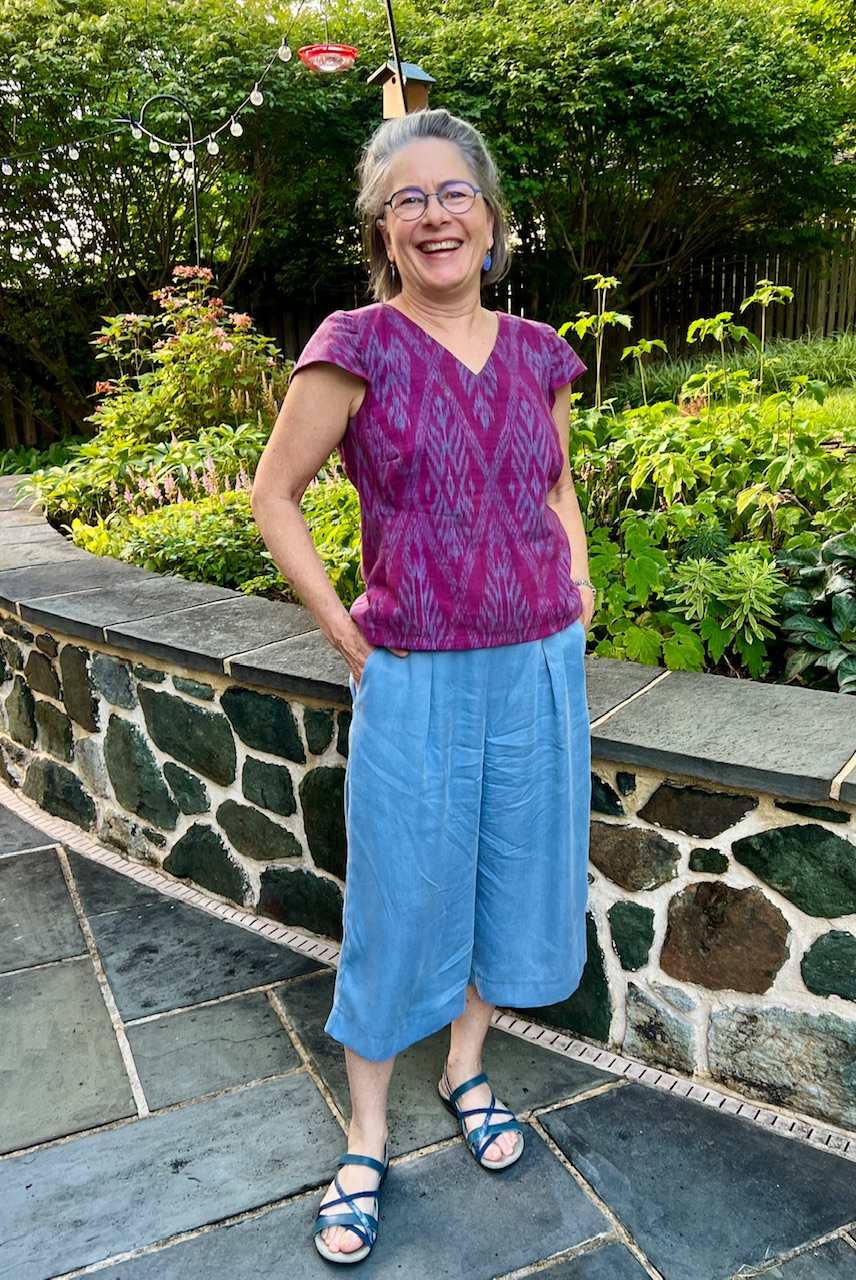
It does seem that every fashion comes back around eventually, and this year we’ve been noticing a lot of cropped wide leg pants, just like the culottes of our youth. In this installment of our occasional series “Inspired by Pinterest,” Carrie relates how she was inspired by Pinterest to create a pattern for culottes from her Trouser Details variations for Eureka! Pants that Fit.
Idea Shop on Pinterest
After deciding that culottes would be just the thing for a lightweight, drapey chambray in her stash, Carrie noodled around on Fit for Art’s Wide Leg Pants board (and more ideas from there) looking for inspiration. She needed guidance on just how wide and long would be flattering for the culotte’s legs. She was also seeking inspiration for an appealing waist finish – more interesting than pull-on elastic while still being flexible for a changing waistline.
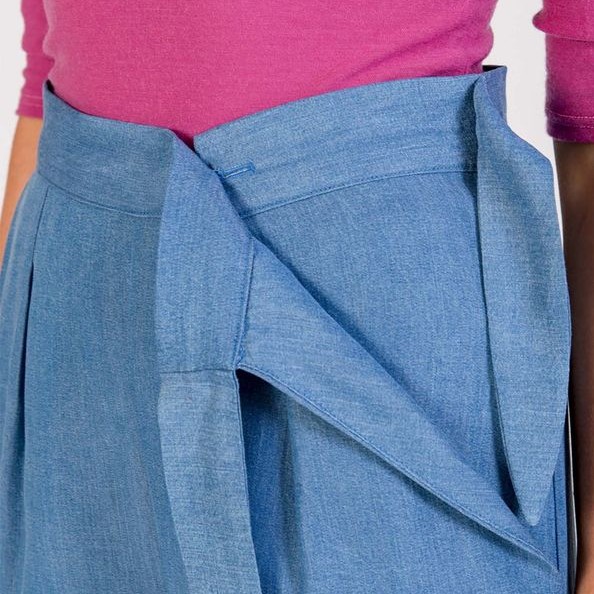
Pinterest delivered! The Flint Pants and Shorts by pattern maker Megan Nielsen, featuring a hidden closure in a side pocket, were just what Carrie had in mind. Bonus! Megan’s blog includes a comprehensive step-by-step tutorial on how to sew the concealed pocket side opening. Many thanks to Megan Nielson Patterns for devising and sharing this ingenious technique!
Get Sewing with FFA Core Pattern and Variations
It didn’t take long to realize that Carrie’s capri-length Trouser Details variation for Eureka! Pants that Fit has all the features needed for this variation on a variation – a straight waistband, slash pockets, relaxed leg shape, and below the knee length.
Carrie was able to make quick work of pattern alterations to create her culottes pattern with a concealed pocket side opening.
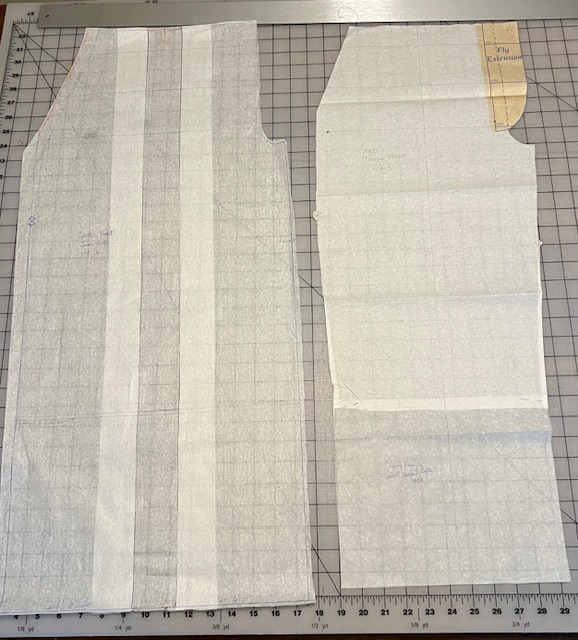
- On the Front pattern, the front fly was removed and a pleat was added by splitting the front pattern open along the grainline and inserting a 2” wide strip of paper. In addition, the opening for the slash pocket was made about ½” wider and ½” longer to ensure that the pant entry would be plenty big enough.
- Leg volume was increased by adding width to both the inner and outer cutting lines of both the Front and Back trouser patterns.
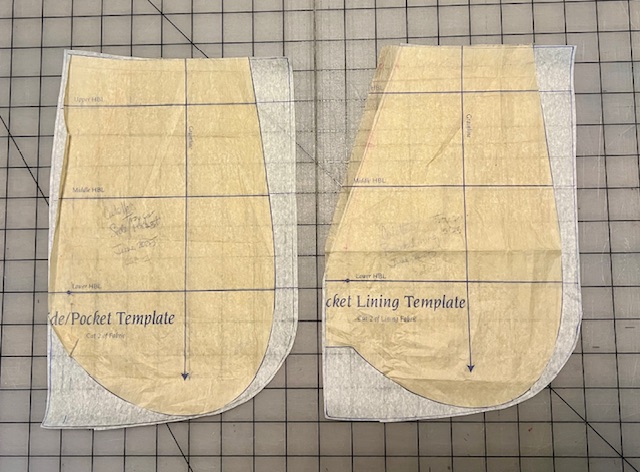
- The side/pocket pattern was altered to match the new slash opening. The pocket bags were also drafted a tad wider and deeper so that the inner edge wouldn’t fall in the same place as the pleat.
Megan Nielson’s step-by-step tutorial was easy to follow to assemble the culottes with a concealed opening in the left pocket, so we needn’t repeat it here.
Innovation in the Waistband
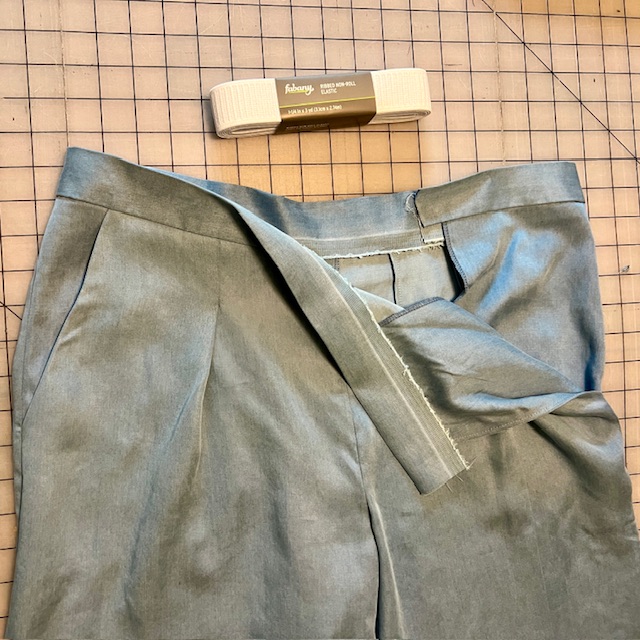
To maximize the flexible fit of the waistband, Carrie opted to fill it with 1½” wide elastic. After the culottes were assembled, the pant opening was measured from end to end to determine waistband length, adding seam allowances. The 4 ¼” wide waistband was cut on the fabric’s selvage for an easy finish.
Here is the method Carrie devised to secure the elastic into the waistband.
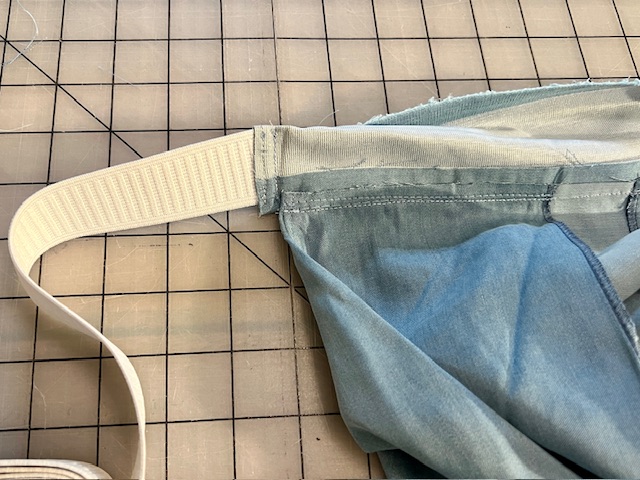

- Approximately 4 inches of the waistband casing were left open at each end and the center section was stitched closed by stitching in the ditch.
- After stitching one end of the elastic into the seam allowance at the outer front end of the waistband, Carrie threaded the elastic through the casing in three segments.
- In the front waistband, the elastic was pulled enough to create just a slight bit of tension, then stitched in place through all layers at the right side seam.
- Greater tension was applied to the elastic as it was pulled through the back waistband, and then stitched in place through all layers at the left side seam.
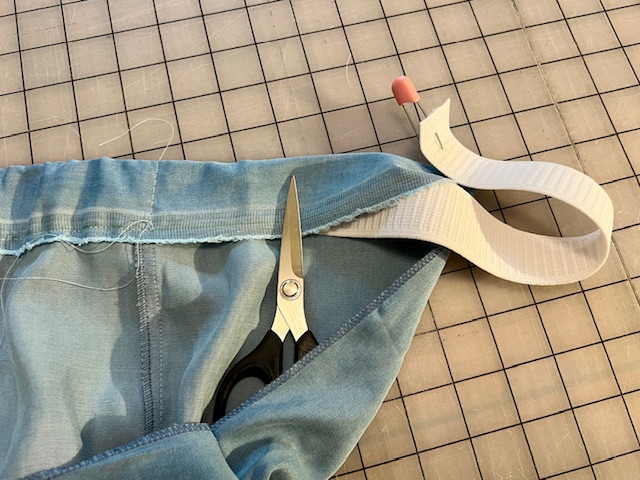
- No tension was applied to the last segment on the inner front. The elastic was cut off a few inches short of the waistband’s end to allow for a machine sewn buttonhole.
- When satisfied with the fit, the open sections of the waistband casing were stitched closed.
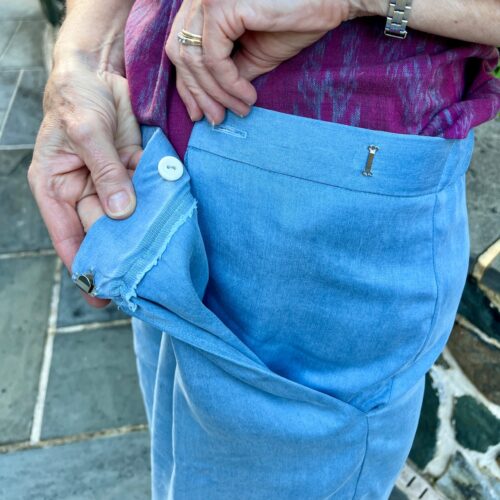
Finally, Carrie selected closures that would allow her to adjust their placement later if needed. A button and buttonhole secure the inner end of the waistband, while a hook and eye secure the outer end of the waistband. This leaves the front of the waistband flat and unadorned.
Carrie is finding these culottes to be super comfortable and fun to wear, so more are probably in her future. Have you been inspired by what you see on Pinterest to create a new pattern variation? Tell us about it!