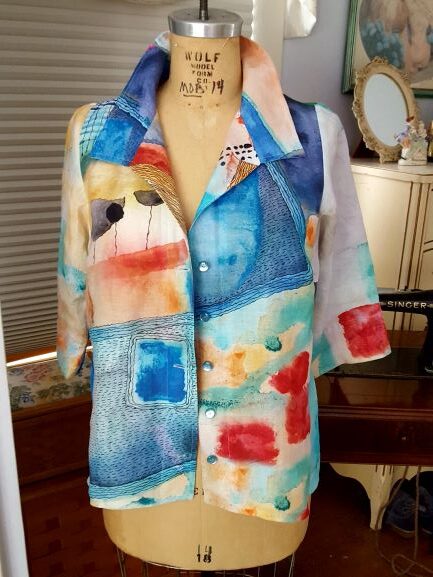
Mythic fabric calls for inventive design and so it was this spring that for the third year, Rae pulled out this beautiful silk blend gazar and began imagining a design. If you follow us on social media, you have had glimpses of this project before. Keep reading to learn how Rae went from Pinterest inspiration to new top!

This was one of the last pieces of beautiful fabric acquired at La Satalin, her wonderful local fabric store in Revel, France that closed last fall when the proprietor retired, a very sad day for us! That creates even more pressure for perfection, but Rae felt up to the challenge. There were two other fabrics that were good matches, though their properties were disparate. Scraps of over-dyed kimono silk were crisp with dreamy colors and lots of selvage. A textured rayon, aqua with a green textured stripe, would be drapey and also featured a good bit of interesting selvage.

Find Ideas
“My heart told me a garment like my big linen shirt, cool in the summer with a button up front, was a winning idea, but it needed to have some different details that matched the available fabrics,” Rae says candidly. Here is the rest of the story.
It was time to head to Pinterest for some ideas from the Fit for Art “Inspo” boards which have so many ideas for interesting details. Inspo – Shirts and Shirt Dresses was the best board for this project, but there were also great ideas on the Inspo – Collars and Necklines and the Inspo – Openings and Closings boards. Here are the three ideas that triggered the successful design process:

The very open collars seemed so fresh and appealing, like this pin.

The placket front that played with the stripe directions on this swingy shirt also featuring an open but smaller collar was also great, but there was a bit more volume at the bottom.

The interesting back details in the last photo led me to imagine the back pleat designs.
Prepare to Cut and Sew
While pre-washing the fabrics and checking for any fading or shrinkage there was time for sketching and fabric measuring, which helps to imagine the possibilities. Then, ideas were draped on the dress form and Rae pondered whether the base should be the Carpe Diem Tunic pattern or the Tabula Rasa Jacket pattern with Shirt Variations.

These explorations led to a finished design which allowed for each fabric to be used to its best advantage – using the Carpe Diem pattern for a base, creating a big shirt with a neat fit in the upper body and front plackets, a small open collar, and back pleats. The rayon would create an excellent highly visible front placket with the selvage placed along the opening. It would also be used on the sleeve cuff and in the lower back pleat to add some swingy drape to the volume. The kimono silk selvage edge would be used under plackets, the under collar, a cuff addition and the interior pleat in the upper back to add structured support.

Rae traced off the Carpe Diem pattern and got to work opening up the neckline in both front and back, dividing the back along the balance line, and adding width to create a high back pleat and a lower back pleat. Then the neckline was measured and a rectangular collar pattern was drafted, slashing and spreading at regular intervals around the outer edge collar to give it shape.

Plan a Test Run for Complex New Designs
At this point, pattern in hand, Rae paused. New designs need to be tested, especially collar and neckline adjustments that must sit just so!

Visit the early summer post, Repurposed Embroidery Tests New Ideas, to see the top used to test the collar, neckline shape and placement, and the upper back pleat idea. After making and wearing that successful Carpe Diem mash up, it was time to cut and sew this beautiful top with confidence.

Get to Work Sewing!
This top is destined to be a favorite enjoyed for years to come. I shared it while teaching at the ASG conference in late June and wore it for the first time in early August to celebrate my anniversary.

Have you translated design ideas from Pinterest onto your core wardrobe patterns? Stay tuned to this Sew! Let’s get Dressed blog to see more of these inspo board based projects this year. Keep an eye on social media this week to see more shots of the finished garment!
Sew and Design Happily, RAE


