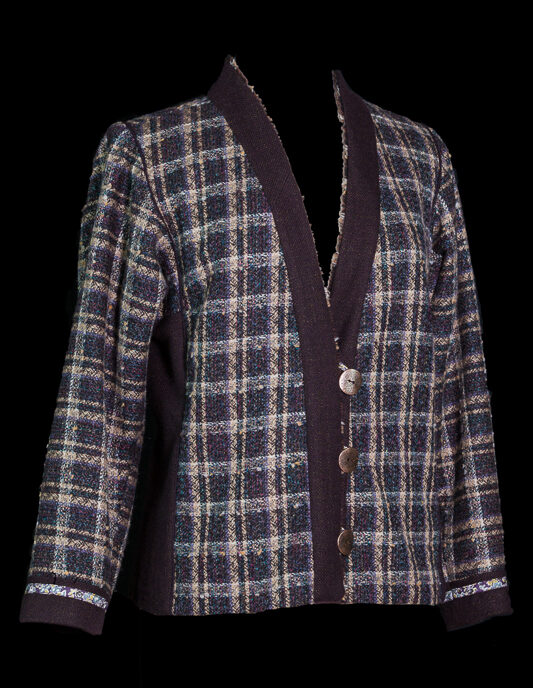
Occasionally a prospective customer comments that she doesn’t like the “boxy” style of the Tabula Rasa Jacket. The TRJ pattern was deliberately designed with fairly straight seams to make the pattern an easy “blank slate” for wearable art, and to keep construction simple. If you would prefer a curvier fit to your Tabula Rasa Jacket, whether all the time or just for some garments, there are some easy pattern adjustments you can make to get that trimmer fit.
A few years ago we wrote a hand out explaining two methods for giving the Tabula Rasa Jacket a trimmer fit. This handout is now available as a free download on our website; you can find it in the Helpful Hints for Jackets page, or at this link to Guidelines to a Trimmer Fitting Tabula Rasa Jacket. You are welcome to print out the document so you’ll have the detailed directions and illustrations for future reference. I have used both methods in some of my garments, so we’ll look at them now to see how it works.
The first method involves carving a curvier line into the side seams. It worked great for this business-like Plaid Wool Jacket. I brought the side seams in by about ¼” at the waist, easing in from zero (meaning the existing seam line) at the middle Horizontal Balance Line (HBL) and back out to zero at the lower HBL. I quickly discovered that it is really important to add ease in the hips when you do this to keep the vertical grainlines straight. So, I eased out another ¼” outside the original seam line below the lower HBL. Because this change was made to 4 side seams, it adds up to a total of two full inches of ease removed at the waistline and added to the hips, which is quite a bit!
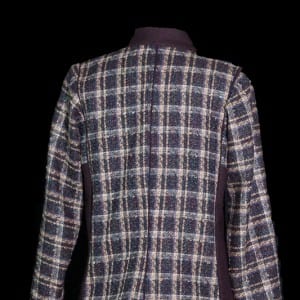
For this plaid jacket, I made the same change down the center back by adding a seam there and making similar adjustments between and below the HBLs. You can see the back seam in this photo. My Shimmery Shirt Jacket (see in photo gallery by clicking this link) was also made with my trimmer fitting pattern.
To figure out how much you want to adjust your seams, I recommend pulling out that old TRJ mock-up. Baste the curvy changes into the side seams, taking 1/8” to ¼” out between the HBLs and letting the seam out below the lower HBL. If that doesn’t seem just right, continue playing with the mock-up until you find a line you like. Now take your mock-up to the cutting table and draw your new seam lines onto the pattern pieces. Add a new cutting line 5/8” outside the seam line. If you expect to use the trimmer fitting pattern more than once, it is well worth the time and effort to trace your original fitted front, side, and back patterns onto pattern paper. Make these adjustments on the traced copy before cutting your trim fit pattern pieces out. This will preserve the original patterns for later use and save you a bunch of taping. Be sure to label and date the new pattern pieces!
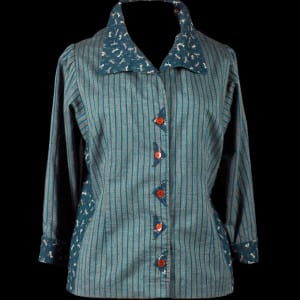
and triangular button frames.
The second method involves adding contour darts to the front, back or sides to get that trimmer fit. I’ve found this method particularly useful for garments that were already constructed and I later decided to fit more closely. Take this TRJ Shirt for example. This was my first proto-type of the Shirt Variations, sewn when we were just starting to develop the pattern. After I’d worn it a few times, I decided it was a bit too loosely fitted. I added a pair of contour darts front and back and have been much happier with it! The boiled wool sweater jacket that I wrote about a few weeks ago is another sample where I decided after it was completed that I’d like a closer fit, so I added a pair of contour darts in the back.
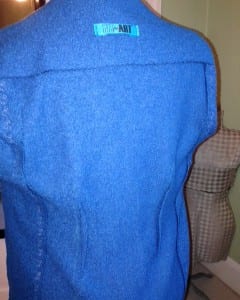
To add darts to your TRJ, put the garment on and, if possible, get a friend to pin in darts to establish the end points and the in-take of the dart. Baste the darts in then try your garment on to make sure the darts have not created pull lines. If they have, you may need to decrease the dart intake or length of your darts. When you are satisfied, secure the darts with a standard stitch sewing from the center of the dart toward each end point. Press contour darts toward the center of the garment.
Have you tried either of these methods to shape your TRJs? Or have you discovered another method you prefer? Tell us about it!
Happy Sewing, Carrie


What is HBL?
Sorry about that! Its an acronym for “Horizontal Balance Line”. All of our jacket and pants patterns have HBLs on the tissue pattern to use for fitting purposes, and we also end up using them sometimes to guide placement of decorative elements or to work with our jacket and pants variations. Hope that helps!