
Do you have orphan quilt blocks in your stash? It’s time to make a unique quilted jacket with those orphan blocks! Whether they were passed down to you from previous generations of sewists or are left over from your own or a friend’s quilt making project, we’ve got some great ideas to put them to use.
Our Orphan Blocks
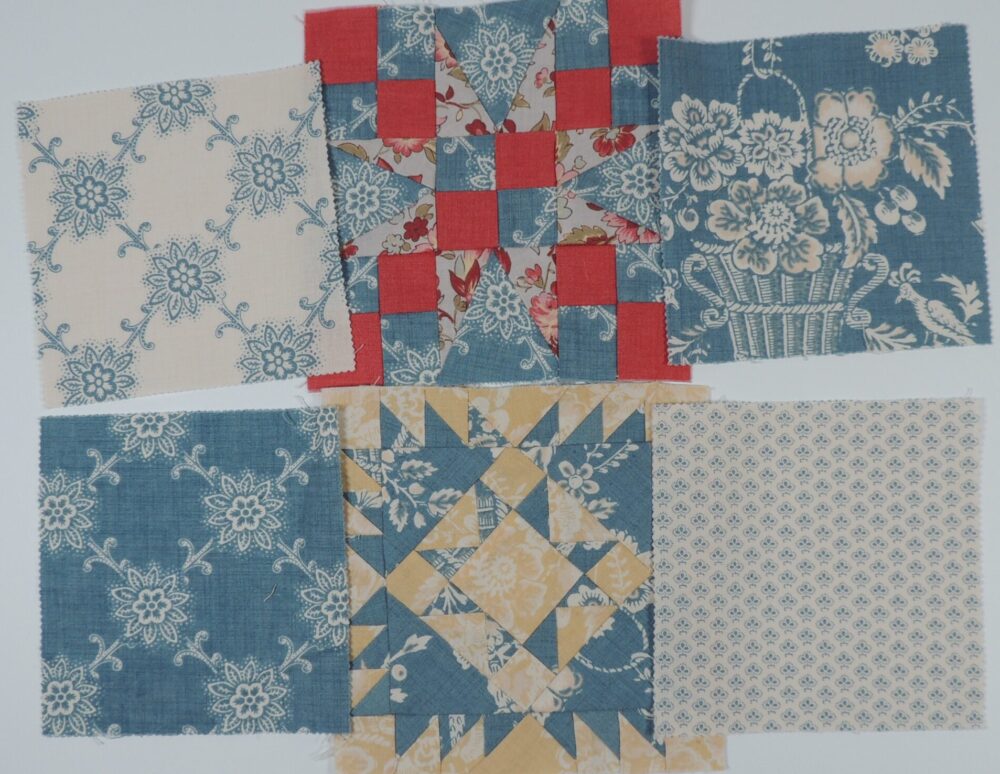
This month we take a closer look at Project #4, the Orphan Blocks Shirt Collar Jacket, in Sewing Quilted Patchwork Jackets. For this project and its companion kids quilted jacket (project # 8), we were gifted a set of orphan quilt blocks that had been made several years ago but never sewn into a quilt. Here you can see the full assortment of blocks, some leftover fabric bits from the blocks, and a few of the fabrics we acquired to round out our quilted jackets.
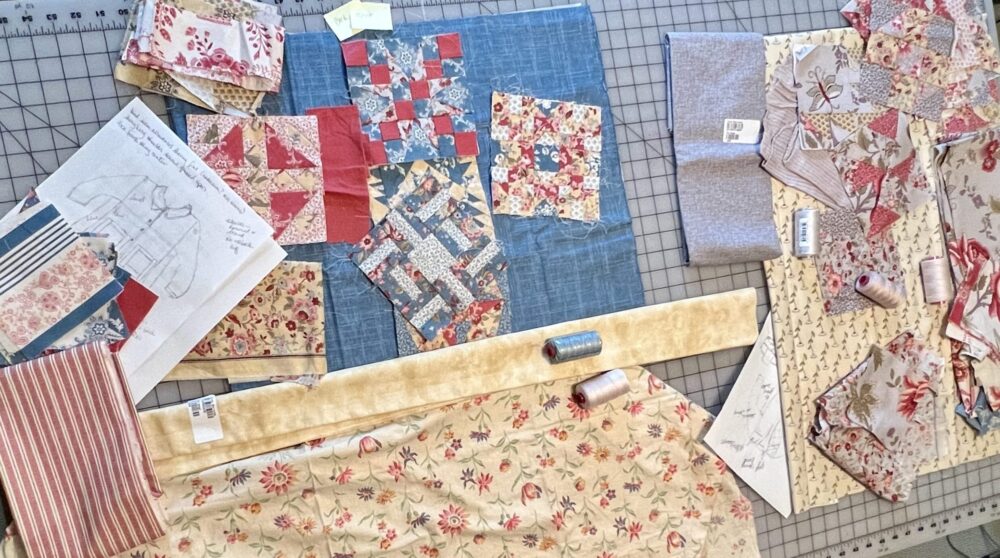
We split the blocks into two groups, Carrie taking the group that was principally blue, red and yellow to make an Adult Opus Jacket and Rae taking the group that was principally gray, yellow and red to make a Kids Opus Jacket. Between the two projects we demonstrate several different ways to incorporate orphan blocks into a quilted jacket. We hope these two samples, and more in our Quilted Jacket Photo Gallery, will inspire your designing process.
Play with Your Blocks
Several important design guidelines came into play when deciding how to incorporate the orphan blocks into a quilted jacket. Carrie focused on choosing appropriate design spaces that could support the blocks, balancing their use around the whole jacket—front, back, and sleeves—and repeating the use of fabrics and colors throughout. An additional design challenge was that no two orphan blocks were executed in the same quilting pattern or selection of fabrics.
Carrie chose a pair of blocks to feature on the front and back of the jacket. Each pair attempted to balance the piecing style, fabrics and colors. Carrie tried out a lot of combinations before settling on the arrangement of blocks and sashing choices you see on the finished jacket! Enjoy a look at a few of the options that were tried out and rejected.
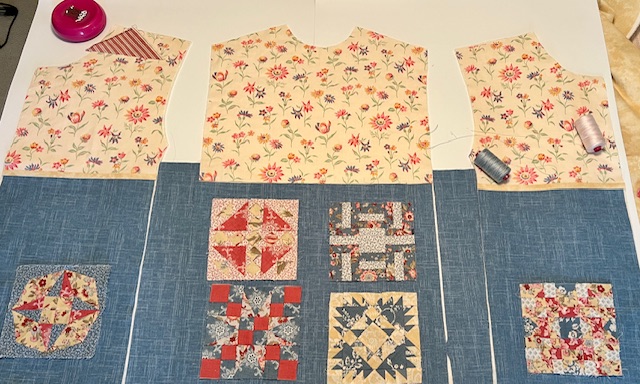
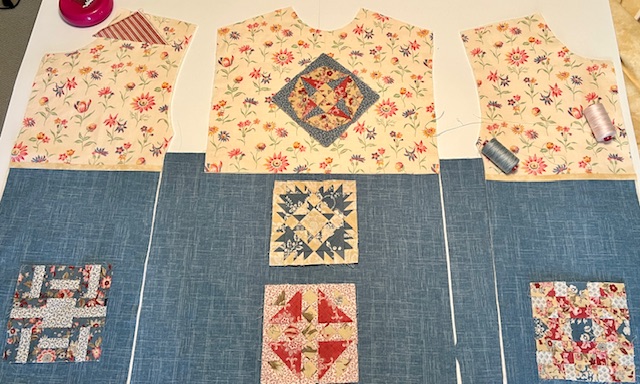
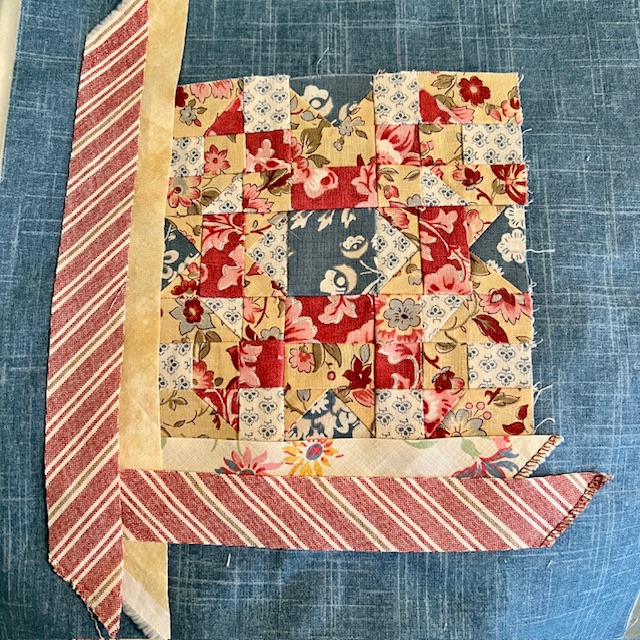
To tie all of them together, she added sashing to each block, making sure to include both the yellow framing fabric and soft red stripe. The sashing also allowed her to fit the blocks into the various spaces of her jacket. If you look carefully, you’ll notice that the finished blocks don’t all have the same number or sequence of sashes, and in a few instances the sash width was modified to fit the block’s location or artistic sense.


The final sashing details and step-by-step photos are included in the book. For the jacket back, the pair of blocks were sewn into the lower back portion of the jacket before assembly and quilting. For the jacket front, the blocks were made into large patch pockets and top stitched into place, straddling the front and side pattern pieces, after the layers had been quilted together.
Modify the Blocks to Fit Your Project
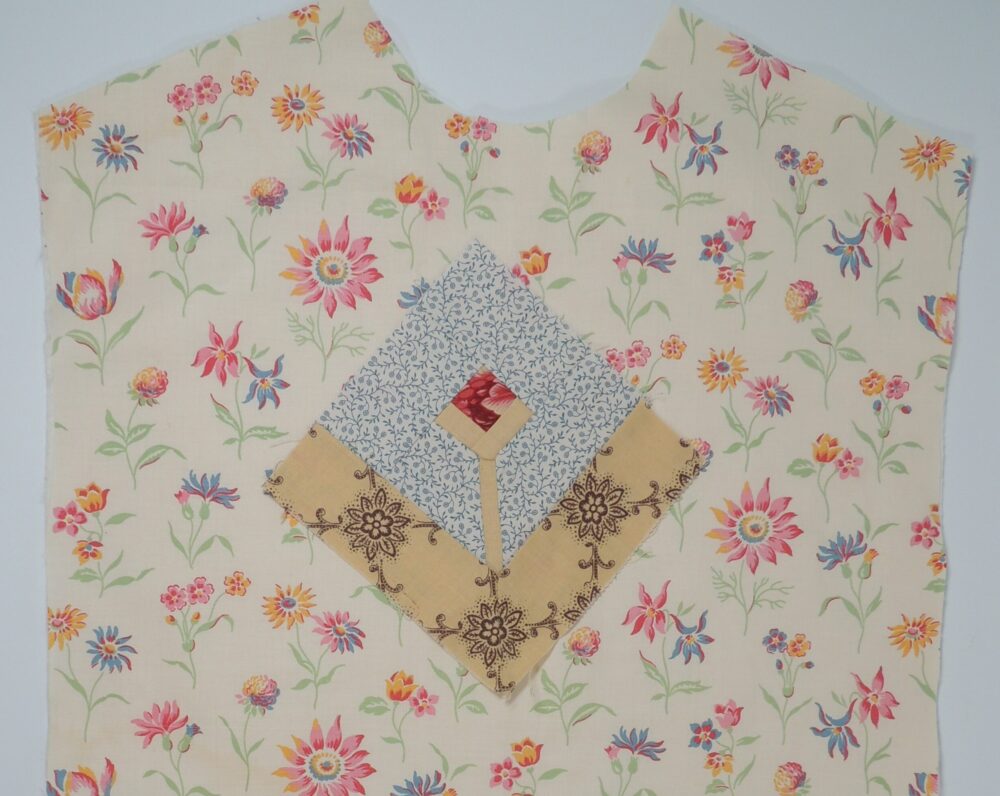
A fifth block was added to the upper back of the jacket; its smaller size better suits the scale of the upper body of the jacket. It’s also a fun example of how one can manipulate orphan blocks. Carrie thought the central portion, but not the outer portion, of this block worked well with the jacket. So, she simply removed the disliked part of the block and added sashing to coordinate with the other blocks. The finished block was topstitched onto the upper back after the layers were quilted.

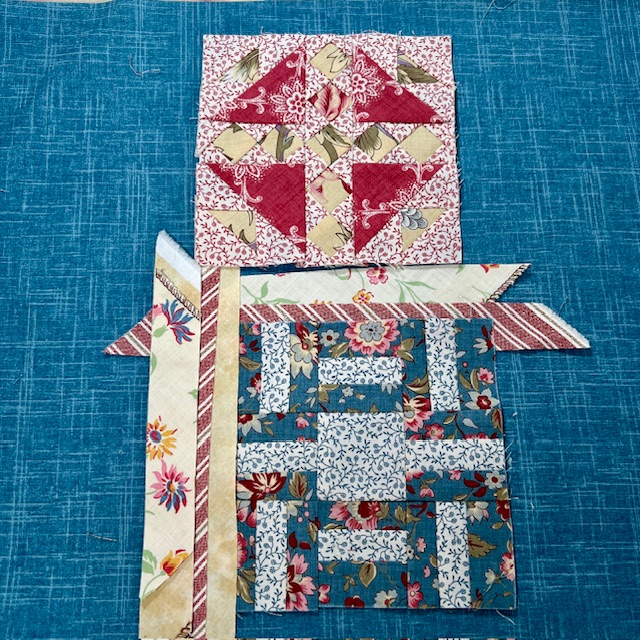
Finally, two remaining orphan blocks were used to create decorative turn-back cuffs. Left over pieces of the block maker’s original fabrics filled out the width needed to match the jacket sleeves.
We know many of our readers are also quilters. We are betting that you have some orphaned quilt blocks haunting your stash! Flaunt them in a quilted patchwork jacket and show off your creativity. Please share your process and photos on social media with our hashtags #sewingquiltedpatchworkjackets and #fitforartpatterns. We can’t wait to see!


Our small guild in Ennis Montana would like to make some type of quilted jackets this winter and display with our quilts at our bi annual quilt show on July 25, 2026. Would anyone be interested in doing a workshop for our guild, via zoom? Do you have a pattern for the jacket?
We do have two jacket patterns suitable for a quilted jacket and you can read more about them in the very recent blog post Which Jacket Pattern to Choose? Rae will reach out to you regarding your inquiry about a zoom class for your guild. Thanks for asking!
I have made 2 quilted jackets and I love making them. My next one will definitely be an orphan block jacket. I live in Florida and don’t get to wear them very often. Oh well, I just love making them, anyway
Hi Janet – Love to hear that you sew quilted jackets for love of the process! Consider using a light weight fabric, such as gauze, for the middle layer to keep your jackets more appropriate for the climate. We’d love to see how you use your orphan blocks! Please send photos.