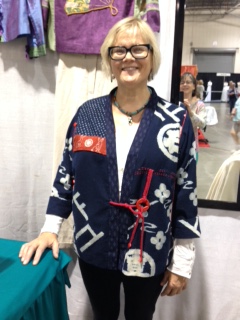

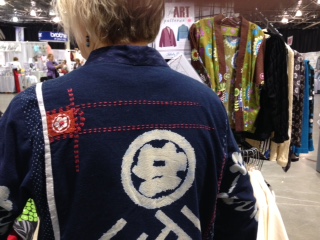
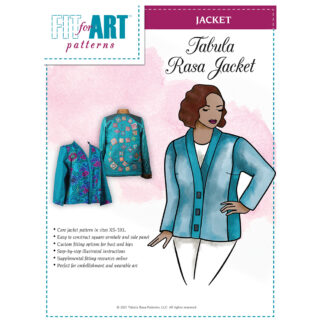
Last year at The American Sewing Expo (ASE) my friend Ruth “C” stopped by our booth to show us her first Tabula Rasa Jacket (TRJ). She had used a large print Japanese cotton in classic indigo with selected red accents and an unusual tie closure. Carrie immediately started taking photos so you could see Ruth’s wonderful TRJ interpretation.
Ruth is one of the most creative sewists I know. We met through the Association of Sewing & Design Professionals (ASDP). On several occasions she has been a winner in the annual Threads Challenge to ASDP and in 2015 she won the ASE’s “Passion for Fashion” design competition.
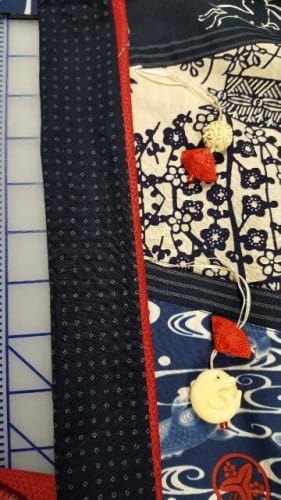
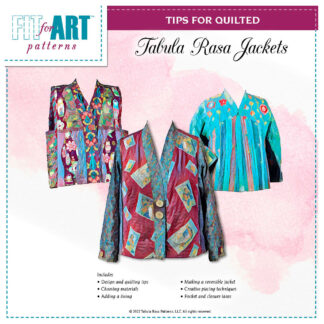
Her jacket brought to my mind a group of fabrics I purchased at Santa Fe Quilting several years ago for a basic TRJ. I dug them all out when I returned home from our fall travels, pre-washed the pieces and began to make a plan. I would put the photos of Ruth’s jacket on the computer in my studio while I moved the fabric about. Our fabrics were a similar dark blue base color but Ruth’s jacket was made entirely of single large print fabric with some asymmetric detailing in red. My fabrics were scaled smaller and to my eye they would work well with some piecing.
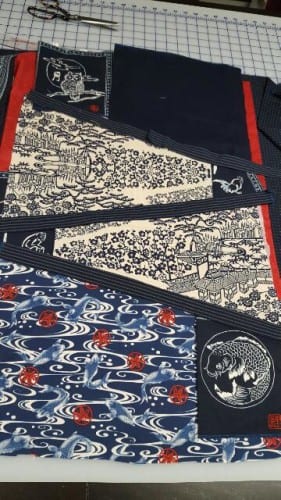
I also had a piece of vintage Japanese cotton with a triangular print gifted by another sewing friend, Julie Bowersox, which seemed an interesting feature to work into the piecing. Ruth’s design motivated me to purchase a piece of red fabric to accent the navy pieces and once I found that, the design fell into place.
My front and back are symmetrically pieced using a “stitch and flip” method (often referred to as “foundation piecing” by quilters). The tie closures are balanced on each side of the jacket band using beads and thin chord. (Check out the PS to see how I made the closures.) While I love Ruth’s funky closure, it did not seem quite right with my pieced front. Perhaps I will use it on a future jacket — perhaps a single fabric jacket that needs extra interest.
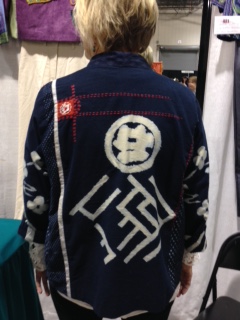
I am still considering using some red or white sashiko inspired stitching on the back where the owl sits next to the solid navy.(The solid navy is the reverse of the stripe used to sash the pieces together which means the color was a perfect match).
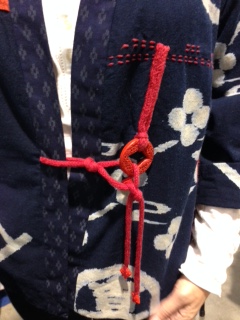
Ruth used red stitching to create detail on her jacket, which I really liked. Here is her description of her red details: “The jacket was embellished with 8 strand cotton embroidery floss. I did a vertical line of outline stitch (also called stem stitch) which resembles piping. The back was embellished with running stitches (similar to Sashiko stitching). The closure was the same thick embroidery thread knitted on #1 knitting needles to make cording (which is called I-cord. The beads are resin, in a Cinnabar color.”
Do you think I should add some stitching to the back or not? Can you see Ruth’s influences on my jacket even though they are not exactly alike? You can see me wearing this jacket in today’s Me Made May post on Instagram and Facebook.
Whether you simply borrow design ideas, copy the work of a talented sewist, or dream up something new, I hope you are stitching up some cotton TRJs for spring.
Next week I will write about the foundation technique I used to piece the front and back. In the meantime, send us photos of your new jackets.
Happy Sewing, RAE
PS The Closures:
A search through my stash turned up a number of excellent red Cinnabar beads in a variety of shapes and sizes and a few carved beads inspired by ivory carvings. I also found several cording options.
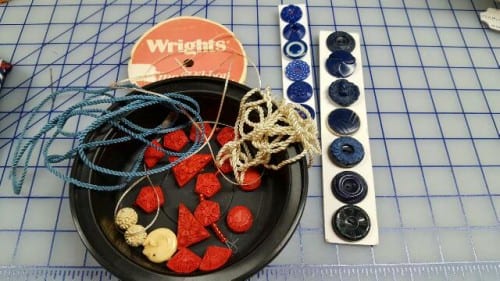
Ultimately I chose the narrowest cord and the beads with the largest holes. That allowed me to feed the narrow ivory colored cord into a large eye needle and through the beads to create a double strand tie.
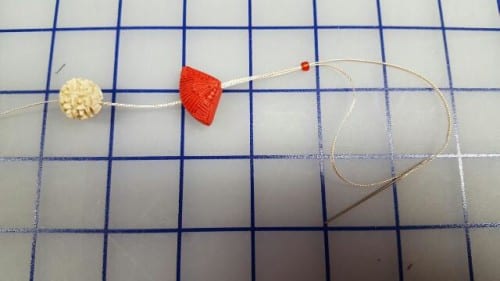
A small red bead at the end of each tie anchors the beads to the cord. The ties were positioned on the pieced fronts before the flat piping or the band were attached. When the band was completed, the cord was anchored to the flat piping with hand stitches.


Rae, thank you very much for sharing Ruth’s version and your new version of the TRJ.
I love them both, and look forward to seeing your finished jacket. Adeline